M11, “The Wild Duck Cluster”

Click image for full size version
January 27, 2016, published in Sky & Telescope, August 2017
(May 2012 version featured in SkyNews Online “This Week’s Sky” August 18-25 2014 and August 31-Sept 7, 2015)
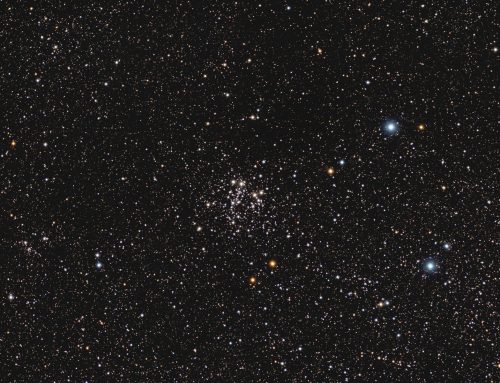
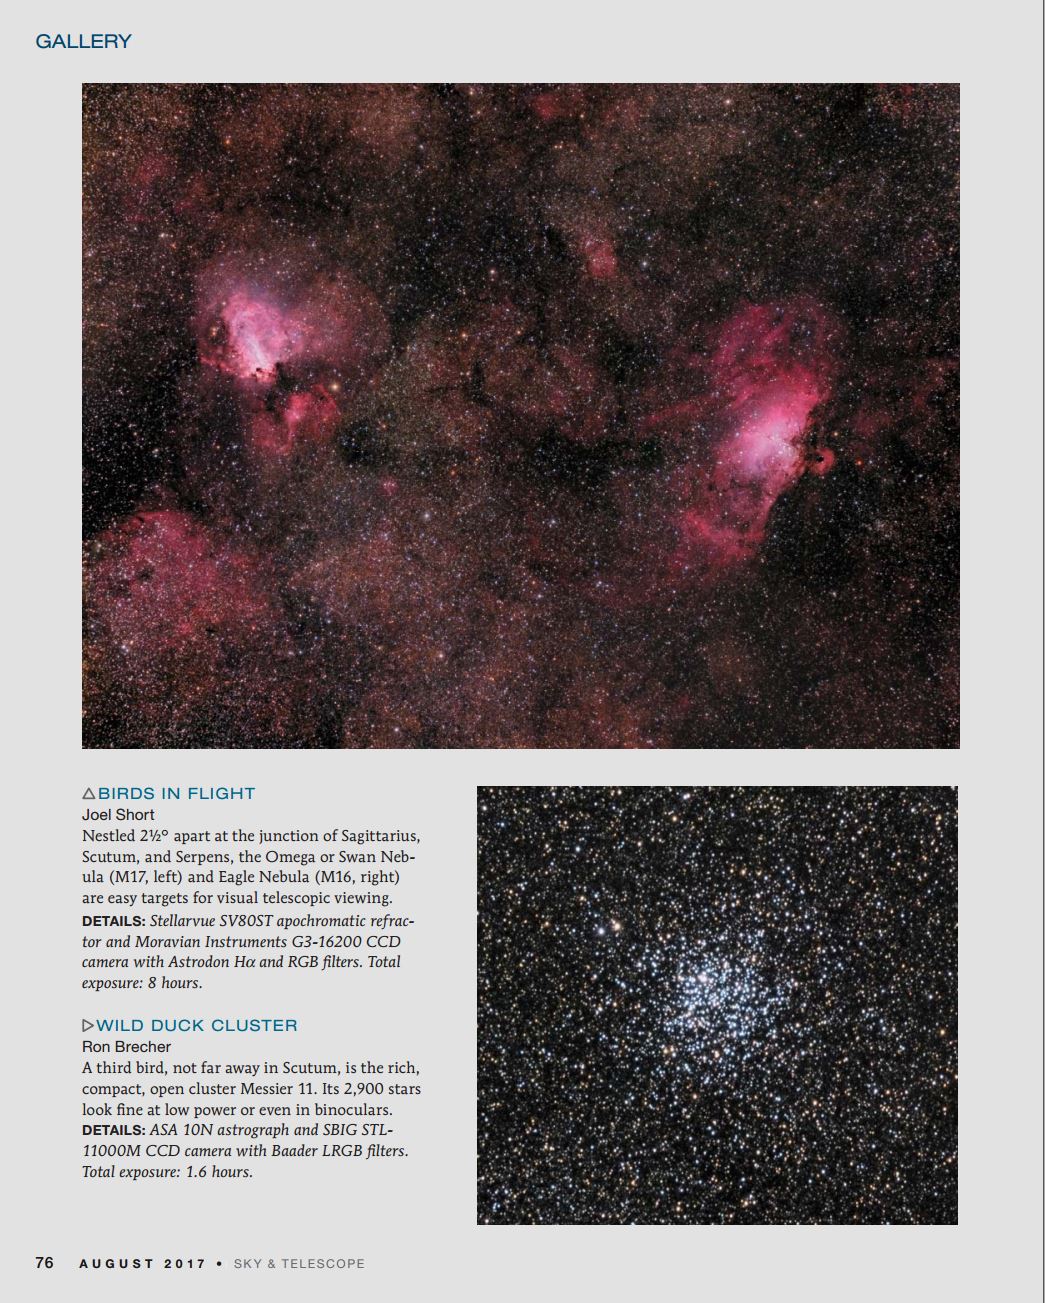 This image shows open cluster M11 set in the rich summer Milky Way. There are so many stars! This shot really makes you think about the scale of the universe. The image captures an area only a couple of times the size of the moon. Can you imagine the number of stars that could fill an all-sky image? It’s literally astronomical!
Although the stars grab my attention first, there are also some darker “lanes” that seem to have fewer stars; these are dark nebulae in our own galaxy caused by dust and soot blocking out or reducing the light from those stars. When we look at other galaxies, these dust lanes can be very obvious. The colour of the stars in this image tells us about their temperature, with redder stars being the coolest and the white and bluish stars that dominate the cluster being the hottest. I haven’t noticed much colour in the stars in a visual scope, but I will look again this summer (and likely every summer!). If you have binoculars, use them on M11: It makes a very fine sight in 7x or 10x binoculars.
The nickname of this cluster probably came from Admiral Smyth who observed it in the 19th century and apparently thought the distinctive wedge-shape group of stars that’s prominent in a small scope resembled a V-shaped flock of wild ducks in flight. Smyth didn’t discover it though. Credit is usually given to Gottfried Kirch, who is believed to have discovered it in 1681. M11 contains thousands of stars (rich for an open cluster) and is a little more than 5000 light years away (its light takes that long to reach us). It’s been estimated to be more than 200 million years old.
Tekkies:
SBIG STL-11000M camera, Baader LRGB filters, 10″ f/6.8 ASA astrograph, MI-250 mount. Guided with STL-11000’s external guider and a 500mm f.l. Lumicon guide scope. Focused with FocusMax. Acquistion, guiding and calibration with MaximDL. Registration, integration and all processing with PixInsight. Shot from my SkyShed in Guelph, Ontario. No moon, above average transparency and seeing. The data for this image were acquired in May 2012.
10x5mL, and 3x5m for each of R,G and B (total of 1hr35m)
RGB
Creation and cleanup: R, G and B masters were combined with ChannelCombination, and the resulting RGB image was cropped and processed with DBE, followed by BackgroundNeutralization and ColorCalibration.
Linear Noise Reduction: MultiscaleLinearTransform was used to reduce noise in the background areas of the RGB image. Layer settings for threshold and strength: Layer 1: 3.0, 0.5 Layer 2: 2.0, 0.39 Layer 3: 1.0, 0.25 Layer 4: 0.5, 0.1. A mask was used to protect high signal areas.
Stretching: HistogramTransformation was applied to make a pleasing yet bright RGB image. ColorSaturation was used with a star mask to boost color saturation.
Synthetic Luminance
Creation and cleanup: The R,G, B and L masters were combined using ImageIntegration tool (average, additive with scaling, noise evaluation, iterative K-sigma / biweight midvariance, no pixel rejection) to create the SynthL channel. The image was cropped to match the RGB and DBE was applied.
Deconvolution: A copy of SynthL was stretched to use as a deconvolution mask. A star mask was made from unstretched SynthL to use as a local deringing support. Deconvolution was applied (75 iterations, regularized Richardson-Lucy, external PSF made using DynamicPSF tool with about 20 stars; local deringing at 70% and global dark deringing at 0.02).
Linear Noise Reduction: MultiscaleLinearTransform was applied to reduce the noise. Layer settings for threshold and strength: Layer 1: 3.0, 0.6 Layer 2: 2.0, 0.5 Layer 3: 1.0, 0.4 Layer 4: 0.5, 0.15
Stretching: HistogramTransformation was applied to make an image with similar brightness to the RGB image. TGVDenoise was applied and the image was re-stretched to reset the black point.
Combining SynthL with RGB:
The luminance channel of the RGB image was extracted, processed and then added back into the RGB image as follows:
1. Extract luminance from the RGB image.
2. Apply LinearFit using SynthL as the reference.
3. Use ChannelCombination in Lab mode to replace the RGB’s luminance with the fitted luminance from step 2.
4. LRGBCombine was then used to make a SynthLRGB image.
Final Processing
UnsharpMask was applied through a star mask. Using the Curves tool, contrast, brightness and saturation adjustments were made separately for background and stars using a mask.
Image scale is about 1.1 arcsec per pixel for this camera / telescope combination.

[…] The object at the centre of this image is M71. For a long time, M71 was classified as an OC. However now it’s known to be a rather loosely packed GC, located about 12,000 light years from us. To me it looks like a GC when I look through an eyepiece, but images make it look more like a rich open cluster (e.g. M11). […]