Using Deconvolution to Reveal Detail in Deep-Sky Images
June 13, 2014
INTRODUCTION
Turbulence in the atmosphere and imperfections in optics cause blurring of details in astronomical images. The “true” image is said to be “convolved” with these unwanted effects. Deconvolution is the process of removing the blurring to enhance the amount of detail that can be seen. The imperfections are inferred from a “point spread function” – a mathematical description of the blurring, which can be determined from stars in the image.
This article describes a step-by-step procedure for doing deconvolution in PixInsight (PI), which can enhance just about any deep sky image. Just like any recipe, you may need to follow the book the first few times you try it, but with practice you’ll be able to home in on optimum deconvolution settings in just a few minutes. Click on the figures for larger versions so you can see the settings.

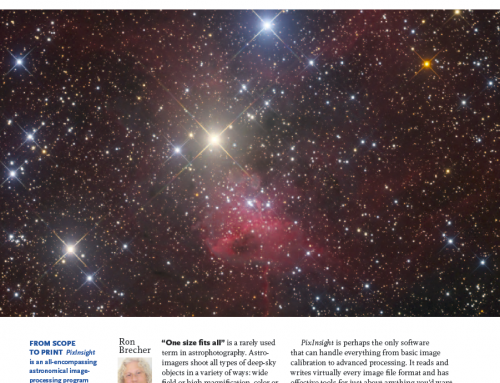
Figure 1: Fine detail visible in this image of NGC4565 is due, in part, to the effective use of deconvolution on the galaxy, while taking care to protect the background and the stars.
WORKFLOW CONSIDERATIONS
Deconvolution should only be done on linear files — that have not been “stretched.” Once stretching is applied to an image, the relationships between pixel values no longer represent the original data, and the techniques described here won’t work properly. I always apply deconvolution right after correction of gradients and colour balance. I use it only on luminance images or the luminance channel of colour images, which is where the eye mainly perceives image detail. But I know other people who deconvolve each colour channel separately, and then combine them. For more information on fitting deconvolution into your workflow, see my article on deep-sky image processing.
PREPARE SUPPORT FILES
Three greyscale images are required as “support files” for deconvolution, and all are produced from the image you want to deconvolve. Make them before you go any further
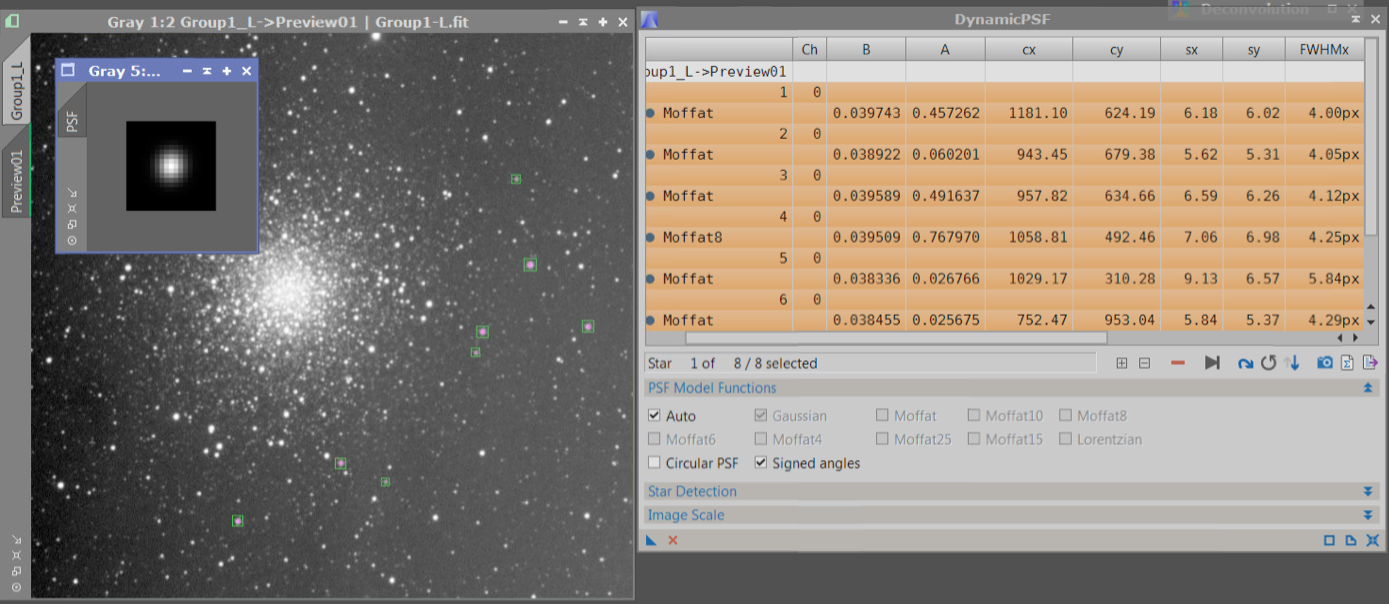
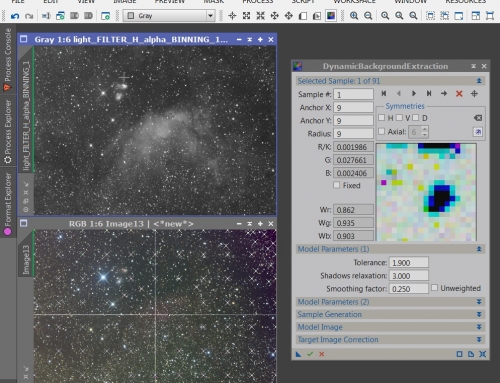
Figure 2: Use DynamicPSF to generate a PSF Support File
PSF Support File: The PSF Support File contains a single “average” star and is used to define the Point Spread Function (PSF) – the mathematical description of the blurring that we will try to correct. To make this support file, open the DynamicPSF process (see Figure 2) and click on about 20 unsaturated stars. Select all the stars as shown in the figure, and then use the blue camera icon (bottom right of the window highlighted in orange) to generate a new view called “PSF” that will contain one “star” which is the average shape of the stars you selected.
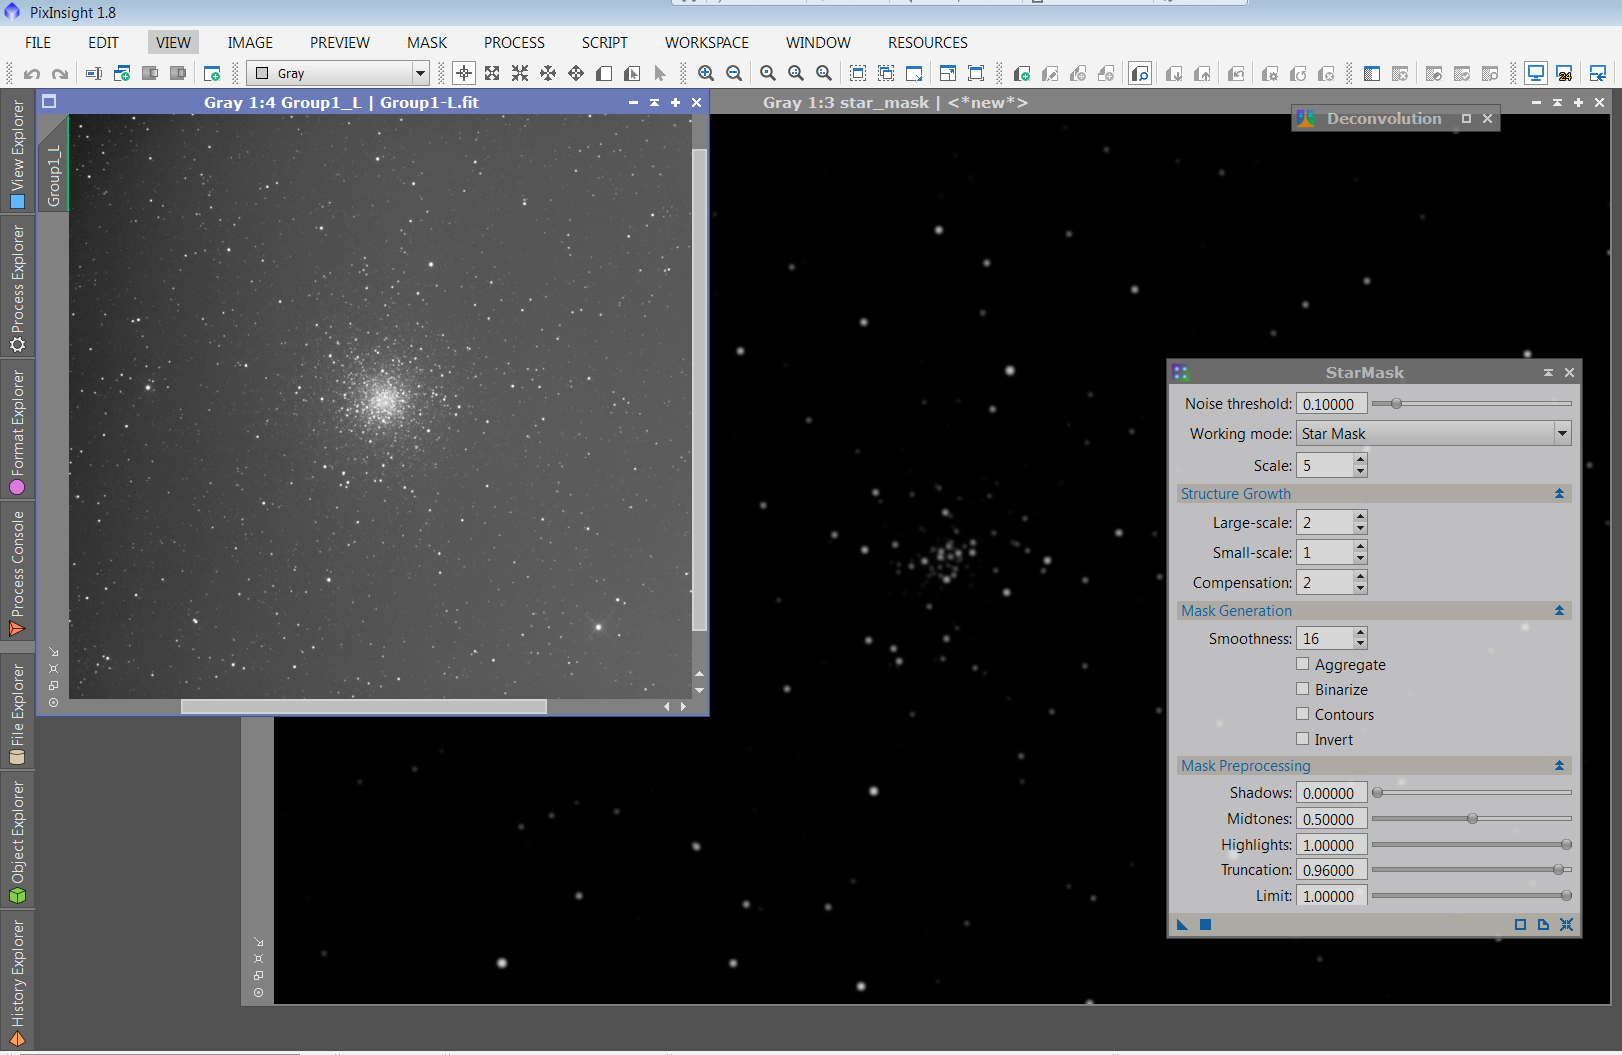
Figure 3: Use StarMask to generate the Deringing Support File.
Deringing Support File: Deconvolution can produce dark rings around stars. Bright stars are especially prone to ringing and we need a star mask to prevent it. To make the Deringing Support File (which is really just a star mask), apply the StarMask process (see Figure 3). I find default settings work well, except that I usually decrease the “Truncation” parameter to around 0.96 (or lower to include more stars). The resulting image is mostly black, showing just a few of the brightest stars as white.
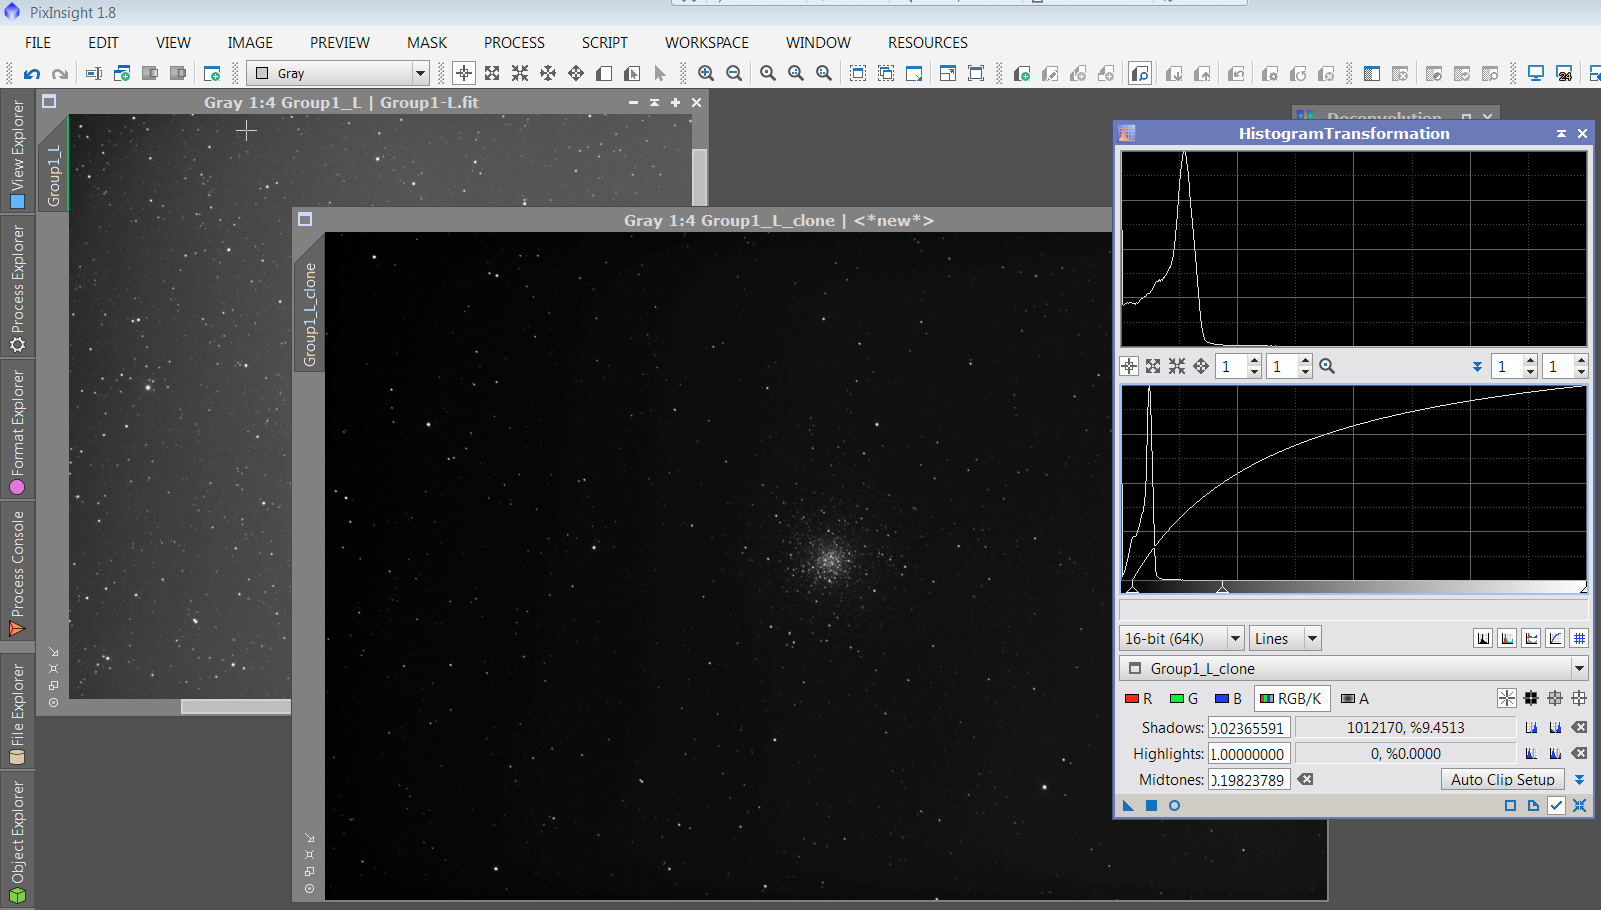
Figure 4: Make a luminance mask by duplicating a black-and-white image or extracting luminance from a colour image. Stretch the mask before using.
Luminance Mask: The luminance mask is a stretched copy of the luminance (brightness) channel from an image (see Figure 4). It is used to protect dark areas from deconvolution. If you are working on a greyscale image, just duplicate it. Things are a bit more complicated if you are working on a colour image. Use the RGBWorkingSpace command (see Figure 5) to set all colour weights to 0.33 (so colours are equally represented in the mask). Then use the ExtractLuminance tool – there’s a menu bar button for this – to make a black-and-white version of your image.
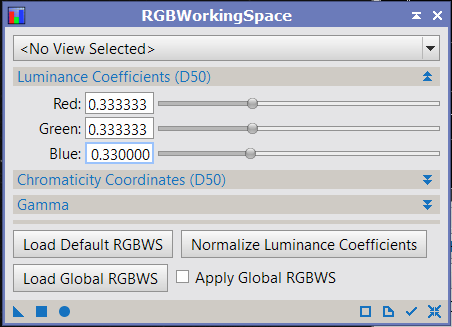
Figure 5: Before extracting luminance from a colour image, make channel weights equal.
Use HistogramTransformation (window at right of Figure 4) to stretch the mask. Parts of the image you want to deconvolve will be white and areas you want to protect will be black.
TIME TO EXPERIMENT
Deconvolution is a resource-intensive process, so I usually work on a small portion of the image to tweak the settings. In PI, this is called a Preview. I select a small Preview that contains areas to be deconvolved, background and bright stars (if possible).

Figure 6: Deconvolution settings. Note use of PSF Support file and Local Deringing Support file.
Apply the Luminance Mask to your image, and then select the Preview you will work on. Open up the deconvolution tool. Set the parameters as shown in Figure 6. Selected the PSF Support File for the External PSF function. I never use fewer than 40 iterations, and often use 50. Select the Deringing Support File for Local Support, and select the local deringing checkbox. Pay special attention to the Global dark setting, which defaults at 0.1. Too high a value will destroy the appearance of your image. Find the lowest value that just corrects rings around stars, without blurring the haloes of stars. For me that is often around 0.03-0.05.
APPLY AND CHECK RESULTS
Once I am happy with the Preview result I run the tool on the full image, making sure that the Luminance Mask is applied and enabled to protect the background. This can take some time, so get a coffee. When you come back, make a duplicate of the deconvolved image and stretch it. Look for artifacts around stars or other features. If you are not completely happy, go back and tweak the settings (almost always the Global dark deringing setting is the culprit).
CONCLUSION
Deconvolution has the potential to reveal hidden detail in deep sky images, details that are blurred by atmospheric turbulence and imperfect optics. Most problems that I have ever had with deconvolution trace back to applying it at the wrong time (it should only be used on unstretched images), or with the wrong settings. Don’t be afraid to experiment; the detail that will be revealed is well worth the effort.
Hi Ron,
Clear, concise guide to deconvolution. Thanks for posting.
Regards,
Mark
Excellent walk-through of your process Ron. I’ve not tried deconvolution yet but will certainly give it a try on my next image.
Thank you for your willingness to share and pass on your knowledge and techniques; eternally grateful and love your work!
Thanks for a very well written, clear and concise explanation of this Deconvolution ‘beast’. Look forward to giving this a shot on some of my previous image processing projects 😉
I’ll save this website until my progression in astrophotography is sufficient; ‘almost there.
Thanks