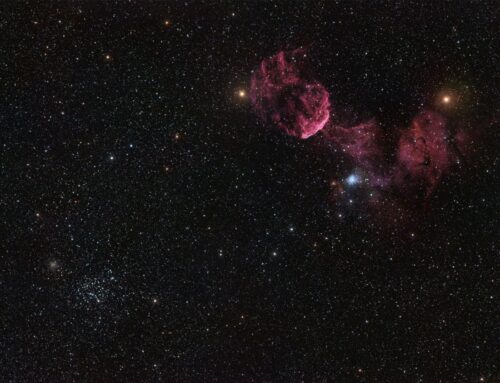
Veil Nebula Wide Field
 Click image for full size version
July 25, 2017; Cover, October 2017 Journal of the Royal Astronomical Society of Canada; Astronomy Now! August 2023
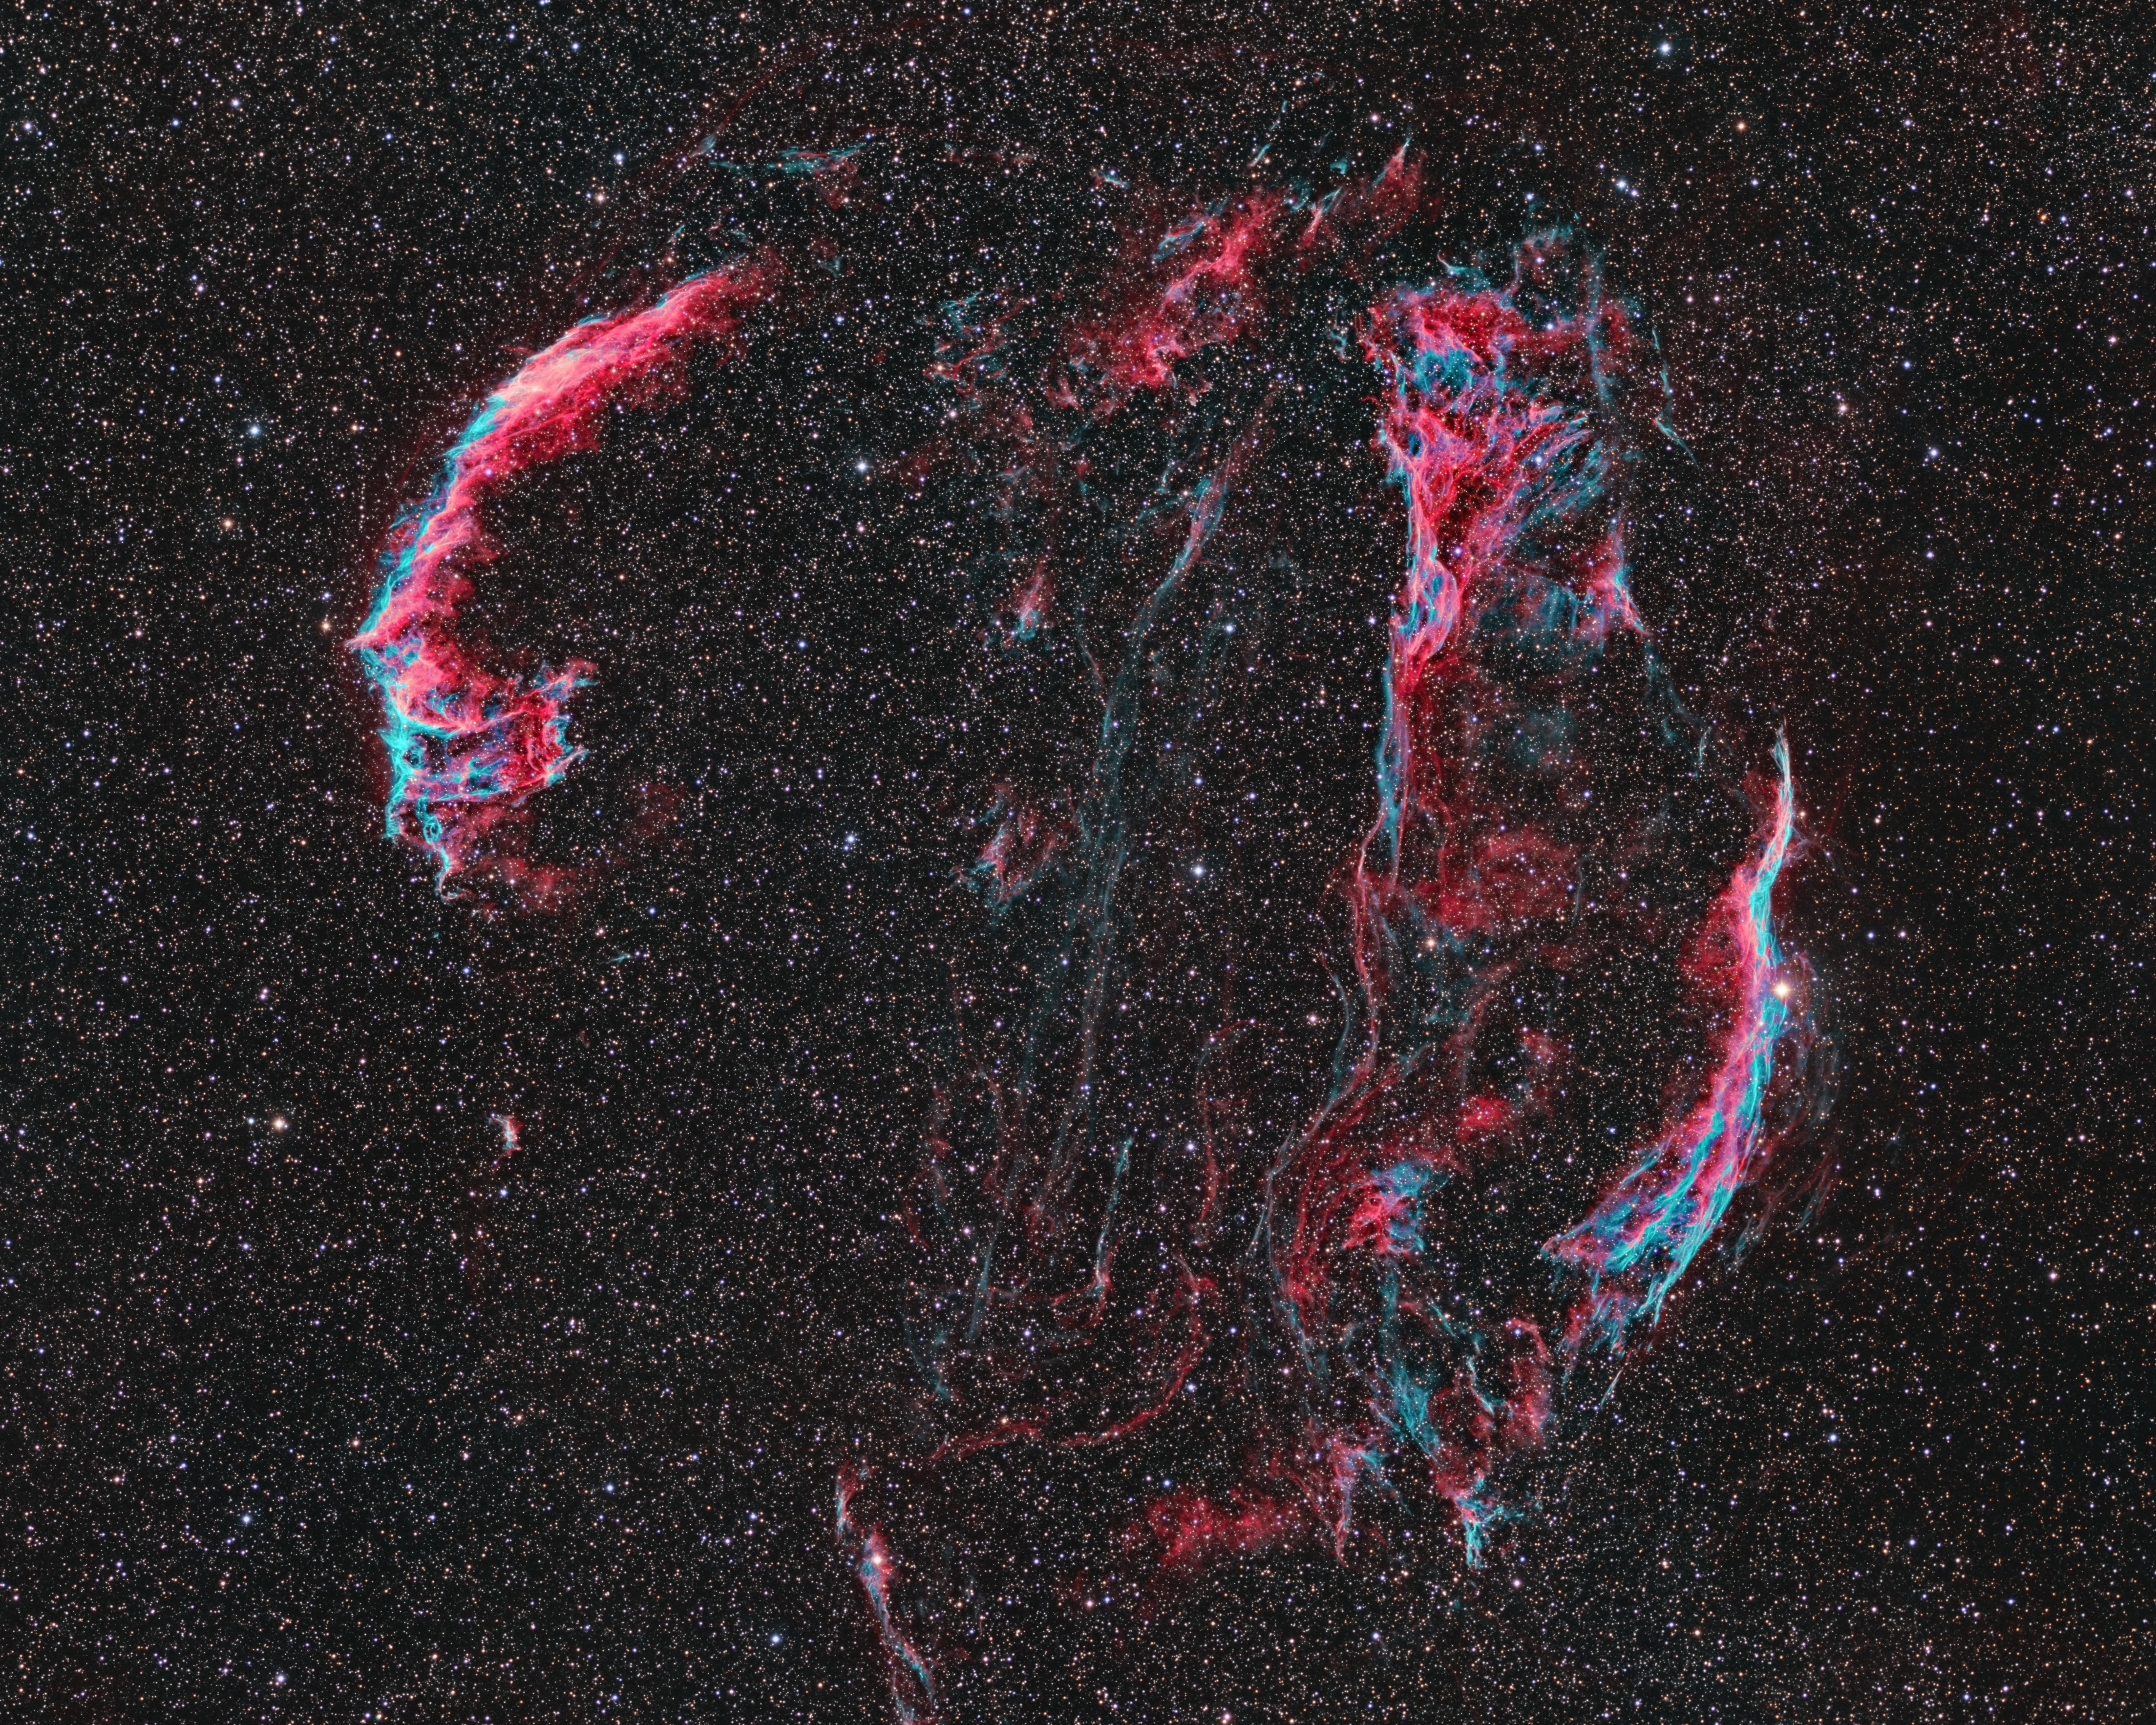
 This image shows the entire Veil Nebula, a supernova remnant in Cygnus the Swan. The Veil Nebula complex is huge, covering about 7 moon widths on the sky. It is so large that it is difficult to capture the whole thing at once, so all my previous images of this region have focused on individual portions (also see annotated image):
– The Eastern Veil Nebula, NGC 6992 is to the left of the image.
– The Western Veil Nebula, NGC 6960 (“The Witch’s Broom”) is at right.
– Pickering’s Triangle is to the left of the Witch’s Broom.
– NGC 6979 lies above and to the right of the Eastern Veil Nebula.
The supernova that created the Veil Nebula happened between 5000-8000 years ago and the nebula has been expanding ever since. The glowing gas is mostly hydrogen and sulphur (red) and oxygen (teal) whose atoms are being excited by the pressure waves created by the massive explosion of the progenitor star, which was about 1,470 light years from Earth.
The brightest parts of the Veil are visible in modest amateur equipment in a dark sky, especially with an Oxygen-3 (O3) filter, which dramatically enhances contrast. It’s well placed high in the sky in late summer and autumn in the northern hemisphere. The bright star at right in the image, 52-Cygni, is visible with the naked eye and is helpful for finding the nebula. The field is crowded with stars because the nebula lies at the edge of the summer Milky Way.
Tekkies:
Moravian G3-16200 EC camera (on loan from O’Telescope), Optolong Ha, O3, R, G and B filters, Takahashi FSQ-106 ED IV at f/3.6, Paramount MX, unguided. Acquisition with the SkyX, focused with FocusMax. All pre-processing and processing in PixInsight. Acquired from my SkyShed in Guelph. Gibbous to full moon for Ha and O3, new to crescent moon for RGB. Average or better transparency and poor to average seeing. Acquired June 8-July 19, 2017.
33x5m R, 30x5m G, 32x5m B, 13×20 Ha and 30x10m O3 unbinned frames (total=17hr15m).
NB-RGB Creation
Creation and cleanup: The BatchPreProcessing script was used to perform calibration, cosmetic correction and registration of all frames. DrizzleIntegration was used to make the channel masters. The R, G, B, Ha and O3 masters were cropped to remove edge artifacts and DynamicBackgroundExtraction was applied to each. R, G and B were combined to make an RGB image which was processed with BackgroundNeutralization and ColorCalibration.
O3 halo removal: The O3 channel was processed using my method to reduce halos around bright stars. A noise-weighted blend of the Green and Blue channels was used in this process.
Combining Ha, O3 and RGB data: The NBRGBCombination script was run with default settings using Ha for red narrowband and O3 for green and blue.
Linear Noise Reduction: MultiscaleLinearTransform was used to reduce noise in the NB-RGB image. Layer settings for threshold and strength: Layer 1: 4.0, 0.92 Layer 2: 3, 0.65 Layer 3: 2, 0.43 Layer 4: 1.0, 0.25 Layer 5: 0.5, 0.14. A linear mask was used (amplification 80; smoothness 0.6).
Stretching: HistogramTransformation was applied to the NB-RGB image to make a pleasing, bright image.
Luminance Processing
Immediately prior to stretching, RGBWorkingSpace was applied to the NB-RGB image with all channel weights set to 1. The Luminance was extracted and processed separately as follows:
Deconvolution: A star mask was made to use as a local deringing support image. A copy of the image was stretched to use as a range mask. Deconvolution was applied (50 iterations, regularized Richardson-Lucy, external PSF made using DynamicPSF tool with about 20 stars).
Linear Noise Reduction: MultiscaleLinearTransform was used to reduce noise in the background areas of the NB-RGB file. Layer settings for threshold and strength: Layer 1: 3, 0.74 Layer 2: 2, 0.52 Layer 3: 1.5, 0.25 Layer 4: 1.0, 0.11. A linear mask was used (amplification 130; smoothness 0.5).
Stretching: HistogramTransformation was applied to the Luminance to make a pleasing, bright image.
Noise Reduction and Re-Stretch: TGVDenoise was applied in Lab mode with 300 iterations with a range mask used to protect high signal areas. This was followed by a HistogramTransformation to raise the black point (but with no clipping).
Combining Luminance with NB-RGB:
The Luminance was applied to the NB-RGB image using LRGBCombine.
Additional Processing
Contrast Enhancement: HDRMultiscaleTransform was applied to a copy of the image in Median mode (6 iterations) using a mask to protect stars and background. The resulting image was blended with the original 1:1 using PixelMath.
Final Steps: MultiscaleLinearTransform was used to sharpen the structures in the bright parts of the nebulae (layers 2-3 at 0.05). Background, nebula and star brightness, contrast and saturation were adjusted in several iterations using Curves with masks as required. SCNR was applied to background areas to reduce a slight green cast. The StarReduction script was applied to the image and the resulting image was blended with the original 1:1. The image was downsampled by a factor of 2 to the original camera resolution to keep file size manageable for web display.
Image scale is about 3.2 arcsec per pixel for this camera / telescope combination.
Beautiful image Ron.
Amazing to see the whole of the Veil in one image.
Well done.
Steve