Venus Transit
Click image for full size version
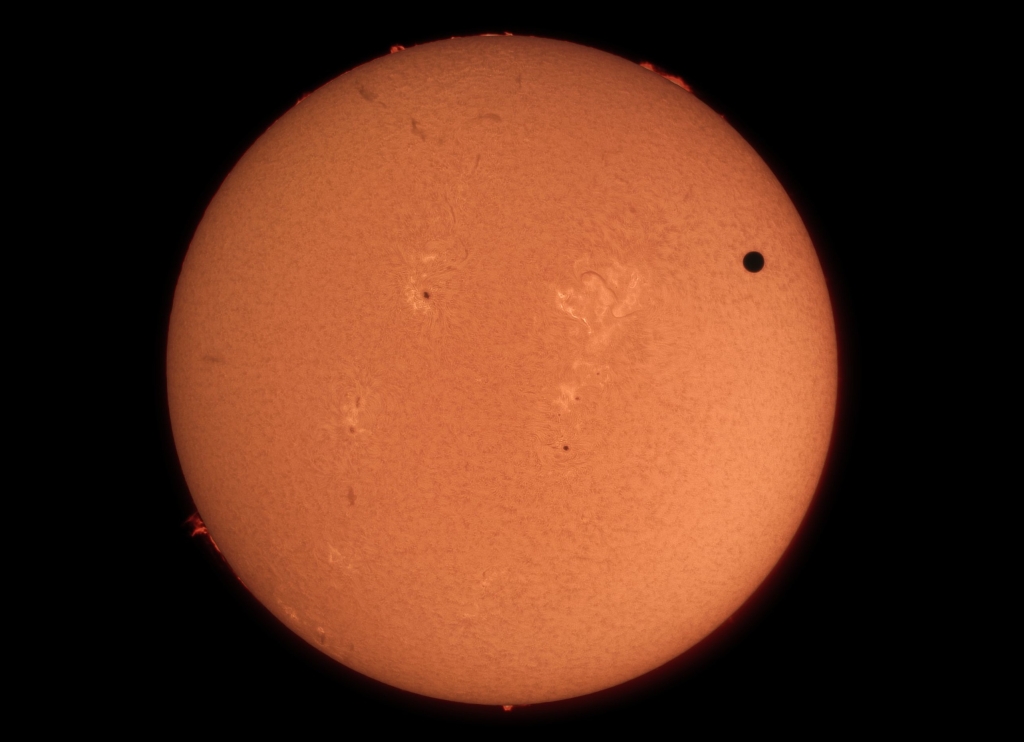
June 5, 2012 – SkyNews Magazine Photo of the Week, July 13, 2012; Published in SkyNews Magazine (Sept/Oct 2012)
June 5th was my birthday! What better way to spend the day than preparing for and shooting the transit of Venus across the face of the Sun. We had two visual scopes set up in my driveway (one for white light and one for H-alpha viewing), and an imaging rig set up fairly far away so I could concentrate when I had to. It was intermittently cloudy all afternoon, but around 4:00 pm, it started to look good. Gord Simpson helped me focus the scope (probably the hardest part of the whole procedure). Although the flares don’t change much during the time course of the three images attached, some of the more active areas of the Sun’s disk evolve quite noticeably through the three frames. I must say I was really impressed with the camera I used (for only the 2nd time). Tiny pixels gave great resolution, and it was well matched for the focal length of my solar scope – I could get the whole Sun on the chip.
- Transit of Venus, June 5 2012
- Transit of Venus, June 5 2012

Tekkies:
Solar View 50, 50mm f/8 refractor with built in Ha filter <0.7 nm bandpass, mounted on an EQ-6 mount, roughly polar aligned. Celestron NexImage 5 vidcam used. It has 2.2 micron pixels and is a 5 MP camera. Shot from my home in Guelph. Supplied software was used to capture 1m videos at about 6 frames per sec. I then used Registax to identify, align and stack the best 200-300 frames to make each master frame. I shot disk and prominences separately for each image, because the prominences required more than 10x more exposure than the disks. For prominences, I used 1/11th sec exposures. For disks, 1/120th sec. In the end, although the disk changed quite a bit, the prominences did not, so I just used one prominence image for all three shots. The three shots were acquired over a bit more than an hour, but there was too much going on for me to get accurate times. I processed all the disks and prominences more or less the same: Colour balance, deconvolution, stretch, local histogram equalization, adjust contrast and saturation. Settings were a little different for each image. I did my best to make them similar to each other, but this was extremely difficult, as the exposure times and focus etc. changed during the run. Once the disks and prominences were all done, I combined them in photoshop.

Leave A Comment