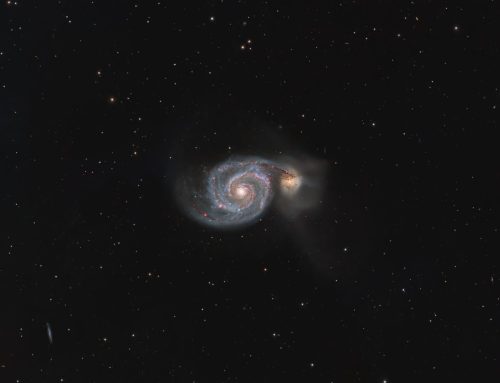
M101, The Pinwheel Galaxy
 Click image for full size version
June 12, 2026
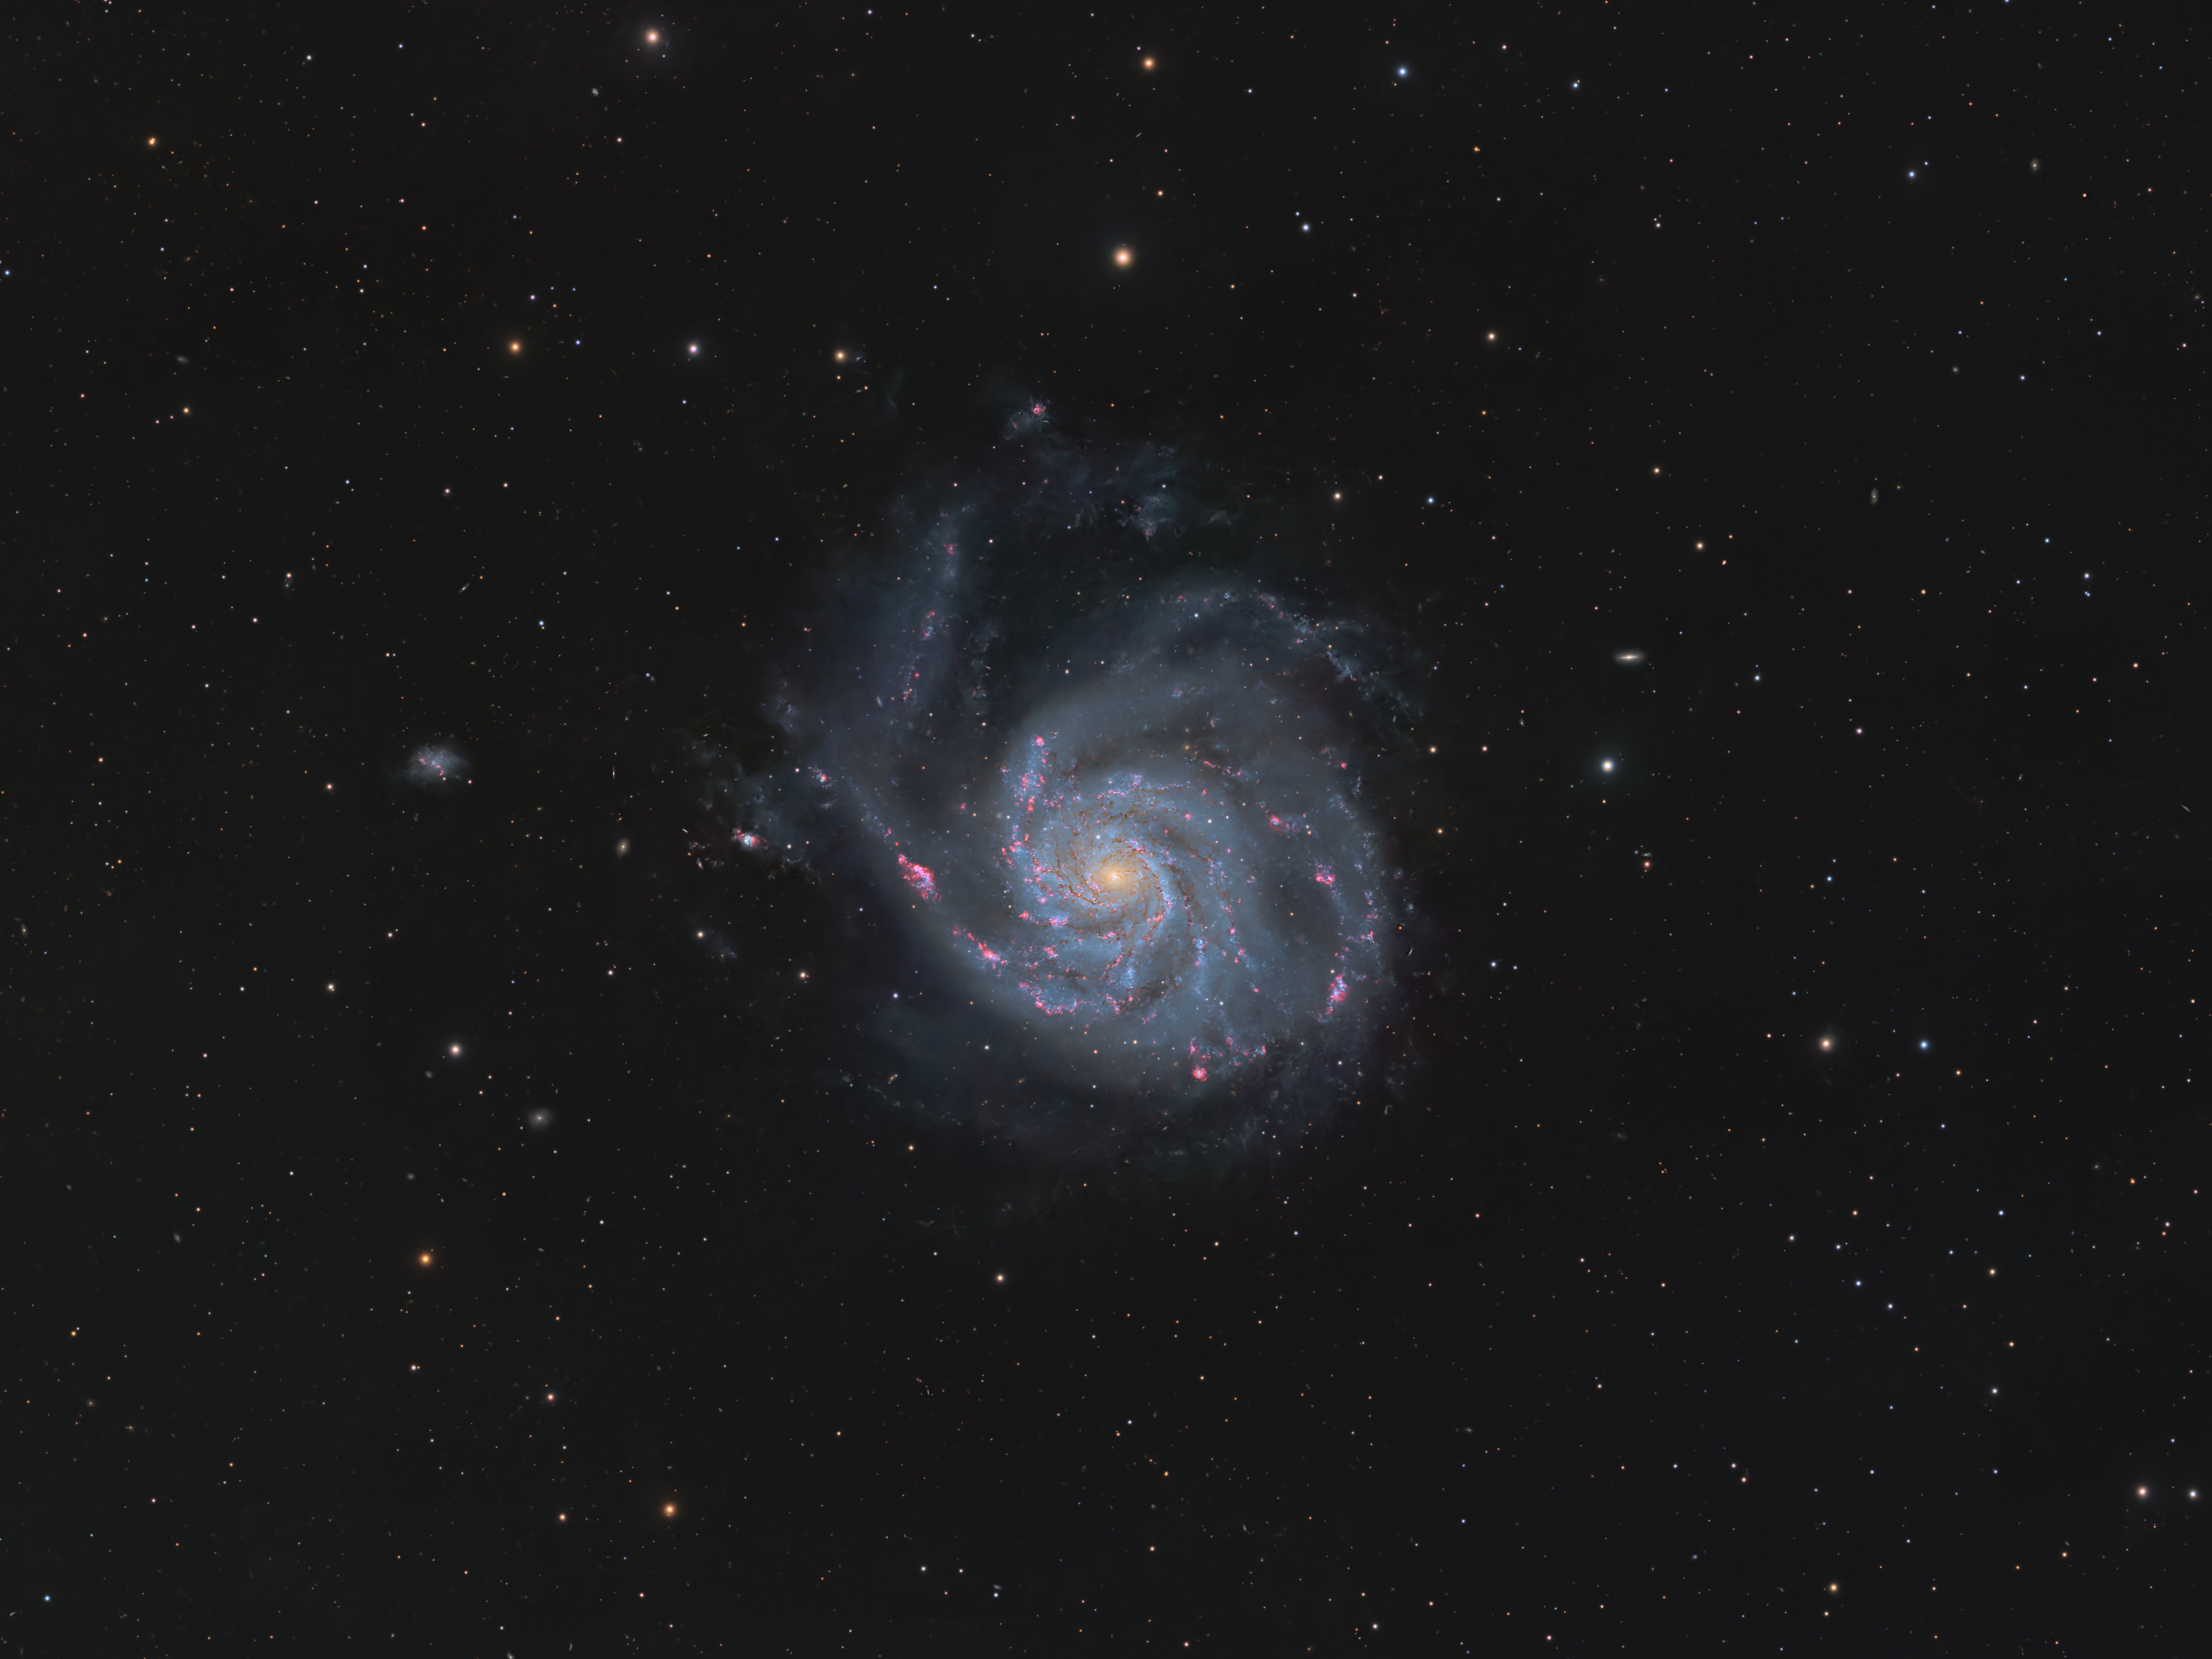
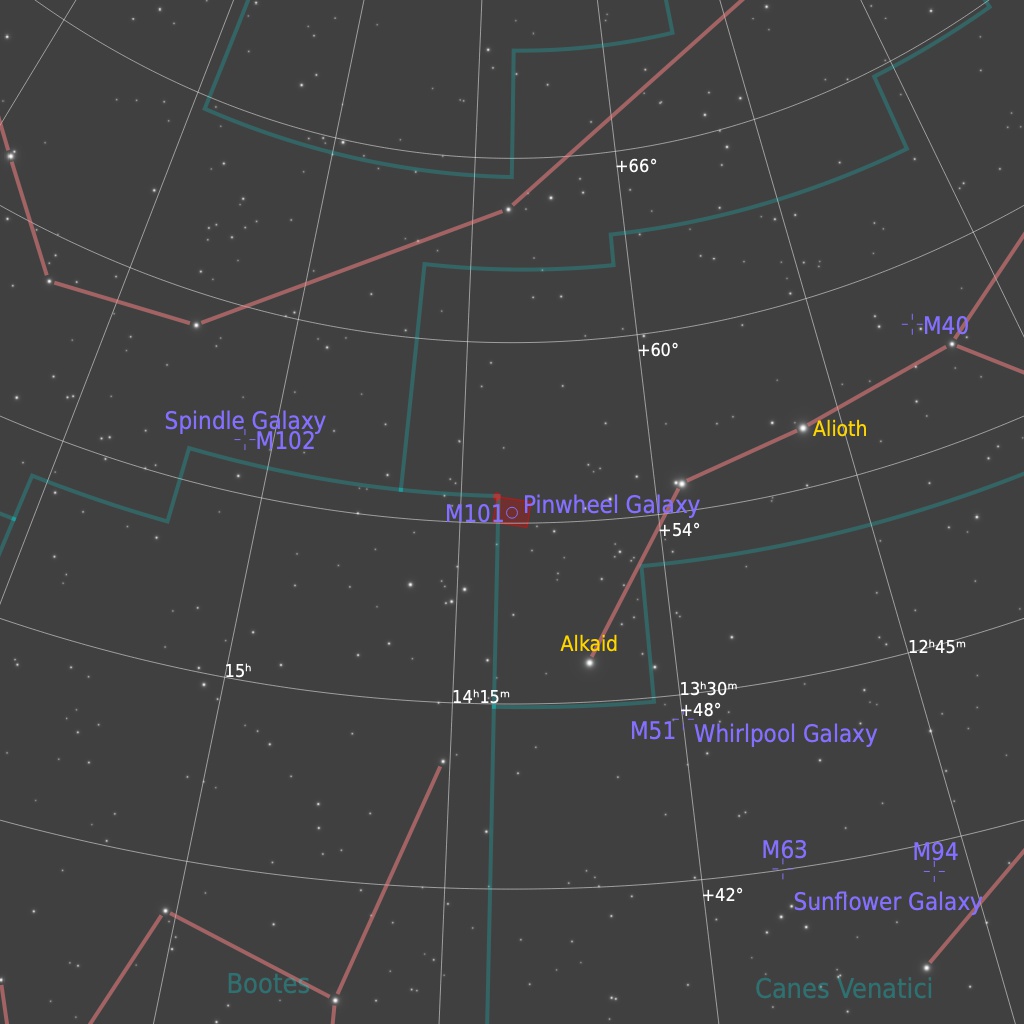
This galaxy is catalogued as M101, but is commonly referred to as the Pinwheel Galaxy. It is close to the handle of the Big Dipper. I have always found this a particularly difficult target to image well. For this image, I combined light that was gathered in 2023 and 2026 for a combined total of 38hr45min.
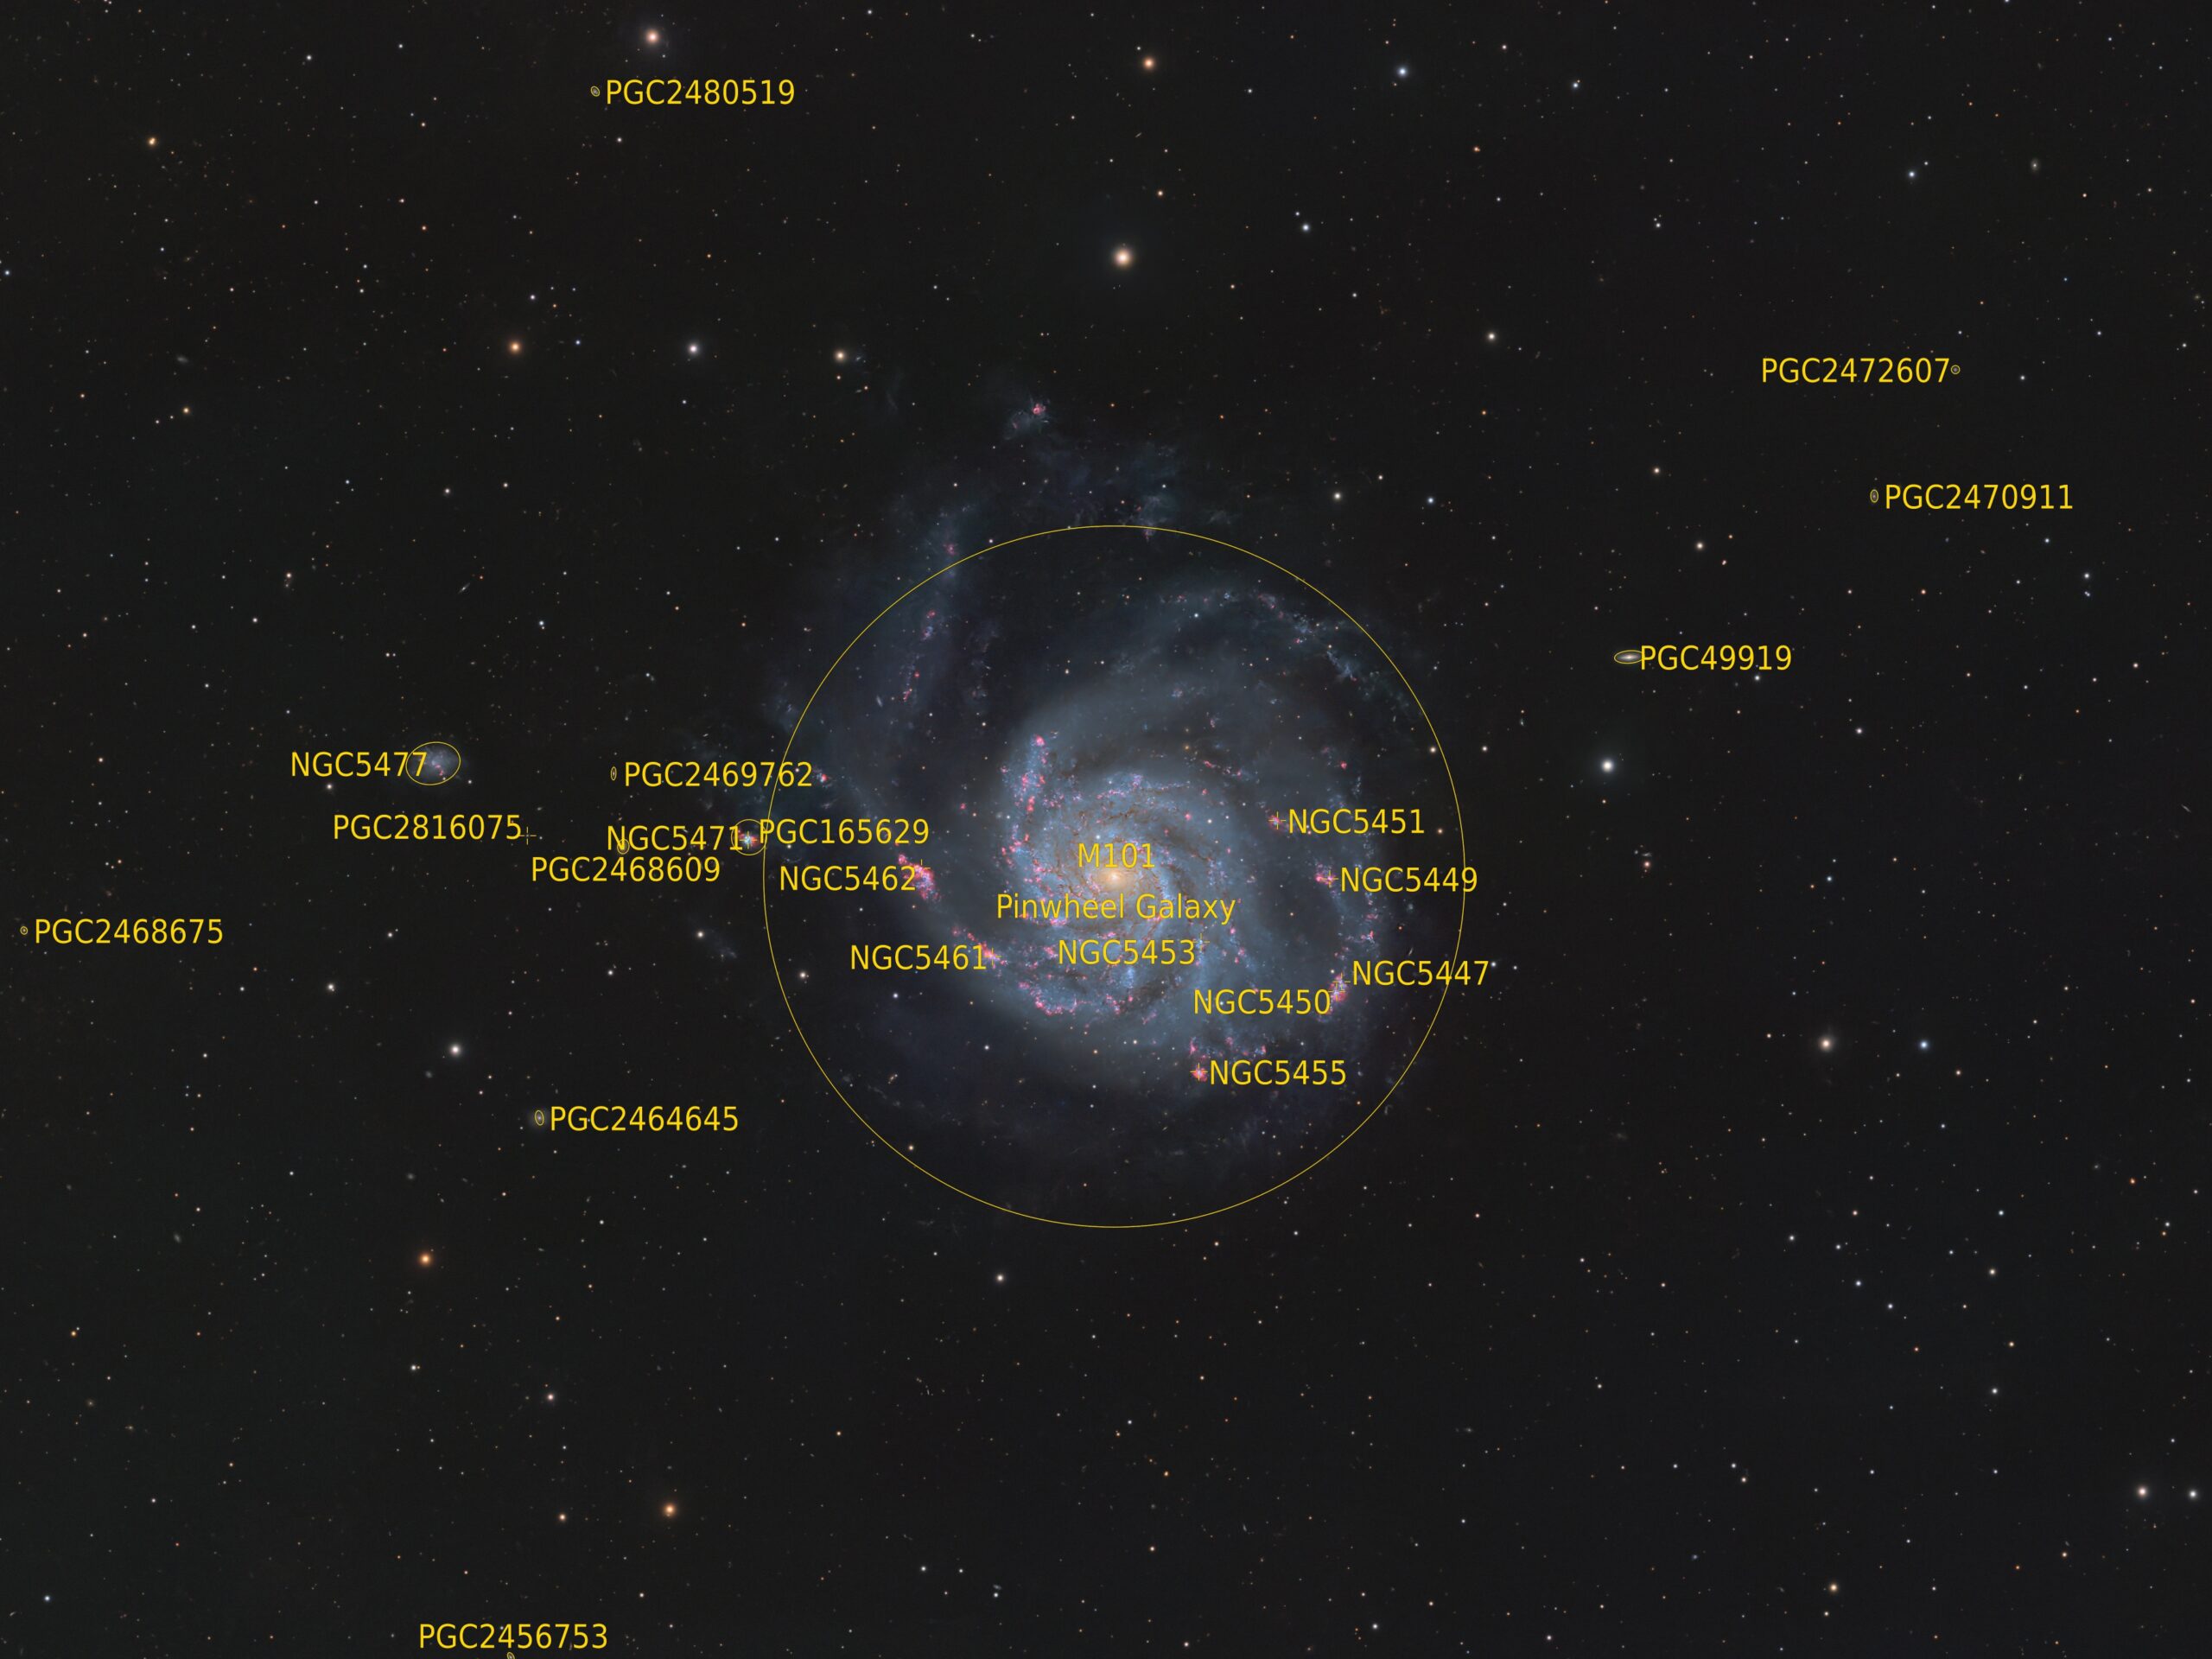
M101 is large — much bigger than our own Milky Way galaxy — and relatively close (22 million light years or so). The asymmetry in M101 is thought to be due to a near-collision with another galaxy a long time ago. This probably triggered extensive star formation, showing up as bright blue clusters within the spiral arms. The pink structures are nebulae, similar to the Orion nebula in our own Milky Way galaxy. Dozens of other galaxies that lie far in the background are spread throughout this image. Many of them are quasars (quasi-stellar radio sources) that are moe than 10 billion light years away! Check out the annotated image for their catalogue designations.
Tekkies:
H-alpha: Sky-Watcher Esprit 150 f/7 refractor and QHY600M camera with Optolong 3nm H-alpha filter. Acquisition, focusing, and control of Paramount MX mount with N.I.N.A., TheSkyX; unguided. Focus with Optec DirectSync motors and controller. Equipment control with PrimaLuce Labs Eagle 4 Pro computer. All pre-processing and processing in PixInsight. Acquired from my SkyShed in Guelph. Good transparency and seeing. Acquired May 12-23, 2022 and March 15-29, 2023 under a moon-free sky.
RGB: Sky-Watcher Esprit 120, QHY168C OSC camera, Optolong L-Quad Enhance filterA cquisition, focusing, and control of Sky-Watcher Wave 150i mount and other equipment with N.I.N.A. and Green Swamp Server. Primalucelab 3″ ESATTO focuser, ARCO rotator, GIOTTO flat panel and ALTO cover motor. Equipment control with Primalucelab EAGLE 6 Pro computer. All pre-processing and processing in PixInsight. Starfield Tri-Pier 1000B. Acquired from my SkyShed in Guelph. Acquired under above average transparency and seeing and moderate moonlight from April 23 – May 16, 2026.
210 x 5m Ha = 17hr 30m
255 x 5m OSC = 21hr 15m
Image scale 0.574 arcsec per pixel (with 2X Drizzle of the OSC)
Preprocessing: The WeightedBatchPreProcessing script was used to perform calibration, cosmetic correction, weighting, registration, local normalization, integration and drizzle integration of all frames.
Alignment of Master Frames: The OSC master was aligned to the Ha master with StarAlignment.
Gradient Removal: DynamicBackgroundExtraction was applied to the two masters.
Colour Calibration: SpectrophotometricColorCalibration was used to calibrate the RGB master.
Deconvolution: BlurXterminator was used on each master with star sharpening set to 0.5, an automatic PSF, and non-stellar sharpening set to 0.9.
Linear Noise Reduction: NoiseXterminator was applied to each image with settings Amount=0.9 and Detail=.15
Ha Continuum Subtraction: The PhotometricContinuumSubtraction script, by Carl Hagen, was used to remove continuum emissions from the Ha master using the red channel of the RGB image as the continuum reference.
Stretching: MultiscaleAdaptiveStretch was applied to each image to make pleasing yet bright images. The RGB image had a final background value of around 0.1 and the Ha image had a final background value of around 0.08 following the stretch.
Nonlinear Processing
H-alpha Blending: The contiuum-subtracted Ha was added to the RGB image using Jurgen Terpe’s CombineHaWithRGB script.
Star Removal and processing: StarXterminator was used to remove the stars with Unscreen checked. Colour was increased in the stars-onlly image by applying Curves saturation through a star mask.
Nonlinear Noise Reduction: NoiseXterminator was used to reduce noise in the background areas of the image with settings Amount=0.9 and Iterations=5. SCNR was applied (Green; average neutral, 60%).
Contrast Enhancement: HistogramTransfotrmation was used to adjust the black point and slightly brighten the image. LocalHistogramEqualization was applied twice. A Contrast Limit of 1.5 and 1 iteration was used for each application (scale 40, strength 0.25 and scale 150, strength 0.3). DarkStructureEnhance was used to slightly boost contrast further.
Sharpening: MultiscaleMedianTransform was used to sharpen Layers 1 – 5 with strengths of 0.03, 0.05, 0.05, 0.04, and 0.03, respectively.
Star Restoration: Stars were added back into the image using the PixelMath expression combine(starless, stars_only, op_screen()).
Final Steps: Background, galaxy and star brightness, contrast and saturation were adjusted in several iterations using CurvesTransformation with masks as required. Mike Cranfield’s StarReduction script was applied to slightly reduce the stars. ICCProfileTransformation (sRGB IEC61966-2.1; Relative Colorimetric with black point compensation) was applied prior to saving as a jpg. The finder chart was made using the FindingChart process. The AnnotateImage script was used to make the annotated image.
Very nice
Ron, that is one of the most beautiful picture that we have ever seen. FANTASTIC. If you make prints I would like to purchase one.
PS.
I have showed it to a few people and they loved it.
Roy and Paula.
Thanks! Yes, my images are for sale. I need to finish it first though! ;-). I will let you know when it is ready.
Clear skies!
What an amazing shot Ron!
When I first started observing with an SC-8 this galaxy was my nemesis. I had no idea what to look for…just that the guide books said it had high luminosity. Night after night I searched the appropriate sky, often using high magnification. You know what I was doing…looking right through it. …Looking at the leaves and missing the forest!
Colours and details are wonderful. Keep up the great work.
Hi Ron,
Saw this great image on the ASA forum.
It would perhaps be instructive to process, say, 10 hours worth, and see what the difference is. I am currently also using ASA10N with all the focal ratio options, but the farthest I’ve gone at f/6.8 is 5 hours 20 min with X2 binning for a scale of 1.3″/px.
Regards,
Mark
I haven’t tried exactly 10 hours, but I did compare the 41.33 and 27.33 hr versions. The difference in luminance is what drives the difference in result — 29 hr vs 15 hr. This really made a huge difference. However, when I considered whether to go for another 10 hours, I figured I’d only get about a 15% improvement in S/N, so I decided to press on for other objects. There are so many objects and so little time 🙂
I aim for an image scale around 1 arcsec/pixel, so f/6.8 works great for me with my camera, which has 9 micron pixels. Your image scale of 1.3”/pixel is very good. If you think it is under sampled for your seeing, consider using PixInsight’s new Drizzle combination process to improve resolution (and your image scale). You could also shoot unbind, which would give you around 0.65″/px – excellent if you often have good seeing.
Ron, excellent image. Thanks for sharing the process flow you used.