M57, The Ring Nebula
Click on images for full size versions
July 23, 2024
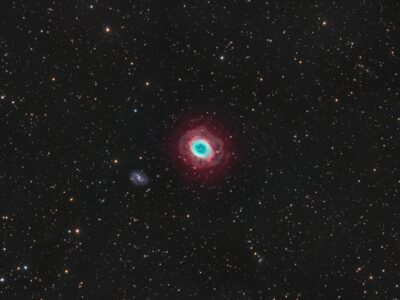
M57, the Ring Nebula, is one of the first deep-sky objects that many people — including me — look at visually when starting out in astronomy. It looks like a cosmic smoke ring in even small telescopes. In reality, it is a planetary nebula, the glowing shell of a dying star, namely the star in the centre of the ring. The main ring structure is about 1.3 light years across, and the nebula lies around 2,500 light years away in the constellation of Lyra. Images capture the pretty colours of the nebula and the surrounding stars, and deep images like these reveal the ruffled outer shell. The red colour is mostly from glowing hydrogen and sulfur atoms, the teal comes mostly from the blue and green emissions of oxygen atoms.
There are two stars inside the ring that I have seen distinctly only once using my 20″ reflector, and indistinctly just a few times. And yet the brightest part of the ring makes it pretty easy in binoculars (except that it’s small). So bottom line is it’s good with just about any kind of optical aid. If you have binoculars or a scope, this object is well placed in the evening just after dark, high in the northeast, smack-dab between two bright stars in Lyra. One of these stars is Sheliak, which will be familiar to Star Trek Buffs. See http://en.memory-alpha.org/wiki/Sheliak to find out more about the brutish Sheliak people and their home world. Photos of M57 over the last 50 years confirm that it is expanding. When your great-great-great-great-great-grandchildren look at it, it will be quite a bit bigger and a lot fainter!
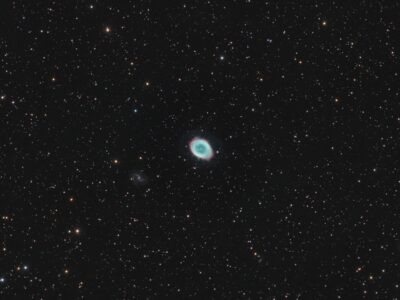
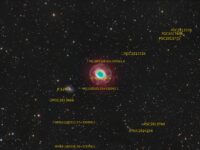
You can’t help but notice the pretty galaxy to the lower left of M57. It is IC 1296, and lies 235 million light years away, far in the background in this image. There are numerous other galaxies in the image, some of which are much farther away, inlcuding some quasars. Check out the annotated image that I prepared. Here is another version made using two telescopes in 2022 – luminance and one-shot colour only. Amazing how the use of different equipment affects the overall look of the field.
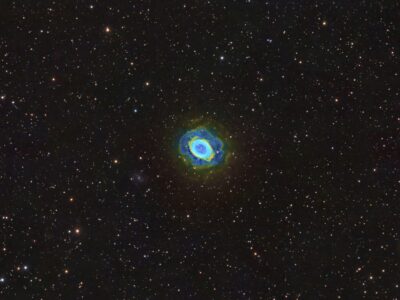
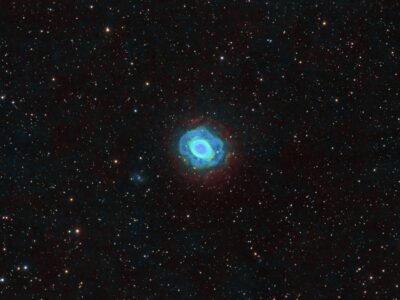
This image data is presented in four different colour palettes:
– RGB natural colour
– RGB plus narrowband natural colour
– Hubble palette with RGB stars
– Foraxx palette with RGB stars
Tekkies:
Acquisition, focusing, and control of Paramount MX mount with N.I.N.A., TheSkyX and PHD2. Primalucelab low-profile 2″ Esatto focuser and ARCO rotator. Flats taken with Primalucelab GIOTTO 430mm flat panel. Equipment control with Primalucelab Eagle 4 Pro. All pre-processing and processing in PixInsight. Acquired from my SkyShed in Guelph. Below average to excellent transparency and average seeing. Data acquired from July 3 to 14, 2024 under strong moonlight.
Celestron 14″ F/11 EDGE HD telescope at f/11 (3,912 mm focal length) and QHY600M camera binned 2×2 with Optolong filters (3nm for narrowband).
62x5m Red = 5hr10m
59x5m Green = 4hr55m
60x5m Blue = 5hr00m
58x5m Ha = 4hr50m
54x5m O3 =4hr30m
56x5m S2 =4hr40m
Total: 29hr 05m
Preprocessing: The WeightedBatchPreProcessing script was used to perform calibration, cosmetic correction, weighting, registration, local normalization, integration and Drizzle integration of all frames.
RGB master: The master RGB image was made from the Red, Green and Blue masters using ChannelCombination in RGB mode.
Gradient Removal: DBE was used to remove gradients from the RGB, SHO, SynthL, Ha, and O3 masters.
Colour Calibration: SpectroptometricColorCalibration was used to calibrate the RGB master. LinearFit was used to match the O3 and S2 to the Ha.
SHO master: The master SHO image was made from the narrrowband masters using ChannelCombination in RGB mode.
Deconvolution: BlurXterminator was applied to the RGB, SHO, SynthL, Ha,, and O3 masters with Automatic psf , star sharpening set to 0.5, and non-stellar set to 0.75.
Star Removal: StarXterminator was used to remove the stars from the RGB, SHO, SynthL, Ha, and O3 masters, with Large Overlap and Unscreen selected. The RGB and SynthL stars-only images were retained.
Linear Noise Reduction: NoiseXterminator was applied to the RGB, SHO, SynthL, Ha and O3 masters with settings Amount=0.9 and Detail=0.1
Stretching: HistogramTransformation was applied in two steps to the RGB, SHO, SynthL, Ha and O3 masters to make pleasing images. Approximate background level after stretch was 0.08 for Ha and O3, 0.1 for SynthL and SHO, and 0.09 for RGB. The first step was done without a mask and just revealed the brightest structures in the nebula and slight brightening in the centre. The second stretch used a range mask to protect these brighter regions and the centre of M57 while bringing up fainter structures outside the masked region.
Nonlinear Processing
SynthL addition: LRGBCombination was applied to replace the lightness of the RGB image with the SynthL master.
Ha Cleanup: Some prominent haloes in the H-alpha master were removed using CloneStamp.
Addition of NB to SynthLRGB: The NBRGBCombination script was used to add Ha (red) and O3 (blue and green) to the SynthLRGB image to make the NB-RGB master.
Foraxx Palette Image Creation: The colour channels of the SHO image were extracted using RGB mode in ChannelExtraction. The resulting red, green and blue channels were used in the Foraxx Palette Utility Script to create the Foraxx palette image.
Nonlinear Noise Reduction: NoiseXterminator was used to reduce noise in the background areas of the RGB, SHO, HOSRGB and Foraxx Palette images with settings Amount=0.9 and Detail=0.15.
Re-stretch: HistogramTransformation was used on the RGB, SHO, HOSRGB and Foraxx Palette images to boost contrast by moving the dark point to the toe of the histogram and slightly decreasing the mid-point slider.
Contrast Enhancement: LocalHistogramEqualization was applied to the RGB, SHO, NB-RGB and Foraxx Palette images using an inverted lightness mask to protect the background and select the nebula and galaxy. Two passes were applied (scale 40, max contrast 1.5, strength 0.4, 1 iteration; and scale 120, max contrast 1.5, strength 0.25).
Sharpening: MultiscaleMedianTransform was used on the RGB, SHO, NB-RGB and Foraxx Palette images with the same mask used in the previous step to sharpen Layers 2 – 4 with strengths of 0.05, 0.05 and 0.02, respectively.
Star Processing and Restoration: HistogramTransformation was used to stretch the stars-only images made from the SynthL and RGB masters. LRGBCombination was used to replace the lightness of the RGB stars-only image with the SynthL stars-only image, followed by CurvesTransformation through a star mask to boost saturation using the Saturation and CIE c* sliders. The stars were added back into the RGB, NB-RGB, SHO and Foraxx masters images using the Screen blending mode in PixelMath.
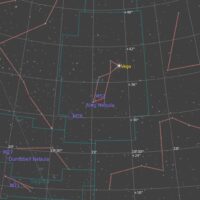
Final Steps: Background, galaxy and star brightness, contrast and saturation were adjusted in several iterations using CurvesTransformation with masks as required. The StarReduction script was used in Halo mode to slightly reduce the size of the stars in all the master images. ICCProfileTransformation (sRGB IEC61966-2.1; Relative Colorimetric with black point compensation) was applied prior to saving as a jpg. The finder chart was made using the FindingChart process. The annotated version was made using the AnnotateImage script.

Leave A Comment