NGC 4565, The Needle Galaxy
Click image for full size version
February 5, 2024
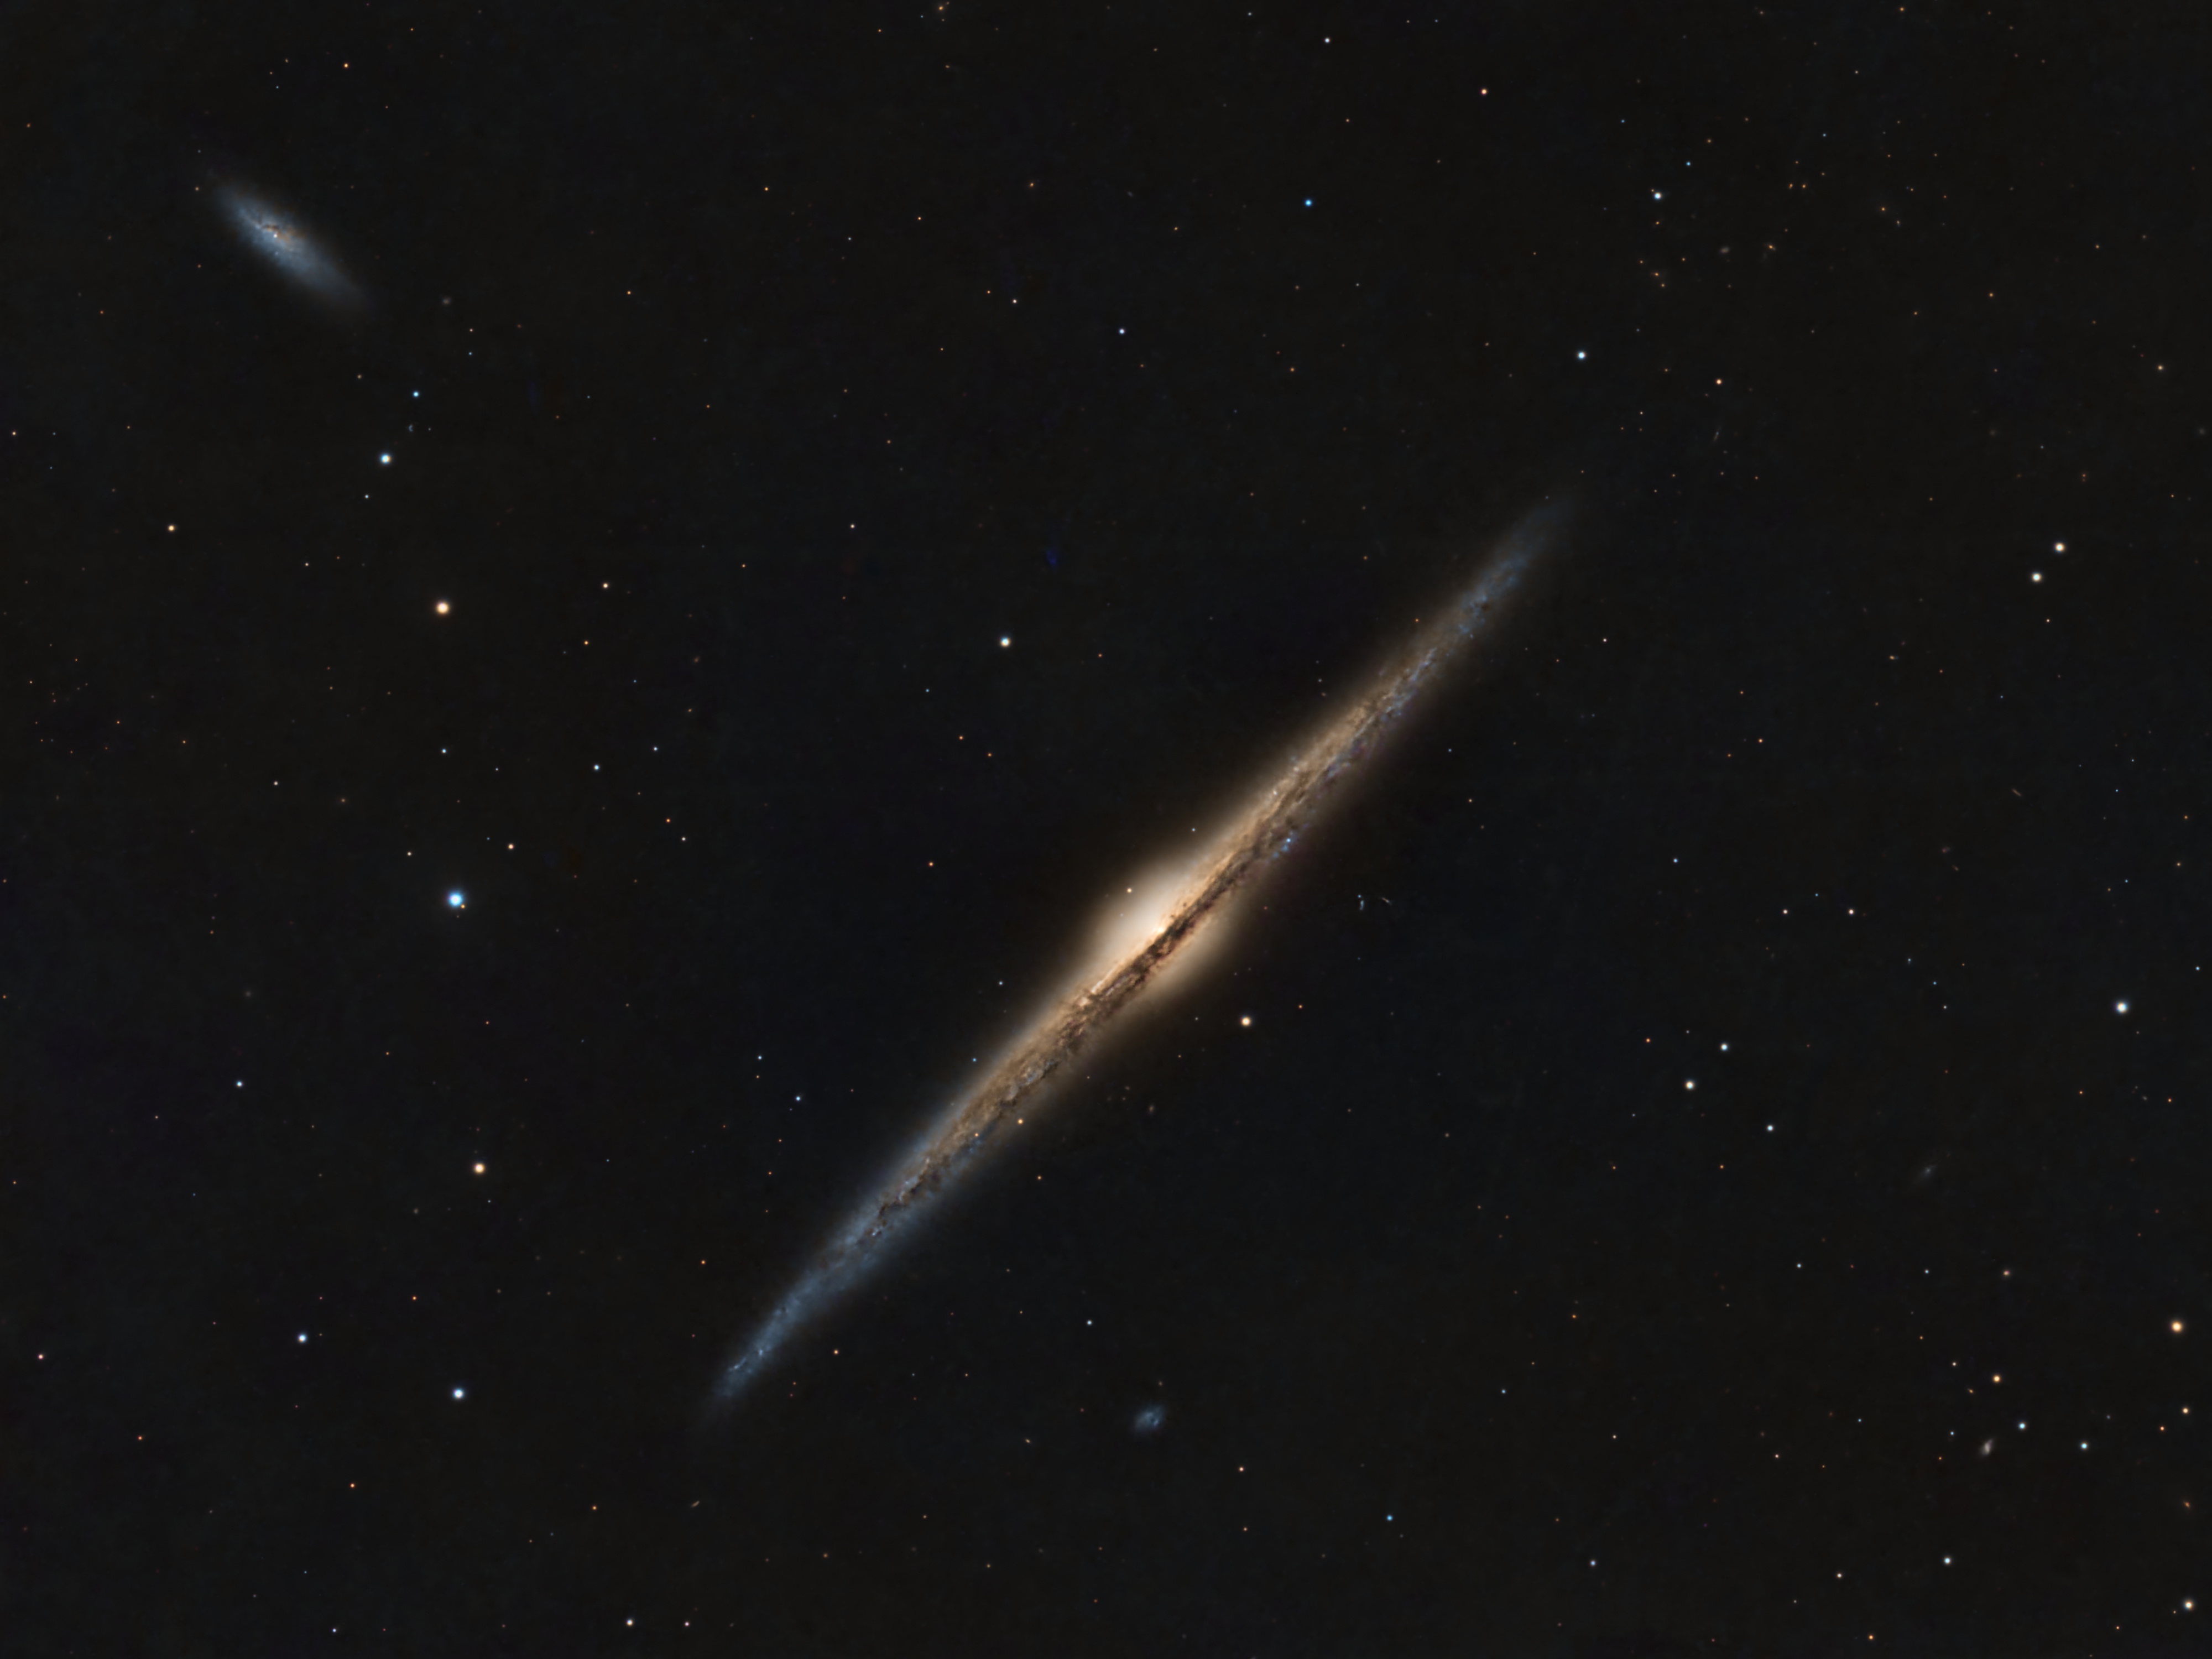
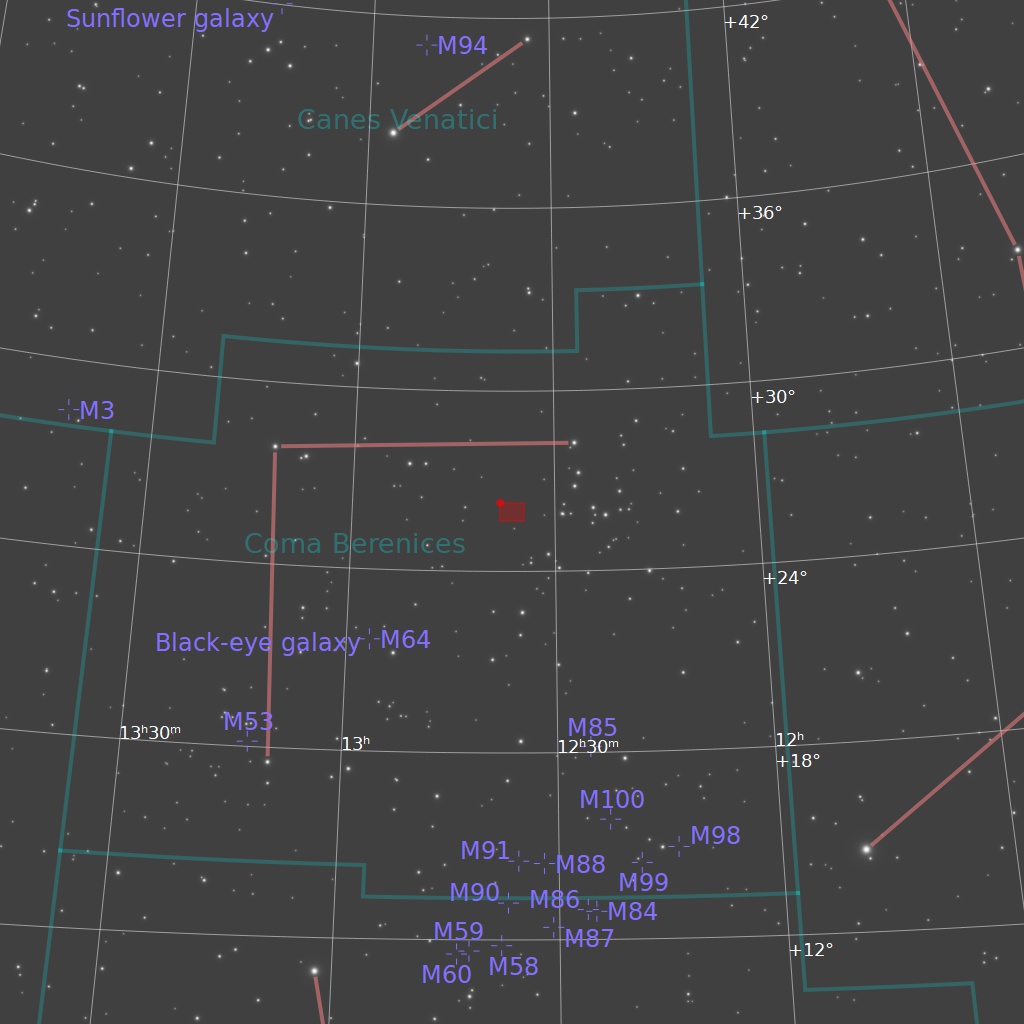
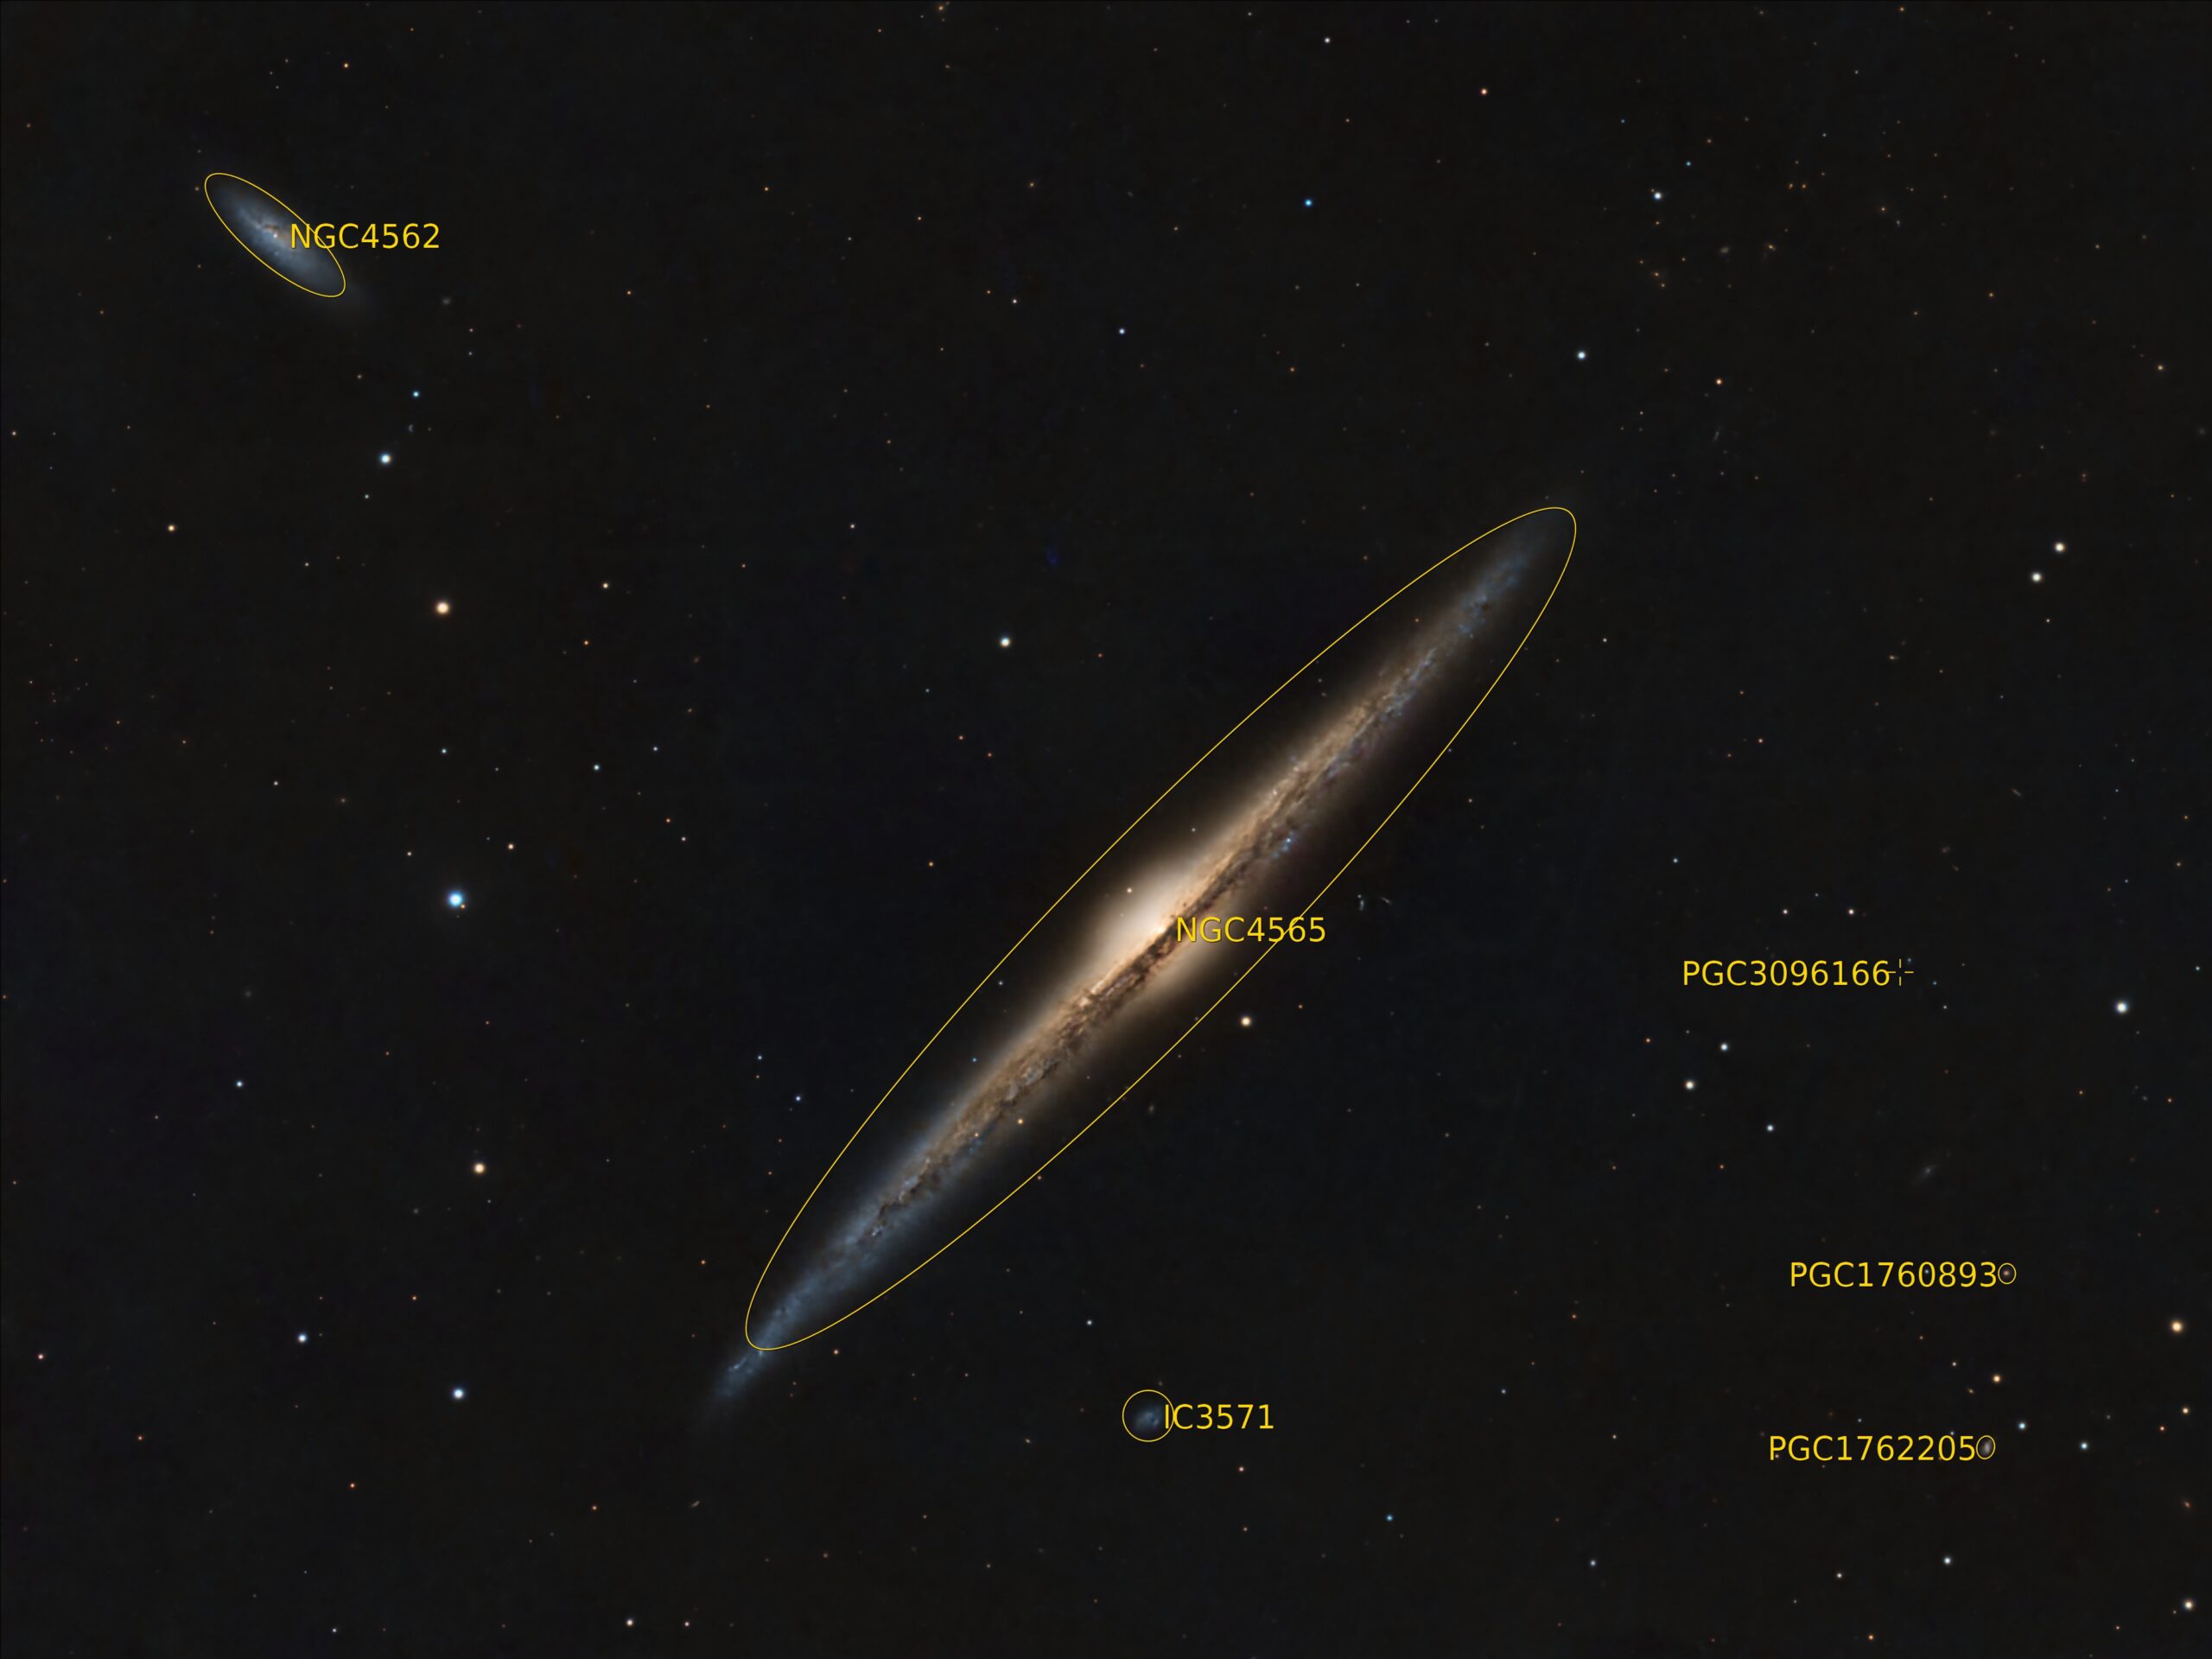
NGC 4565, The Needle Galaxy, lies about 30-50 million light years from Earth in the constellation Coma Berenices. It has a diameter of about 100,000 light years, similar to that of our own Milky Way galaxy. Its length appears about half the Moon’s width in images, and somewhat less through the eyepiece. Although it is classified as a barred spiral galaxy, the central bar isn’t visible in this image, because the galaxy is edge-on to our line of sight. However, the bar’s presence is evident from Spitzer Space Telescope data. Several other galaxies also appear in this field. The most prominent, and showing some nice detail, is NGC 4562 at upper left. There are also many unmarked galaxies, including many off the upper right tip of NGC 4565. The annotated image shows the location of a few of these galaxies. I’ve imaged this many times before, but no previous image shows such good resolution. I’m really enjoying the C14.
Tekkies:
Acquisition, focusing, and control of Paramount MX mount with N.I.N.A., TheSkyX and PHD2. Primalucelab low-profile 2″ Essato focuser and ARCO rotator. Equipment control with PrimaLuce Labs Eagle 4 Pro computer. All pre-processing and processing in PixInsight. Acquired from my SkyShed in Guelph. Average transparency and seeing. Data acquired September 15-20, 2023 in a moonless sky.
Celestron 14″ EDGE HD telescope at f/11 (3,912 mm focal length) and QHY600M camera binned 2×2 with Optolong filters.
22x5m Red = 1hr50m
12x5m Green = 1hr00m
16x5m Blue = 1hr20m
Total: 4hr10m
Preprocessing: The WeightedBatchPreProcessing script was used to perform calibration, cosmetic correction, weighting, registration, local normalization, and integration of all frames. The R, G and B channels were combined with ChannelCombination.
Gradient Removal: GraXpert was applied to the RGB master.
Star Correction: BlurXterminator was applied with Correct Only checked.
Colour Calibration: ColorCalibration was used to calibrate the RGB master.
Deconvolution: BlurXterminator was applied using an automatic PSF, and star sharpening set to 0.35.
Star Removal: StarXterminator was used to remove the stars, with Unscreen selected.
Linear Noise Reduction: NoiseXterminator was applied with Amount=0.95 and Detail=0.35
Stretching: HistogramTransformation was applied to make a pleasing yet bright image. Approximate background level after stretch was 0.10
Nonlinear Processing
Nonlinear Noise Reduction: NoiseXterminator was applied with Amount=0.9 and Detail=0.15
Supplemental Stretching: HistogramTransformation was used to adjust the black point and increase brightness and contrast. Approximate background level after stretch was 0.10
Contrast Enhancement: Using a mask to select the galaxies, LocalHistogramEqualization was applied twice. A Contrast Limit of 1.5 and 1 iteration was used for each LHE application (scale 50, strength 0.25; scale 150, strength 0.18).
Sharpening: The same mask was used with MultiscaleMedianTransform to sharpen Layers 1 – 4 with strengths of 0.01, 0.03, 0.03, and 0.02, respectively.
Stars-only steps: The stars-only image was stretched with HistogramTransformation. The stretch was slightly less aggressive than the sreen transfer function determined automatically by StarXterminator. CurvesTransformation CIE c* (colourfulness) slider was used to add colour saturation to the stars through a mask made by extracting the Luminance from the stretched stars-only image.
Star Restoration: PixelMath expression combine(starless, stars, op_screen()) was used to combine the starless and stars-only images created with StarXterminator.
Final Steps: Background, galaxy and star brightness, contrast and saturation were adjusted in several iterations using CurvesTransformation with masks as required. ICCProfileTransformation (sRGB IEC61966-2.1; Relative Colorimetric with black point compensation) was applied prior to saving as a jpg. The image was annotated with the AnnotateImage script. The finder chart was made using the FindingChart process.
One of my favourite edge ons. Love all the little background galaxies. Hope you have time for a jam (at mickey’s camp?) again this year.
cheers, clear *skies, . . . Glenn
Very nice, I like all the detail in the dust lanes!!