NGC457 – The Owl Cluster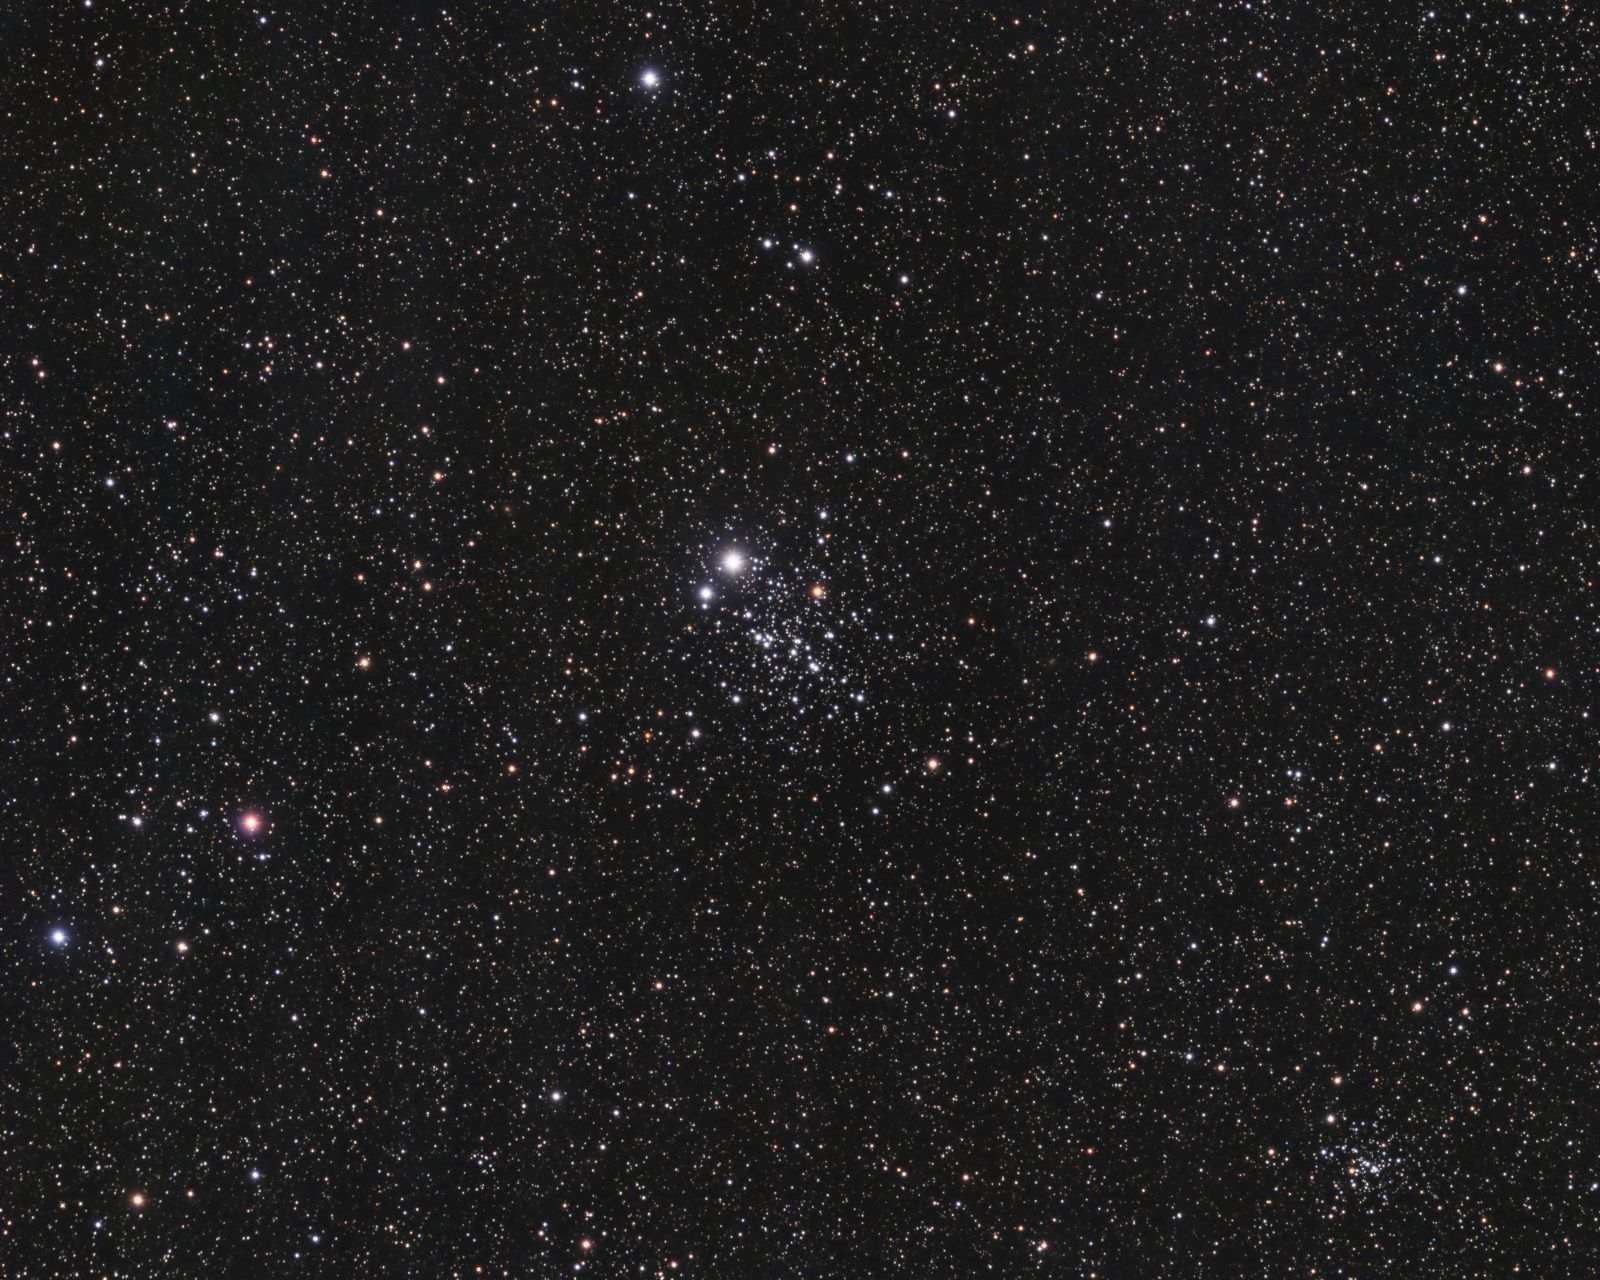
Click image for full size version
January 1, 2019
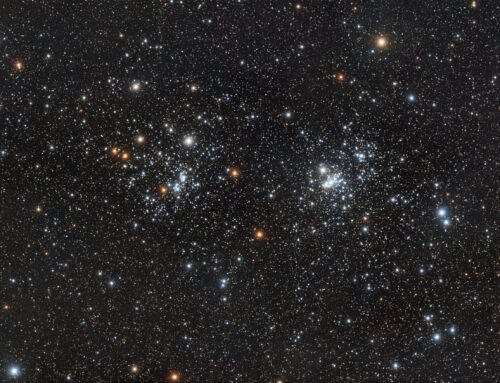
NGC 457 is the main open cluster at centre of this image. It is about 7,900 light years away and its age is estimated to be 21 million years. It is known as the Owl cluster, the Number 5 Cluster or the E.T. Cluster. I can see the resemblance to the alien from the movie E.T., but to me the owl is more prominent, with wings more than half unfolded.
NGC 436 is at the bottom right in this image. It’s a little further away than the Owl at 9,800 light years, and a lot older, at about 85 million years old. You may also be able to spot a few galaxies scattered around this field. They are very faint owing to the short exposure time for this image.
This image was made from only 1 hour of data. The weather in November and December 2018 has been terrible, with only a few clear moments here and there.
I have previously posted two images of this object (see here and here), both of which were published (see here and here). It’s a target I keep coming back to because it is attractive, easy to shoot in a short time, and looks similar to the visual impression in my 20″ Dob. Shooting an object with different optics and cameras helps me in evaluating equipment performance. I am really enjoying this Sky-Watcher Esprit 150 and QHY 16200-A camera.
Tekkies:
Sky-Watcher Esprit 150 f/7 refractor, QHY 16200-A camera, Optolong R, G and B filters, Paramount MX. Acquisition with TheSkyX unguided. Focused manually with Bahtinov mask. Automation with CCDCommander. All pre-processing and processing in PixInsight. Acquired from my SkyShed in Guelph. No moonlight, average transparency and average seeing. Data acquired December 18, 2018.
5x5m R, 4x5m G and 3x5m B (Total = 1hr).
Image scale is 1.15″ per pixel
Data Reduction and Cleanup
The BatchPreProcessing script was used to perform calibration, cosmetic correction and registration of all frames. ImageIntegration was used to create the R, G and B masters, which were cropped identically with DynamicCrop. DynamicBackgroundExtraction was applied to each master. CloneStamp was used to repair a prominent dust shadow in the same location in each master.
RGB Creation and Processing
Creation and cleanup: ChannelCombination was used to make a colour image from the R, G and B masters. The RGB image was processed with PhotometricColorCalibration using a small preview of background sky as the background reference.
Linear Noise Reduction: MultiscaleLinearTransform was used to reduce noise in the RGB image. An internal mask was used, with layer settings for threshold and strength as follows: Layer 1: 3, 0.85 Layer 2: 2, 0.6 Layer 3: 2, 0.35 Layer 4: 1, 0.2.
Stretching: HistorgramTransformation was applied to the RGB image to make a pleasing, bright image.
Synthetic Luminance
Creation and cleanup of SynthL: The R, G and B masters were combined using ImageIntegration (average, additive with scaling, noise evaluation, iterative K-sigma / biweight midvariance, no pixel rejection).
Deconvolution: A star mask was made to use as a Local Deringing Support image. A copy of the image was stretched to use as a range mask. Deconvolution was applied (50 iterations, regularized Richardson-Lucy, external PSF made using PSFImage script tool with 30 stars).
Linear Noise Reduction: MultiscaleLinearTransform was used to reduce noise in the SynthL image. An internal mask was used, with layer settings for threshold and strength as follows: Layer 1: 3, 0.5 Layer 2: 2, 0.35 Layer 3: 2, 0.2 Layer 4: 1, 0.1.
Stretching: HistogramTransformation was applied to the SynthL to make a pleasing, bright image.
Combining SynthL and RGB
The processed SynthL was applied to the RGB image using LRGBCombine.
Additional Processing
Nonlinear Noise Reduction: TGVDenoise was used in L*a*b* mode to reduce noise in the background.
Final Steps: Background and star brightness, contrast and saturation were adjusted in several iterations using CurvesTransformation with masks as required.

Leave A Comment