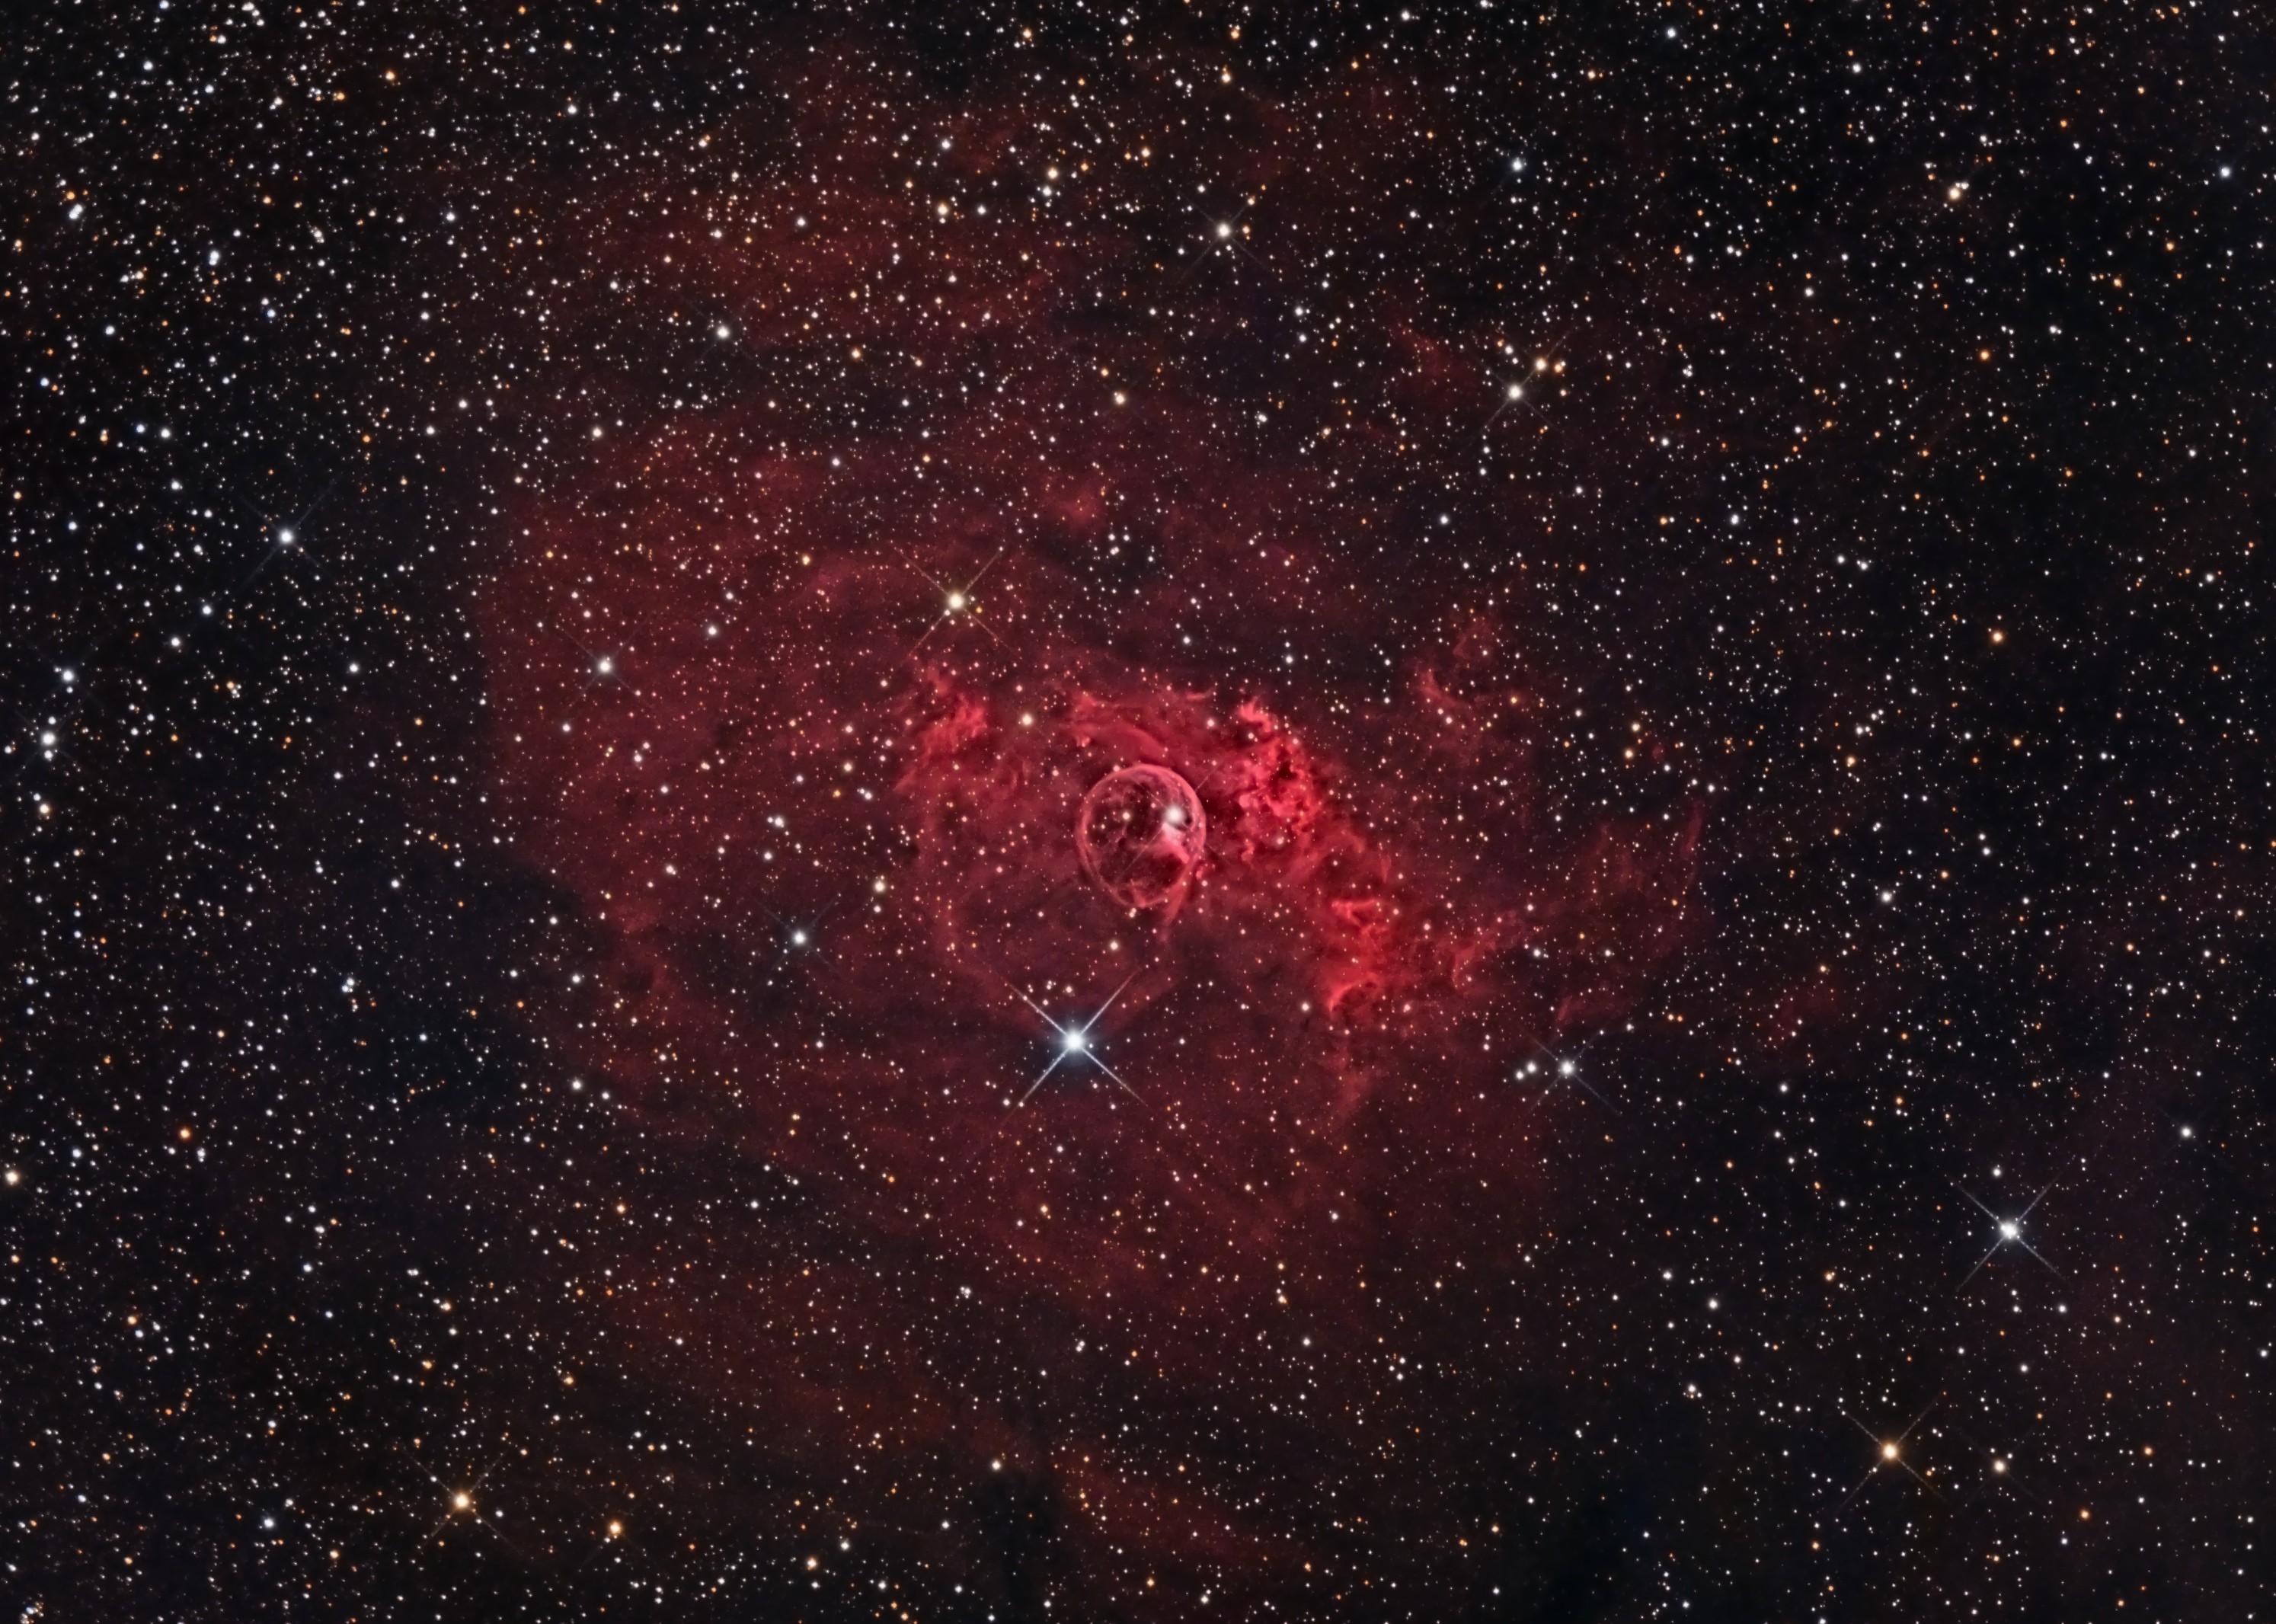
NGC7635, The Bubble Nebula
Click image for full size version
January 4, 2015
Like so many objects I’ve shot before, the Bubble Nebula looks better in this shot than in my previous attempts. This is due to evolution of my equipment and my knowledge of processing. I sent out an image of this object on August 31 2011, and mused in that email that I was expecting my new scope to ship shortly. This image was taken with that then-new scope, but my previous attempt at processing it, in 2012, did not do it justice.
The Bubble Nebula glows red because of hydrogen. It is lit by the bright star inside the bubble, which is of a type known as a Wolf-Rayet star. These stars emit lots of particles and energy, enough to actually blow the bubble. The central star of the bubble is between 7000-11000 light years away. I’ve glimpsed the brightest parts of the bubble visually through my 20″ reflector. Photographically it’s one of my faves (they all are!). I really like the fine detail that can be seen by zooming in on the bubble region.
Tekkies:
SBIG STL-11000M camera, Baader LRGB filters, 10″ f/6.8 ASA astrograph, MI-250 mount. Guided with STL-11000’s external guider and a 500mm f.l. Lumicon guide scope. Focusing with FocusMax. Acquistion, guiding, and calibration using Maxim-DL. All processing in PixInsight. Shot from my SkyShed in Guelph, Ontario. All data collected with lots of moon in the sky. Average transparency and seeing.
14x5m R, 14x5m G, 13×5 B, 10x20m Ha and 11x10m Ha (total 9hr45m).
Subframe Selector script was used to eliminate poor quality frames.
Ha, R, G and B masters were cropped to remove edge artifacts from stacking. The R, G and B channels were combined to make an RGB image. Ha and RGB were processed with DBE, combined with the NB-RGB script, and Colour Calibration was applied. HistogramTransformation was applied, followed by TGVDenoise and another HistogramTransformation to reset the black point.
Synthetic Luminance:
Creation and cleanup: The individual R,G,B and Ha frames were combined using the ImageIntegration tool (average, additive with scaling, noise evaluation, iterative K-sigma / biweight midvariance, no pixel rejection). DBE was applied to neutralize the background.
Deconvolution: A star mask was made to use as a local deringing support. A copy of the image was stretched to use as a range mask. Deconvolution was applied (100 iterations, regularized Richardson-Lucy, external PSF made using DynamicPSF tool with about 40 stars).
Stretching: HistogramTransformation was applied, followed by TGV Denoise and another HistogramTransformation to reset the black point. No pixels were clipped during either stretch. The Curves tool was used to boost brightness, contrast and saturation of the nebula.
Combining SynthL with HaRGB:
The luminance channel was extracted, processed and then added back into the RGB image as follows:
1. Extract luminance from the RGB image.
2. Apply LinearFit using the SynthL channel as a reference.
3. Use ChannelCombination in the Lab mode to replace the luminance of the RGB with the fitted luminance from step 2.
4. LRGBCombine was then used to make a SynthLRGB image.
Multiscale Processing:
Contrast Boost on Large Structure: Small-scale structures were isolated using MultiscaleLinearTransform (8 wavelet layers, residual layer deselected) on a copy of the SynthLRGB image. Large-scale structures were isolated by subtracting the small-scale image from the SynthLRGB (no rescaling). Colour saturation and contrast were boosted on the large-scale image. Then small-scale and large-scale images were added back together in PixelMath.
Saturation Boost on Small Structures: Small-scale structures were isolated using MultiscaleLinearTransform (4 wavelet layers, residual layer deselected) on a copy of the SynthLRGB image. Large-scale structures were isolated by subtracting the small-scale image from the SynthLRGB (no rescaling). Colour saturation was boosted on the small-scale image. Then small-scale and large-scale images were added back together in PixelMath.
Final Steps:
MorphologicalTransformation was applied with a star mask to slightly reduce stars. TGV noise was applied using an extracted luminance channel as a mask. A range mask was used to protect all but the nebula and LocalHistogramEqualization and an increase in colour saturation were applied to boost the nebula. ACDNR was applied at a 4-pixel scale using a very strong mask (i.e. protecting the stars and bright parts of the nebula).
Image scale for this telescope/camera/rescaling combination is about 1.1 arcsec/pixel.

Leave A Comment