Sh2-136
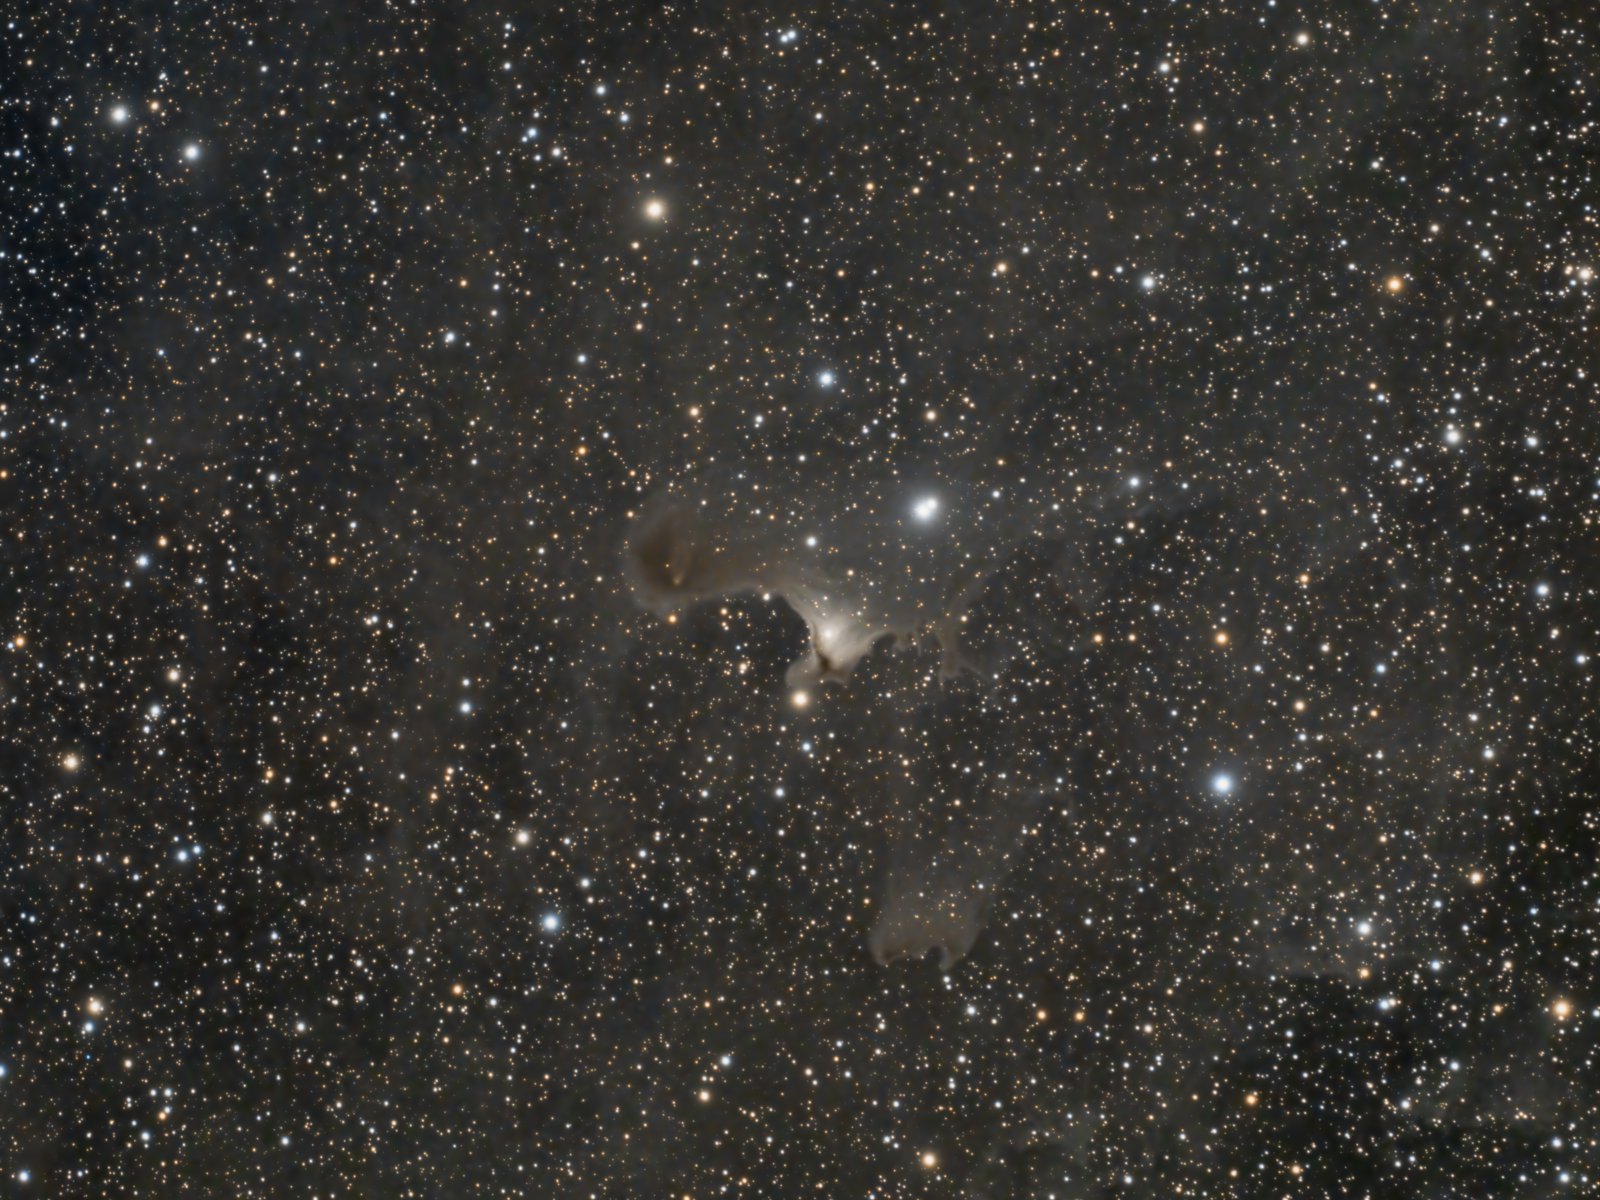 Click image for full size version
March 14, 2022
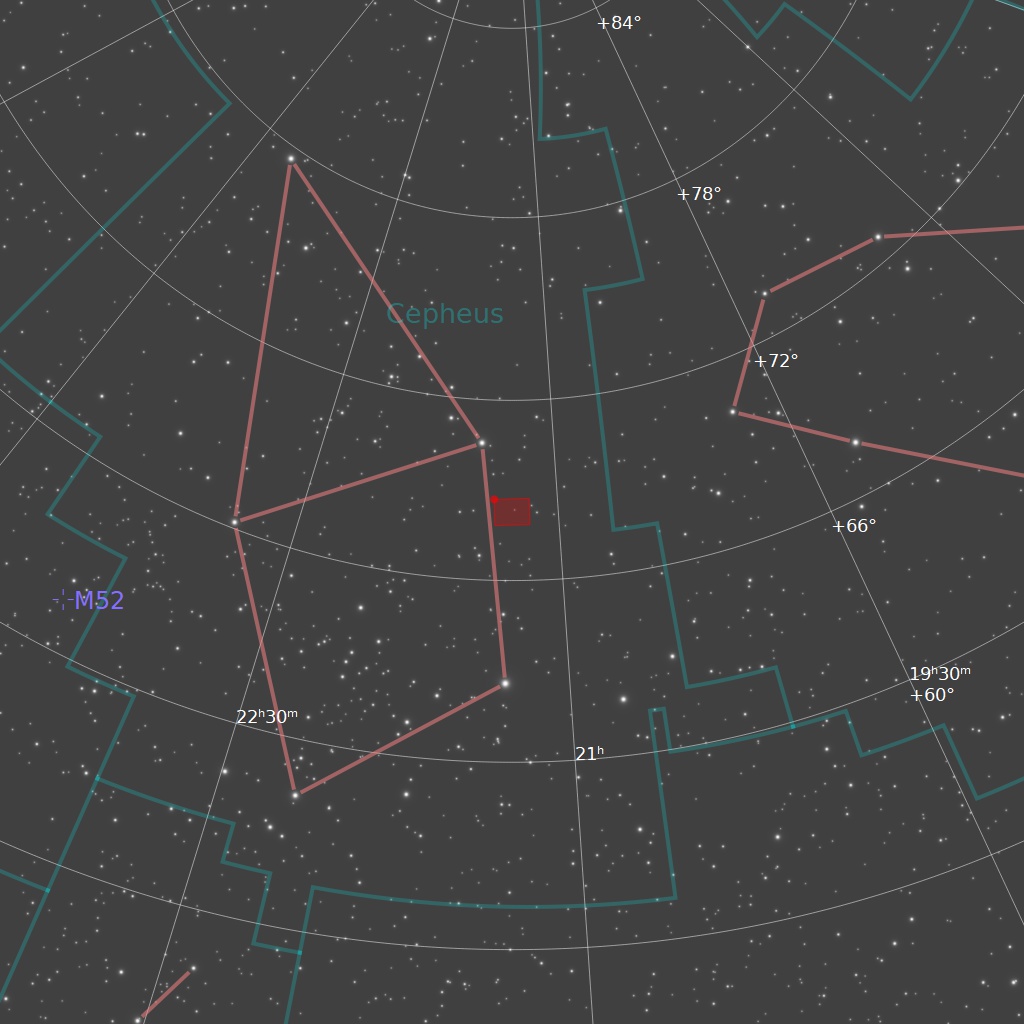
Sh2-136 is nicknamed the Ghost Nebula, and is also catalogued as vdB-141. It glows very faintly in the constellation Cepheus, and is the brightest structure at the centre of this image. It is a classified as a globule, and is 2 light years across. This region of the sky is full of faint reflection nebulae that are visible in photos, shining by reflected starlight. See the finder chart below for its location in the sky. There are also a couple of other catalogued nebulae in this field: dark nebula LDN 1177 and bright nebula LBN 495. Note that so-called bright nebulae aren’t bright at all. They are typically very faint, but are given this name to distinguish them from dark nebulae – patches of dust and soot that block out the light of stars behind them.
 Tekkies:
Acquisition, focusing, and control of Paramount MX mount with N.I.N.A., TheSkyX and PHD2. Focus with Optec DirectSync motor and controller. Equipment control with PrimaLuce Labs Eagle 4 Pro computer. All pre-processing and processing in PixInsight. Acquired from my SkyShed in Guelph. Above-average transparency and seeing. Data acquired June 16 – July 3, 2021 in a nearly moonless sky.
Luminance: Sky-Watcher Esprit 150 f/7 refractor and QHY600M camera with Optolong UV/IR filter
Chrominance: Takahashi FSQ-106 ED IV @ f/5 and QHY367C Pro one-shot colour camera with Optolong UV/IR filter
147x5m OSC = 12hr15m
Total: 27hr55m
Data Reduction and Initial Processing
Preprocessing: The WeightedBatchPreProcessing script was used to create a Luminance master frame from the mono camera and an RGB master frame from the one-shot colour camera. DrizzleIntegration (2x CFA Drizzle) was applied to the RGB set. The RGB master was registered to the Luminance master using StarAlignment.
Gradient Removal: DBE was applied to both masters using Subtraction.
Colour
Colour Balancing: Colour was balanced with PhotometricColorCalibration.
Linear Noise Reduction: MultiscaleLinearTransform was used to reduce noise in the background areas, using an internal mask to protect bright structures. Layer settings for threshold and strength: Layer 1: 5.0 0.95, 2 iterations; Layer 2: 4.0, 0.85, 2 iterations, Layer 3: 3.5 0.75, 1 iteration; Layer 4: 2.0, 0.5, 1 iteration.
Stretching: HistogramTransformation was applied to make a pleasing, bright image, with background set to an intensity of approximately 0.10.
Lightness
Deconvolution: A star mask was made from the Luminance master to use as a Local Deringing Support Image. A stretched copy of the Luminance master was used as a deconvolution mask. . Deconvolution was applied (30 iterations, regularized Richardson-Lucy, ParametricPSF mode with default settings; Global dark deringing = 0.03; Global bright deringing 0.005).
Linear Noise Reduction: MultiscaleLinearTransform was used to reduce noise in the background areas, using an internal mask to protect bright stars and the brighter regions of the galaxy. Layer settings for threshold and strength: Layer 1: 5.0 0.85, 1 iteration; Layer 2: 4.0, 0.75, 1 iteration, Layer 3: 3.3 0.65, 1 iteration; Layer 4: 1.0, 0.35, 1 iteration.
Stretching: HistogramTransformation was applied to make a pleasing, bright image, with background set to an intensity of approximately 0.10.
Combining Lightness and Colour Images
LRGB Combination: The lightness image was applied to the RGB image using LRGBCombination with default settings.
Additional Processing
Temporary Star Removal: Starnet2 was used at default settings to temporarily remove the stars and produce a separate image containing the stars.
Nonlinear Noise Reduction: TGVDenoise was used in L*a*b* mode to reduce noise with the starless image selected as the Local Support image (used like an external mask would be, to target the background areas and protect the stars and galaxy) (max. 1,000 iterations and convergence selected for both lightness and chrominance).
Contrast Enhancement: LocalHistogramEqualization was applied three times to the starless image using a mask to protect the background, with one iteration each at maximum contrast of 1.5 and scales of 20, 50 and 150 (strength 0.2, 0.18 and 0.25 respectively).
Sharpening: MultiscaleMedianTransform was used to sharpen Layers 2, 3 and 4 with strengths of 0.15, 0.07, and 0.05, respectively, through the same mask used for the previous step.
Addition of Stars to Starless Image: PixelMath was used to add the stars back into the starless image using the expression $T + star_mask with rescaling.
Final Steps: Background, nebula and star brightness, contrast, and colour saturation were adjusted in several iterations using CurvesTransformation with masks as required. ICCProfileTransformation (sRGB IEC61966-2.1; Relative Colorimetric with black point compensation) was applied prior to saving in jpg format.

Another great one. I am especially fond of these mostly gray images, like this one and LDN 1251, just beautiful. I am curious whether you would consider also publishing some intermediate processing results. In particular, for these somewhat colorless images, what do the RGB and L images look like before combination?
Paul in Colorado
There are dozens of intermediate results, so I can’t really publish them here. Check out my recent Photons to Photos workshop here, and you can see the image evolve from start to finish. https://www.mastersofpixinsight.com/photons-to-photos-6