IC 1318
Sky-Watcher Esprit 70 EDX First Light
 Click here for full size image
July 5, 2025
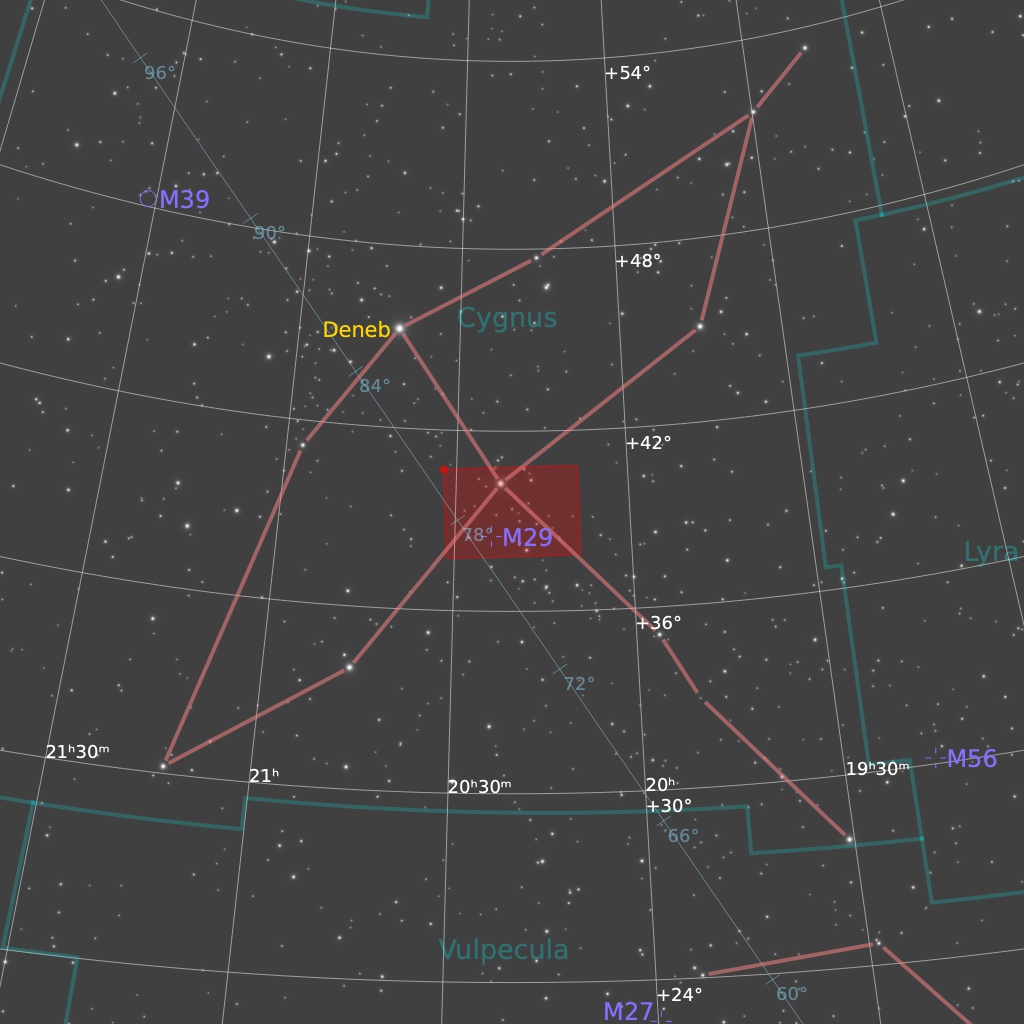
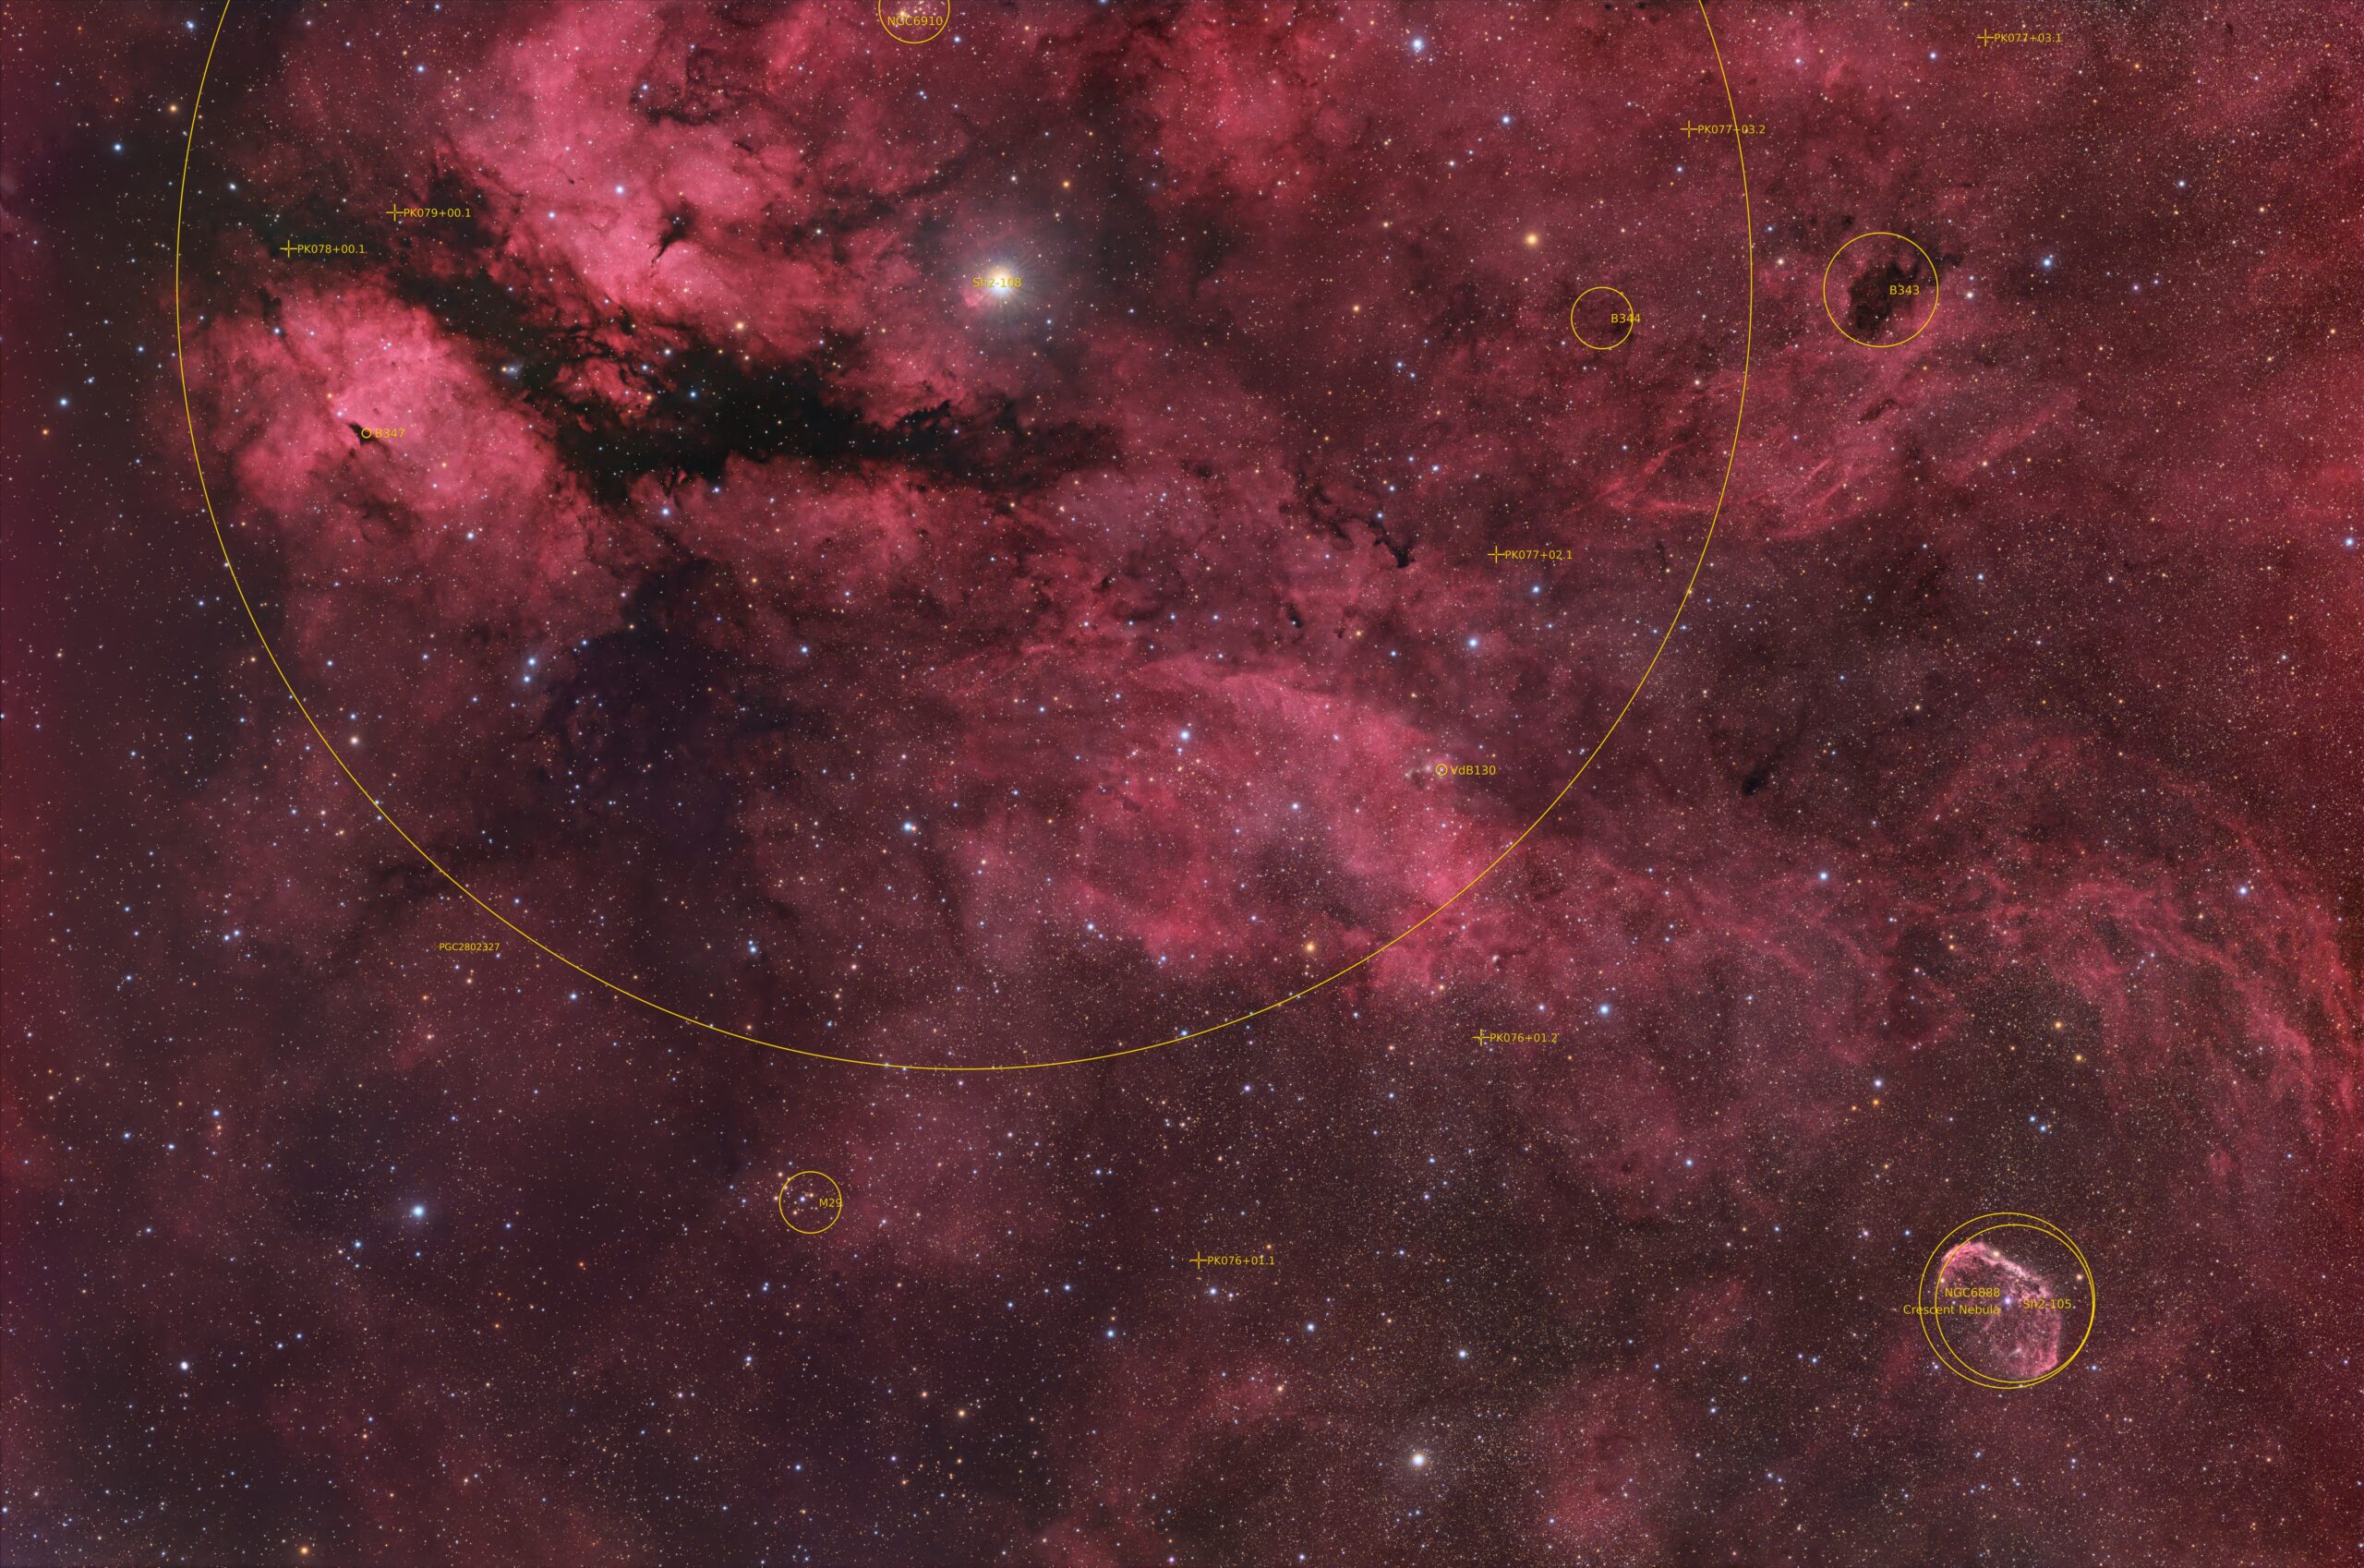
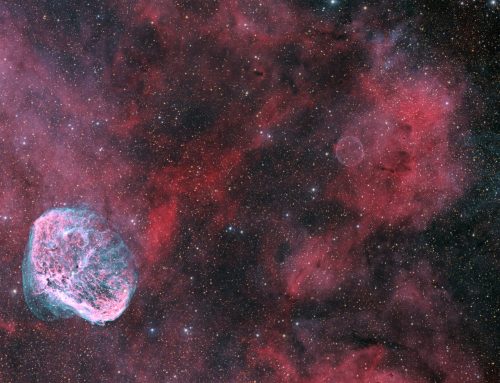
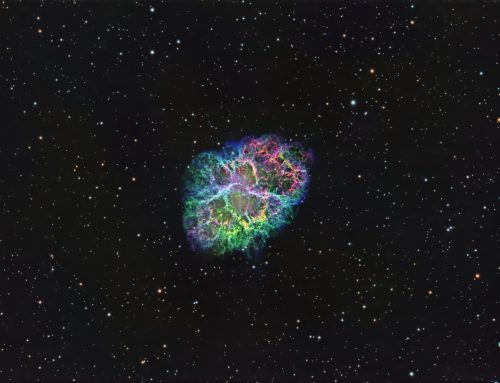
IC 1318 is the nebula around the bright star gamma-Cygni at upper left in this photo. Gamma-Cyg is the star where the body and wings of Cygnus, the swan, cross in the sky. Cygnus is a rich region for imaging during summer and fall in the Northern Hemisphere. Despite its appearance in this image, this nebula is actually faint and tenuous visually — the brightest parts are visible in a dark sky with a big telescope, but they look just like a faint haze in the eyepiece. The brightness of gamma-Cygni makes it challenging to see faint objects unless you keep the bright star out of the eyepiece field of view. I framed this image to also capture the Crescent Nebula, NGC 6888, at lower right.
This is the First Light Image for a new telescope: the Sky-Watcher Esprit 70 EDX. Unlike the Esprit 80mm, this scope has an image circle that can cover a full-frame 35mm sensor with pinpoint stars. The field of view is a whopping 4.5 x 3 degrees. Focus was stable over a 3C temperature range (I focused only once, manually, at the start of a 4-hour imaging run). They will hopefully be available to buy later in 2025.

Tekkies:
Acquisition, focusing, and control of Paramount MX mount and other equipment with N.I.N.A. and TheSkyX. Unguided, manual focus. Equipment control with Primalucelab Eagle 4 Pro computer. All pre-processing and processing in PixInsight. Acquired from my SkyShed in Guelph. Acquired under average transparency and seeing and a first-quarter Moon on the night of July 4-5, 2025.
First Light with Sky-Watcher Esprit 70 EDX refractor. QHY367C Pro camera with Optolong L-Quad Enhance filter.
41 x 5m = 3hr 25m
Preprocessing: The WeightedBatchPreProcessing script was used to perform calibration, cosmetic correction, debayering, weighting, registration, integration and Drizzle integration of all frames (2x drizzle, 1.0 Drop Shrink).
Gradient Removal: Graxpert was applied with default settings except smoothing = 0.5.
Colour Calibration: BlurXterminator was applied to the RGB master with Correct Only selected, followed by SpectrophotometricColorCalibration.
Deconvolution: BlurXterminator was applied to the RGB master with Automatic psf , star sharpening set to 0.5, and non-stellar set to 0.9.
Linear Noise Reduction: NoiseXterminator was applied with settings Amount=0.9 and Iterations=4.
Stretching: HistogramTransformation was applied to make a pleasing image with background approximately 0.08.
Nonlinear Processing
Star Removal: StarXterminator was used to remove the stars from the master, with default settings, except Large Overlap was selected. The stars-only image was retained.
Nonlinear Noise Reduction: NoiseXterminator was applied with Amount=0.9 and Iterations = 4
Re-stretch: HistogramTransformation was used to boost contrast by moving the dark point to the toe of the histogram and slightly decreasing the mid-point slider.
Contrast Enhancement: LocalHistogramEqualization was applied twice. A Contrast Limit of 1.5 and 1 iteration was used for each LHE application (scale 50, strength 0.25; scale 320, strength 0.18).
Sharpening: MultiscaleMedianTransform was applied. (Layers 2 – 4 with strengths of 0.03 0.04, and 0.02 respectively).
Contrast, Brightness and Colour: Brightness, contrast, hue, and saturation were adjusted in several iterations using CurvesTransformation and the Jurgen Terpe Selective Color Correction script, with masks as required.
Stars-only steps: The CIE L* channel (i.e. the lightness channel) was extracted from the stars-only image and then applied to the star image as a mask. CurvesTransformation’s Saturation slider was used to boost colour in the stars.
Star Restoration: The PixelMath expression combine(starless, stars, op_screen()) was used to combine the starless starless image with the stars-only image. The StarReduction script was applied with small star protection enabled (Tranfer method, strength 0.4) to slightly reduce the larger stars.
Final Steps: Background, galaxy, and star brightness, contrast, and saturation were adjusted in several iterations using CurvesTransformation with masks as required. ICCProfileTransformation (sRGB IEC61966-2.1; Relative Colorimetric with black point compensation) was applied prior to saving as a jpg. The finder chart was made using the FindingChart process. The annotated image was made with the AnnotateImage script.

This is beautiful! I’ve been imaging IC 1318 over the past three nights with my Redcat 51, ASI585MC Pro, and L-eXtreme filter from my light-polluted backyard in southern CA. I am still pretty new at using PixInsight, but I’m learning! I enjoyed your article in the August 2026 S&T about dual-band imaging with a one shot color camera. I’m glad my anniversary is coming up next month so I can ask my hubby for the L-Synergy!
Awesome! Glad you enjoyed my article.