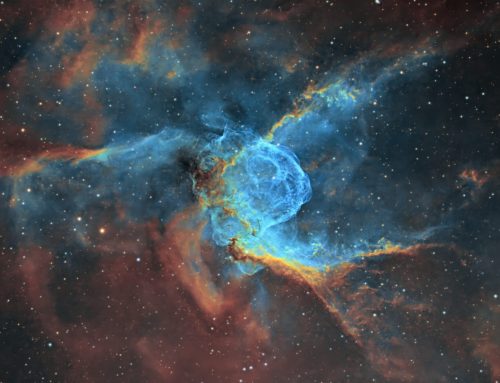
M17, The Swan Nebula
 Click image for full size version
December 4, 2023
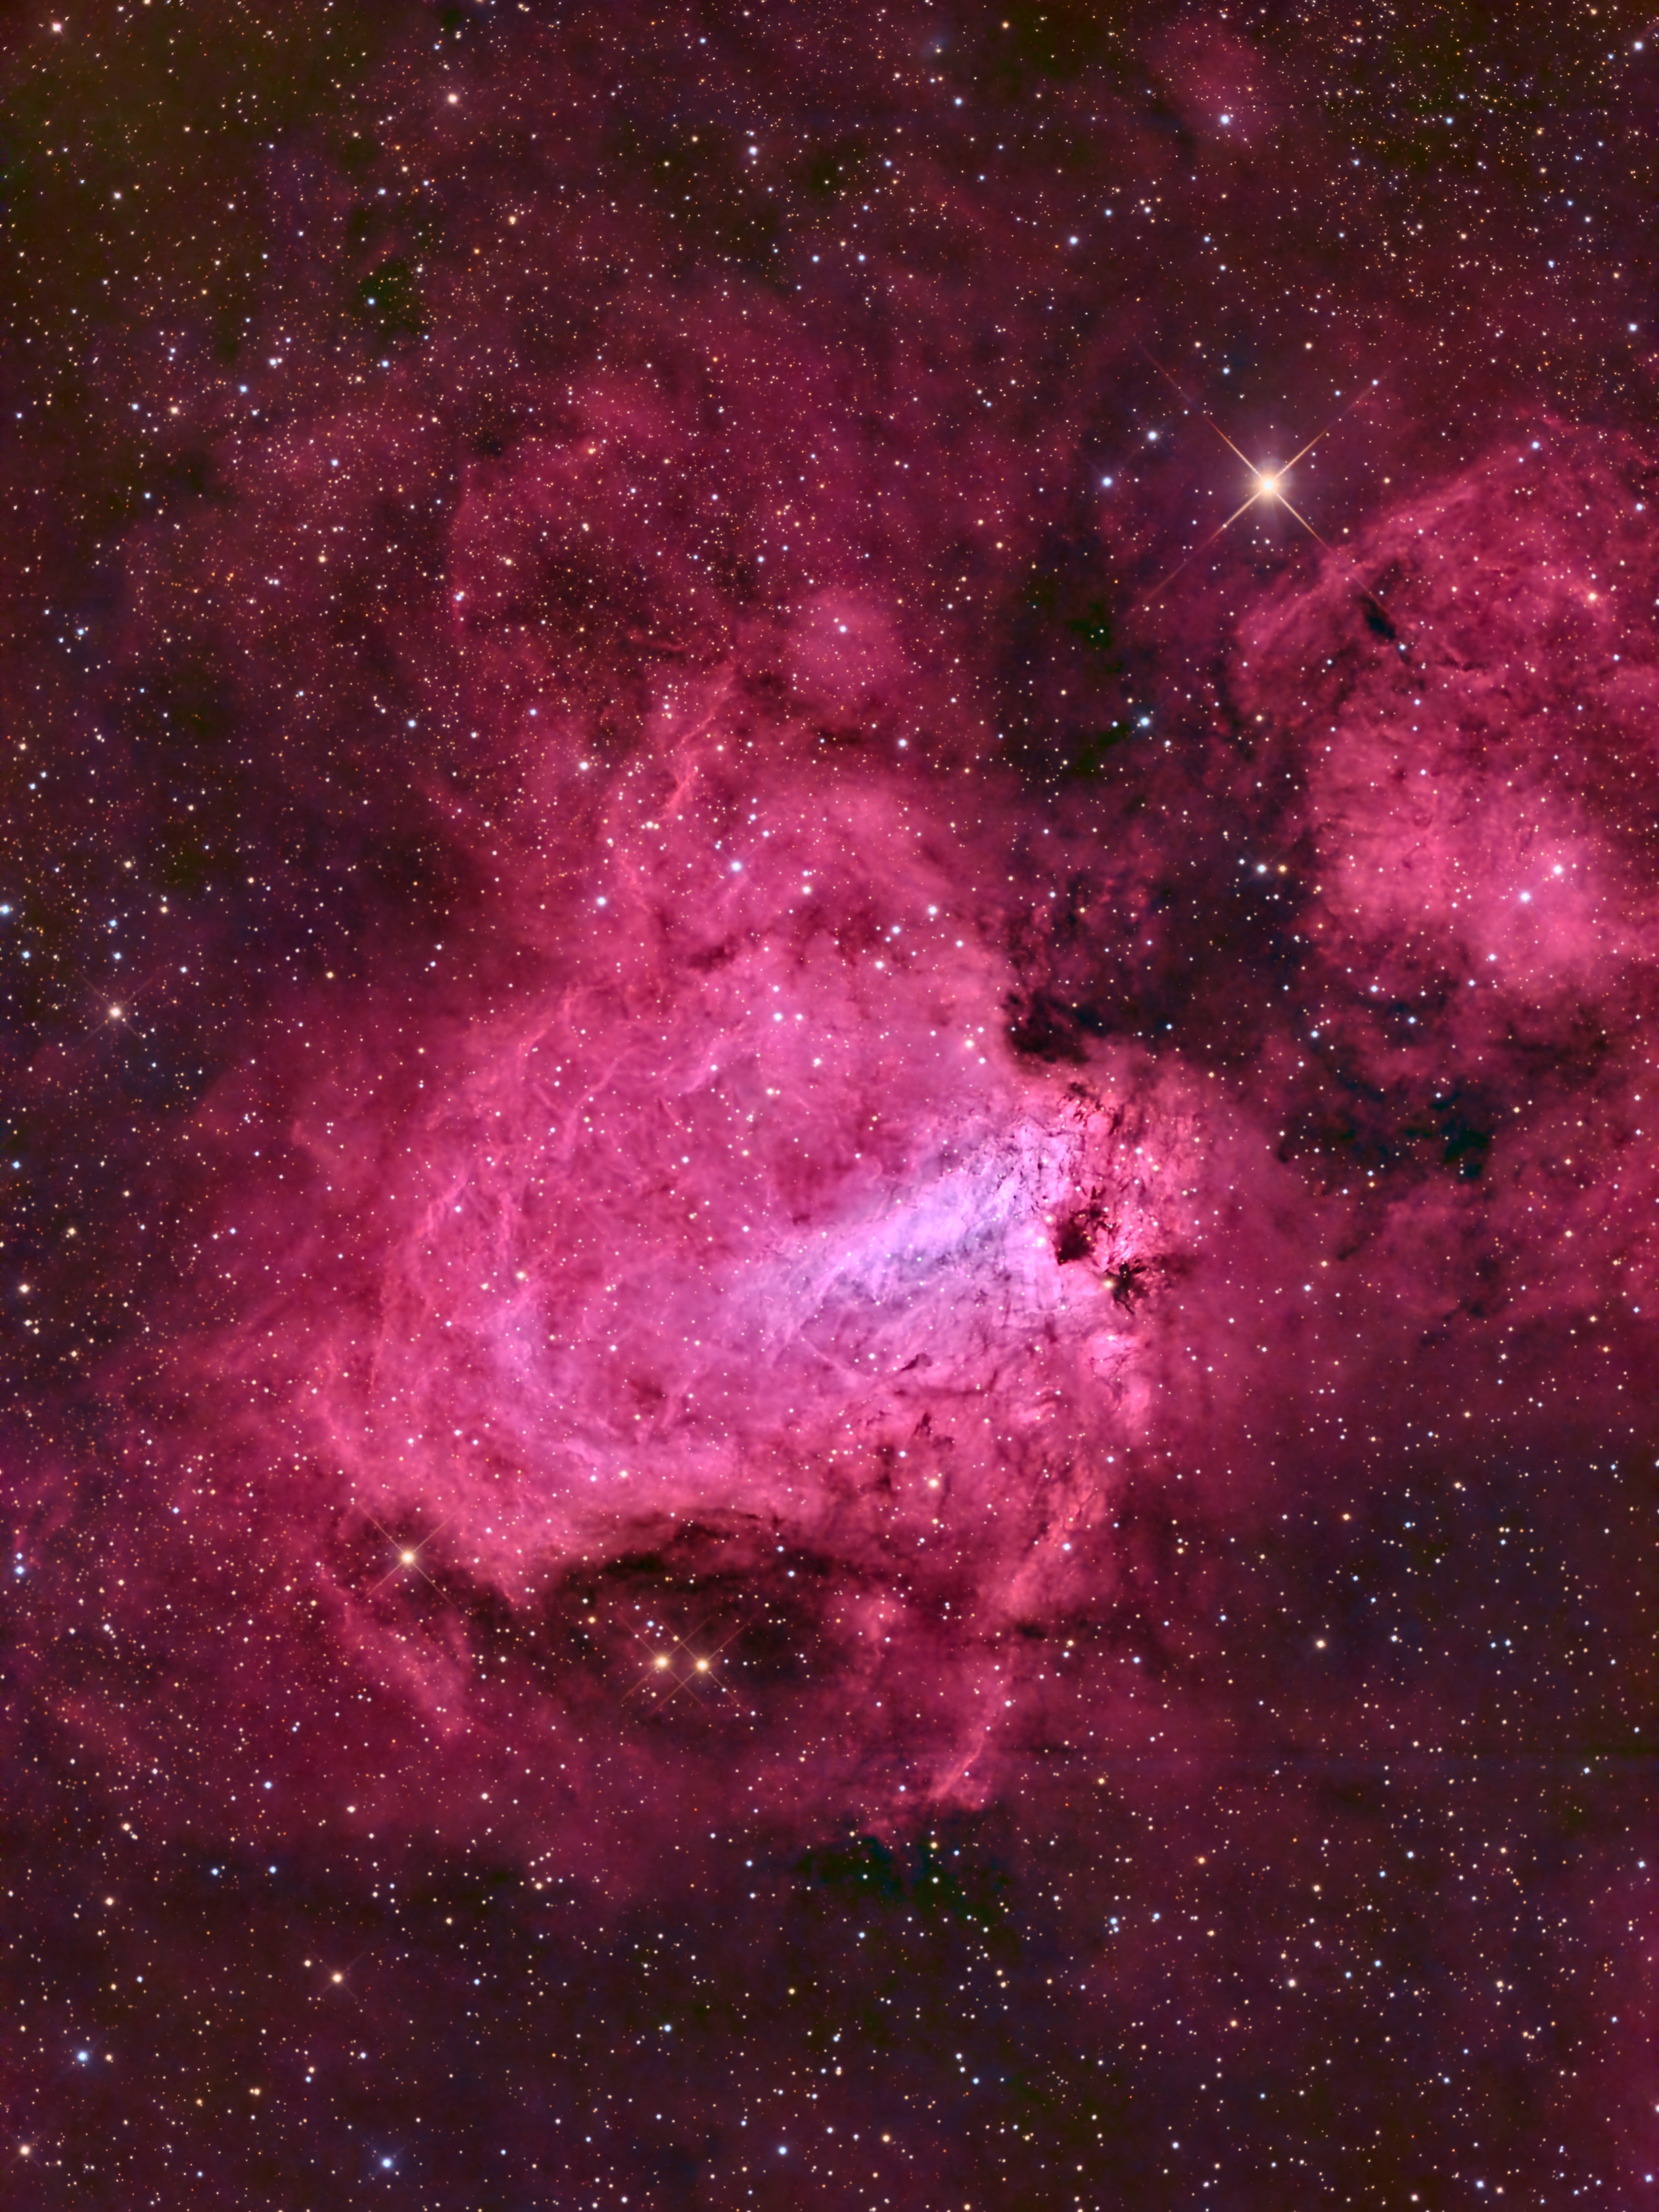
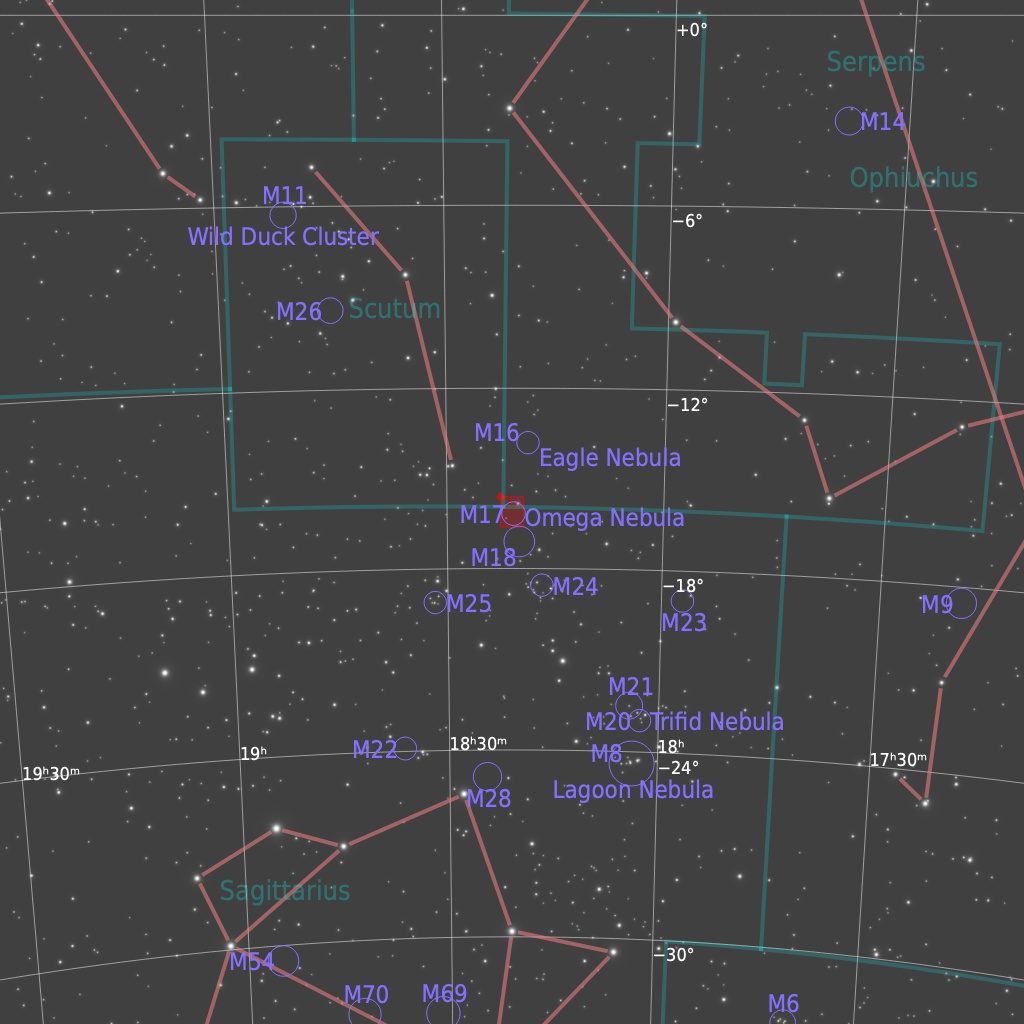
Messier 17 is known as the Swan Nebula, owing to its appearance in the eyepiece. In a moderately sized telescope, only the brightest part of the nebula can be seen easily, and looks distinctly swan-like. Another nickname is the Omega Nebula; personally I see only a very limited resemblance to that Greek letter. The Swan swims in the Sagittarius Milky Way about 5,000 to 6,000 light years away. It is about 15 light years across and its total mass is about 800 times that of the Sun. From our vantage point, its location in the sky is not far from the Eagle Nebula. The above image blends the red, green and blue colour channels with data collected through a deep red H-alpha filter.
This image is a re-process of a data set acquired in 2016. The original image is here. My processing approach and the tools available to me have changed completely, and the results are dramatically different now than they were then.
Tekkies:
SBIG STL-11000M camera, Baader Ha, R, G and B filters, 10″ f/6.8 ASA astrograph, Paramount MX. Guided with QHY5 guide camera and 80 mm f/6 Stellar-Vue refractor. Acquisition, guiding and mount control with TheSkyX. Focusing with FocusMax. Automation with CCDCommander. All preprocessing and post-processing in PixInsight. Shot from my SkyShed in Guelph, Ontario August 3-6, 2016. Nearly full Moon for Ha and little moonlight for RGB. Good to excellent transparency and poor to good seeing throughout acquisition.
6x10m Red
6x10m Green
6x10m Blue
3x20m H-alpha
Total=4hr00m
Image scale is 1.1″/pixel
Preprocessing: The WeightedBatchPreProcessing script was used to perform calibration, cosmetic correction, weighting, registration, local normalization and integration of all frames.
RGB master: A master RGB image was made from the Red, Green and Blue masters using ChannelCombination in RGB mode.
Gradient Removal: The GraXpert AI program was used to remove gradients from the RGB and Ha masters. It was applied in subtraction mode with no smoothing.
Colour Calibration: ColorCalibration was used to calibrate the RGB master.
Deconvolution: BlurXterminator was applied to the both masters with Automatic psf , and star sharpening set to 0.10 with “Correct First” selected.
Star Removal: StarXterminator was used to remove the stars from the Ha and RGB masters, with default settings.
Linear Noise Reduction: NoiseXterminator was applied to the Ha and RGB masters with settings Amount=0.9 and Detail=0.35
Stretching: HistogramTransformation was applied to the Ha master and RGB masters to make pleasing images. Approximate background level after stretch was 0.08 for Ha and 0.10 for RGB.
Nonlinear Processing
Addition of Ha to RGB: PixelMath was used to blend Ha into the RGB image using the following expression with parameter values a=1.5 and b=0.10.
Red: max($T[0], a*Ha)
Green: $T[1]
Blue: iif($T[0]<a*Ha, $T[2] + b * Ha, $T[2])
Nonlinear Noise Reduction: NoiseXterminator was used to reduce noise in the background areas of both masters with Amount=0.9 and Detail=0.2.
Re-stretch: HistogramTransformation was used to boost contrast by moving the dark point to the toe of the histogram and slightly decreasing the mid-point slider.
Contrast Enhancement: LocalHistogramEqualization was applied twice using a mask to select the brighter regions of the nebula (made with the RangeSelection tool). A Contrast Limit of 1.5 and 1 iteration was used for each LHE application (scale 40, strength 0.35; scale 150, strength 0.35).
Sharpening: The same mask was used for sharpening with MultiscaleMedianTransform (Layers 1 – 5 with strengths of 0.01, 0.02, 0.04, 0.02, and 0.01, respectively).
Stars-only steps: HistogramTransformation was applied to the RGB-stars-only image. A mask was made by extracting the Luminance from the image. CurvesTransformation was used to add saturation to the stars through the star mask, using the CIE c* slider.
Star Restoration: PixelMath expression combine(starless, stars, op_screen()) was used to combine the starless HaRGB image with the stars-only image.
Final Steps: Background, nebula and star brightness, contrast, hue, and saturation were adjusted in several iterations using CurvesTransformation with masks as required. Juergen Terpe’s SelectiveColorCorrection and EnhanceNebula scripts were also applied. ICCProfileTransformation (sRGB IEC61966-2.1; Relative Colorimetric with black point compensation) was applied prior to saving as a jpg. The finder chart was made using the FindingChart process.


Leave A Comment