M31, the Andromeda Galaxy
 Click image for full size version
October 22, 2023 – Test with Takahashi FS60-CB, QHY367C Pro and Optolong L-Quad Enhance Filter
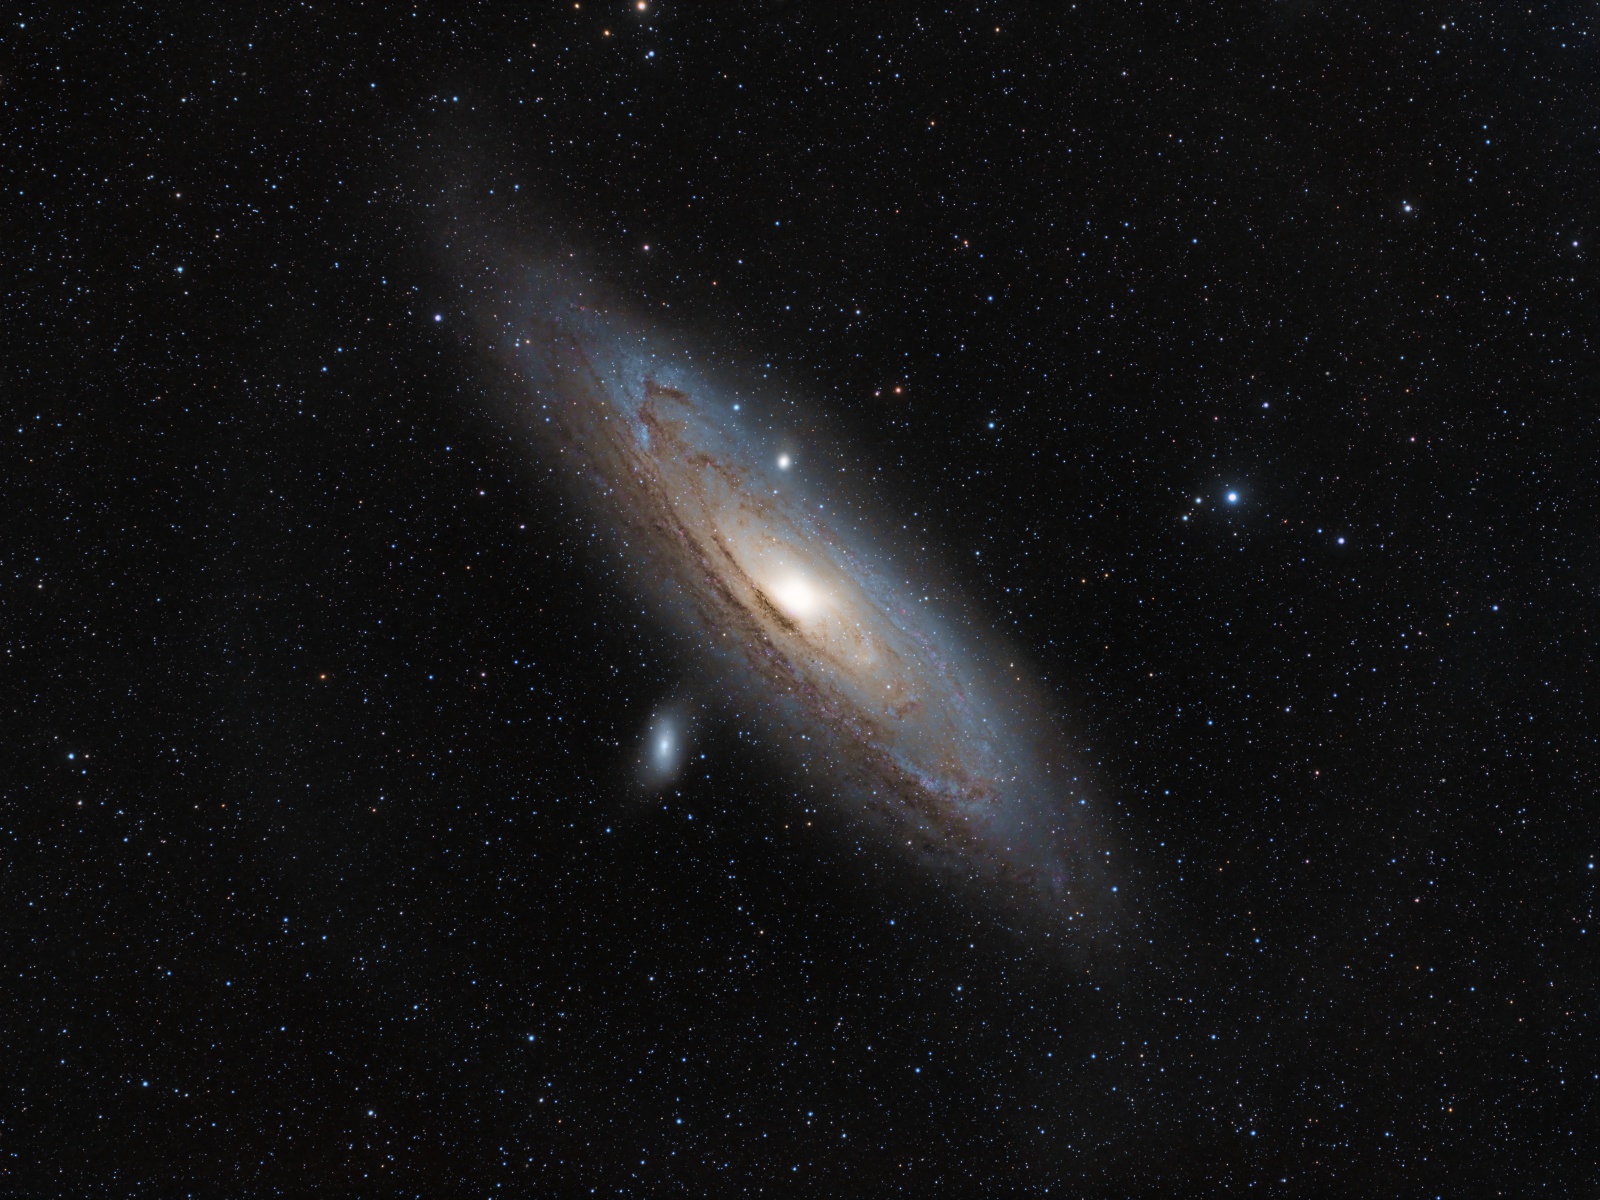
This image shows the iconic M31, the Andromeda galaxy. Most people are familiar with it – Apple even has a desktop background that features it. It’s visible to the naked eye from my house at this time of year, and is a delight in binoculars, small and large telescopes and in images.
The Andromeda Galaxy is thought to be quite similar to our own Milky Way. The two are the largest galaxies of the cluster we are in, known as The Local Group. M31 lies about 2.5 million light years from us — pretty close. In fact, Andromeda and the Milky Way will eventually merge. This shot shows star clusters, nebulae and dust lanes in the Andromeda galaxy. The galaxy’s tips extend almost right out of this image, with a diagonal of about 4 degrees (about 8 moon widths). The galaxy to the lower left of M31 is M110. This shot shows some dark features in M110. The galaxy on the right edge of Andromeda is M32, another satellite galaxy. Andromeda is thought to contain about a trillion stars. Wow.
Whenever I look at this galaxy — which is often with my naked eye — I think of the light reaching my eye having begun its journey before humans evolved on earth. Pretty cool.
I first imaged M31 in 2009, and again in 2014, and 2015, but this new shot shows what can be done even with a small telescope – in this case a 60 mm f/6.2 refractor. This image used Optolong’s new L-Quad Enhance Filter, a broadband light pollution suppression filter for one-shot colour cameras. This is my third image with it (the other two are IC 1396 and the Double Cluster). I chose three very different objects (one mainly red, one mainly blue/yellow, and a star cluster) so as to get a feel for whether colours would come out nicely. It was easy to get nice colours without any special processing techniques.
Tekkies:
Takahashi FS-60CB scope with flattener at f/6.2. QHY367C Pro one-shot colour camera with Optolong L-Quad Enhance Filter. All mounted on Paramount MX unguided. Scripting for acquisition with N.I.N.A. All pre-processing and processing in PixInsight. Acquired from my SkyShed in Guelph on October 12-18, 2023. Average transparency and fair to average seeing, no Moon, Bortle 5.
56x5m chrominance = 4hr40m
Preprocessing: The WeightedBatchPreProcessing script was used to perform calibration, cosmetic correction, weighting, registration, local normalization, integration and Drizzle integration of all frames (CFA Drizzle checked, Scale=2x, Drop Shrink=0.9, Gaussian kernel, individual channels, recombined).
Gradient Removal: DynamicBackgroundExtraction was applied to the OSC master.
Colour Calibration: ColorCalibration was used to calibrate the OSC master.
Deconvolution: BlurXterminator was applied using an automatic PSF, star sharpening set to 0.10, and “Correct First” selected.
Linear Noise Reduction: NoiseXterminator was applied with Amount=0.95 and Detail=0.25
Stretching: HistogramTransformation was applied to make a pleasing yet bright image. Approximate background level after stretch was 0.10.
Nonlinear Processing
Nonlinear Noise Reduction: NoiseXterminator was applied with Amount=0.9 and Detail=0.25
Stretching: HistogramTransformation was applied to adjust the black point and increase brightness and contrast. Approximate background level after stretch was 0.10
Contrast Enhancement: Using a mask to select the galaxy, LocalHistogramEqualization was applied twice. A Contrast Limit of 1.5 and 1 iteration was used for each LHE application (scale 40, strength 0.25; scale 150, strength 0.35).
Sharpening: The same mask was used with MultiscaleMedianTransform to sharpen Layers 1 – 5 with strengths of 0.01, 0.03, 0.03, 0.03, and 0.02, respectively.
Stars-only steps: CurvesTransformation was used to add saturation to the stars through a mask made by extracting the Luminance from the stars-only image.
Star Restoration: PixelMath expression combine(starless, stars, op_screen()) was used to combine the starless and stars-only images created with StarXterminator.
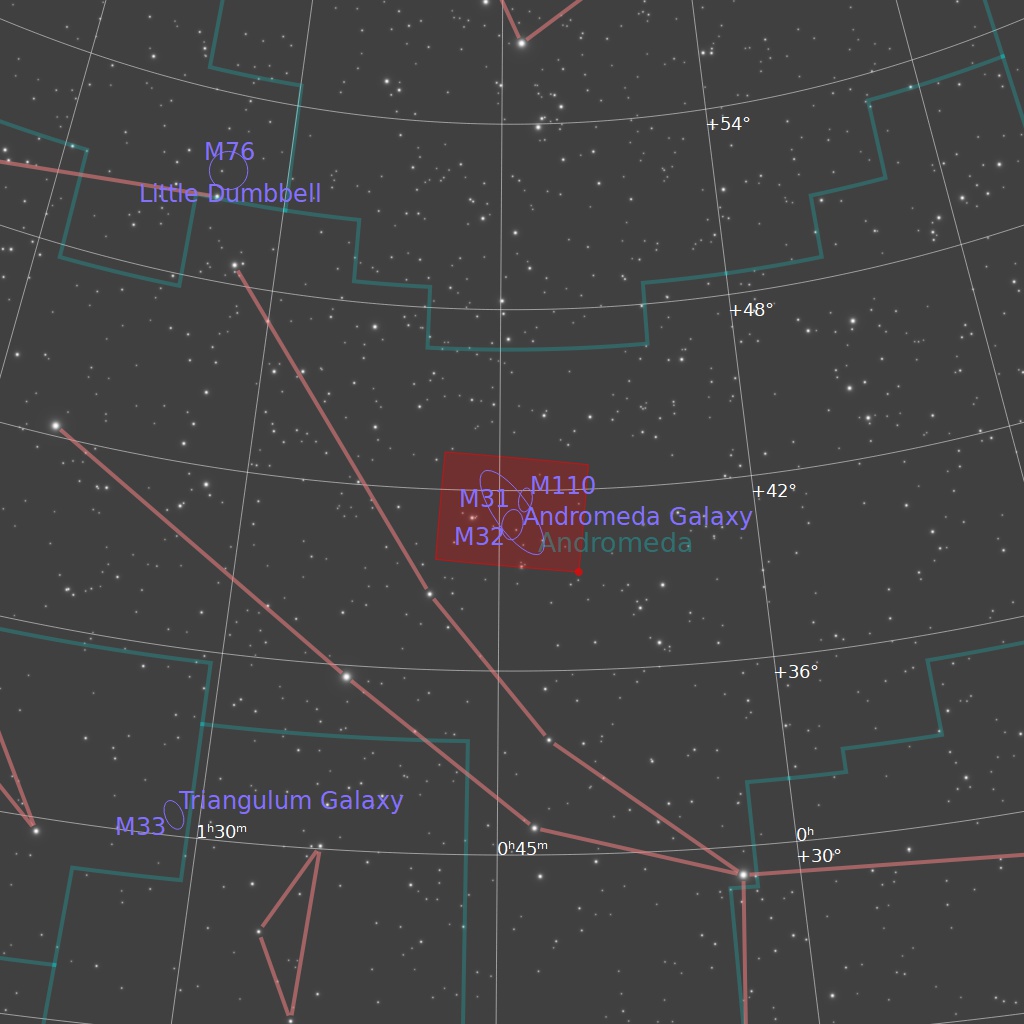
Final Steps: Background, galaxy and star brightness, contrast and saturation were adjusted in several iterations using CurvesTransformation with masks as required. The image was down-sampled by a factor of 2, which restored it to the original resolution. ICCProfileTransformation (sRGB IEC61966-2.1; Relative Colorimetric with black point compensation) was applied prior to saving as a jpg. The finder chart was made using the FindingChart process.


Nice work Ron! Probably need some Ha data to bring a little more red.
Gorgeous image, like always!