Globular Cluster M5
 Click image for full size version
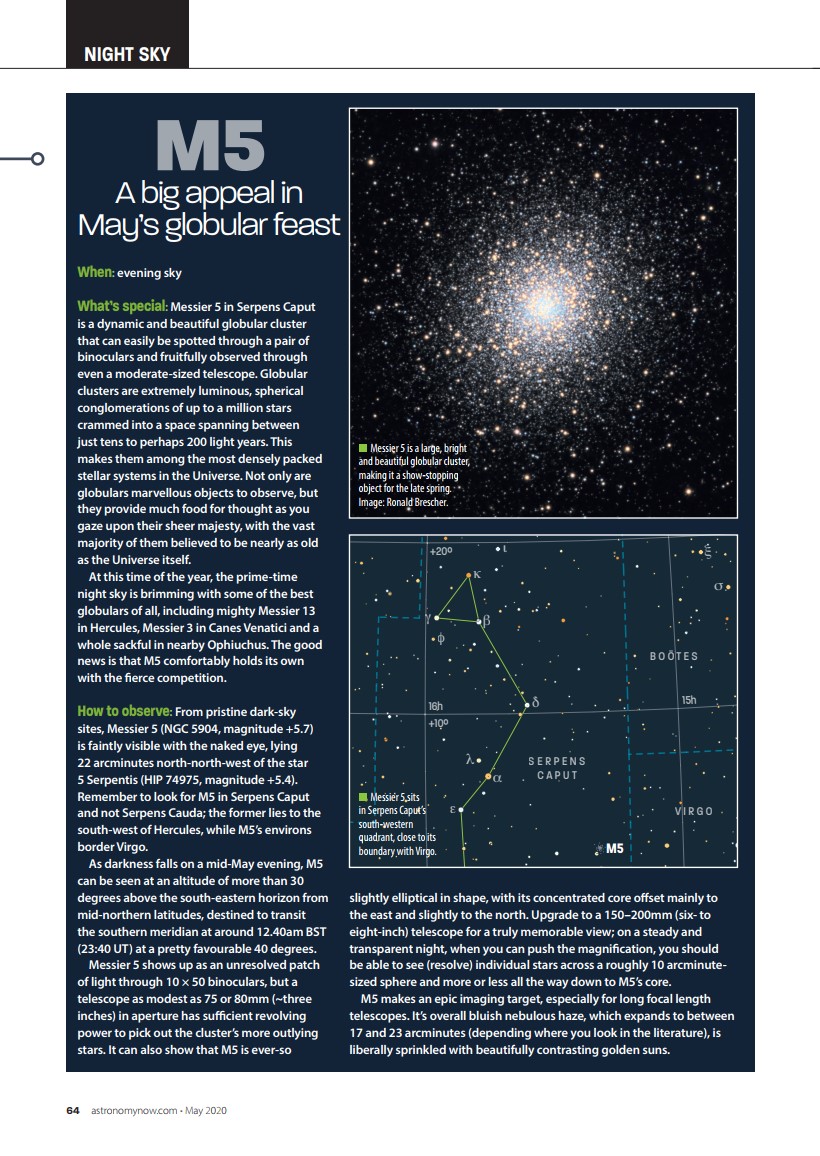
June 19, 2019, AstronomyNow! May 2020
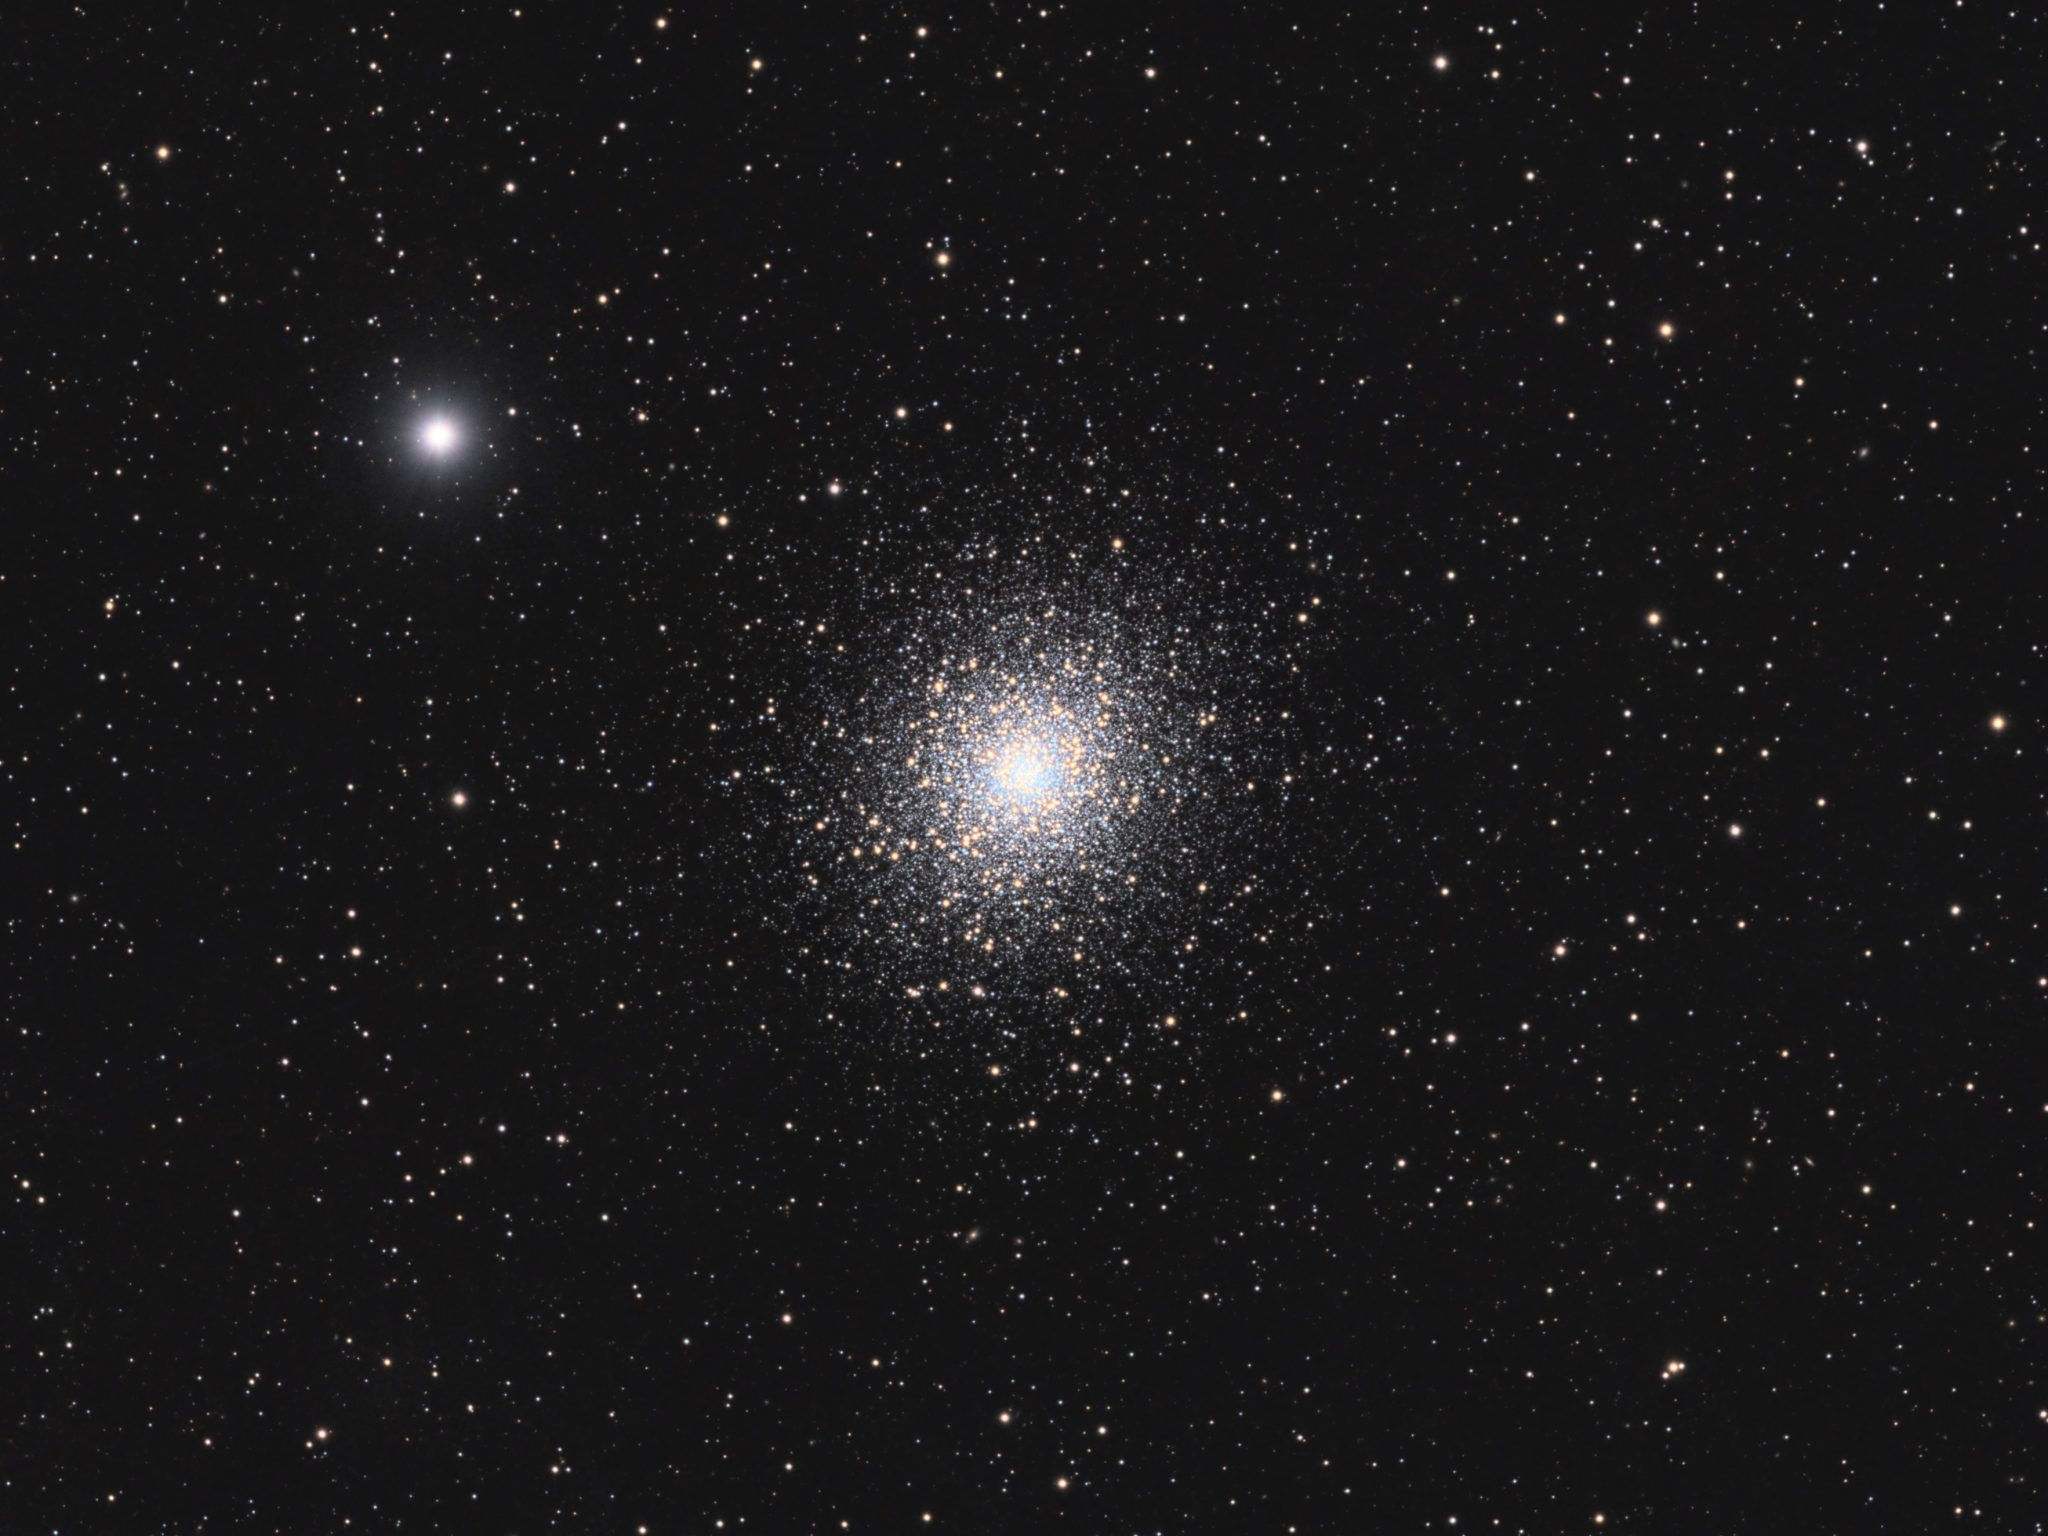
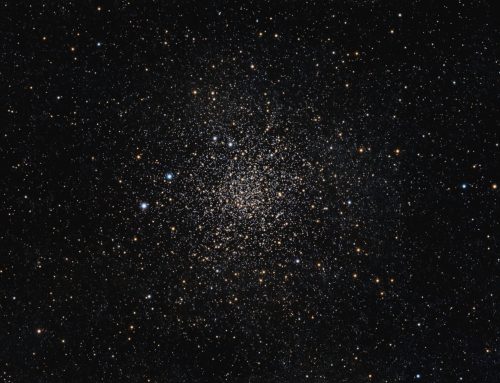
 Globular cluster M5 contains hundreds of thousands of stars.and is one of my favourite objects to view in any scope. Bright globular clusters remind me of sugar spilled on a black table cloth. Although some globular clusters, like M5, are large, relatively bright, and easy to see in the eyepiece, they are challenging to image because the wide range of brightness from the centre to the halo. Long exposures burn out the core, while short exposures don’t show the faint outer stars. The solution: High Dynamic Range (HDR) techniques. I shot 3m and 10m subs for luminance and combined them to get the best of each image. The core detail comes from the short sub-exposures; the rest, including the faint outer halo, comes from the long sub-exposures. My friend Richard Wright aptly described the appearance of the halo of stars in this image as “powdery” – a look I strive for in globular clusters. You can also search the full resolution image (click on the pic above) to find many faint galaxies peppered throughout the field of view. I prepared an annotated image that shows several dozen, but many more unmarked galaxies are in the field too.
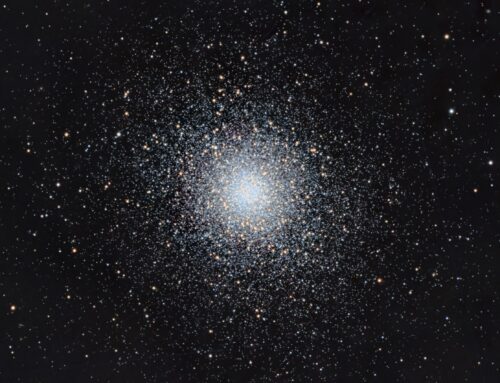
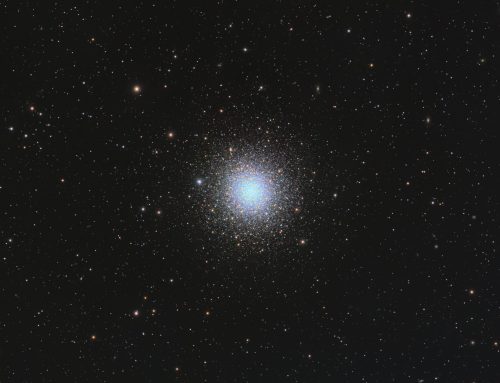
I also imaged this object in 2013 with a different setup; it was Astronomy Magazine’s online Picture of the Day on August 16, 2013. My image processing has really changed in the intervening 6 years!
First Light for Primaluce Labs Eagle 3 Pro!
This is the first light image for the Primaluce Labs Eagle 3 Pro computer. This observatory control computer sat on top of the Esprit, performing all the functions of my observatory laptop. The Eagle 3 Pro also powered my camera, focuser, USB-powered devices and dew heater strips. The main advantages of the system compared to my prior observatory control laptop are these:
- No dangling wires; all the wiring went up to the Eagle 3 Pro and could be easily managed.
- Power and USB ports can be turned on/off from the Eagle’s control software. When devices occassionally hang (yes, sometimes that happens), I can virtually unplug/reconnect a USB or power cord even when I’m halfway around the world.
- No long cable runs or extra USB hubs connecting mount and camera to a distant laptop. The Eagle is right on the mount. Cable runs are short, and no hubs are needed since the Eagle has four USB2 and four USB3 ports.
- There are three variable voltage RCA-style ports for dew heater strips – no controller is needed. (another PLL product, the ECCO, is available to further optimize dew control).
Like any new equipment, it took a little time and effort to integrate the Eagle into my imaging setup. I did it in stages, first setting up all the software, then getting the eagle to connect to and control my hardware, and then mechanically integrating the Eagle into the payload on the mount. But it was really no more challenging than setting up a new laptop.
My friend Shawn Neilsen made a video with me, talking about the Eagle’s various features.
I also need to give a shout out to other companies whose fine equipment I use in my imaging — all linked under Tekkies below.
Tekkies:
Sky-Watcher Esprit 150 f/7 refractor, QHY 16200-A camera, Optolong L, R, G and B filters, Paramount MX, unguided. Acquisition, and focusing with TheSkyX. Automation with CCDCommander. Equipment control with PrimaLuce Labs Eagle 3 Pro computer. All pre-processing and processing in PixInsight. Acquired from my SkyShed in Guelph. No Moon, average to above average transparency and average seeing. Data acquired May 25 – June 4, 2019.
23x10m L, 19x3m L, 16x5m R, 16x5m G and 15x5m B (Total = 8hr42m)
Image scale 1.15 arcsec per pixel
Data Reduction and Cleanup
The BatchPreProcessing script was used to perform calibration, cosmetic correction and registration of all frames. ImageIntegration was used to make the L (10m- and 3m-), R, G and B masters. DynamicCrop was used to crop all the masters identically. DynamicBackgroundExtraction was applied to each master twice, with Division followed by Subtraction. HDRComposition was used to blend the long and short luminance masters into an HDR luminance master, referred to as HDR below.
RGB
Creation and cleanup: The R, G and B were combined with ChannelCombination to make an RGB image which was then colour balanced with PhotometricColorCalibration.
Linear Noise Reduction: MultiscaleLinearTransform was used to reduce noise in the background areas, using an internal mask to protect bright structures. Layer settings for threshold and strength: Layer 1: 3.0 0.9 Layer 2: 2.0, 0.75 Layer 3: 1.0, 0.6 Layer 4: 0.5, 0.2.
Stretching: HistogramTransformation was applied to make a pleasing, bright image, with background set to an intensity of approximately 0.08.
Luminance
Deconvolution: StarMask was applied with default settings to produce a Local Deringing Support Image. A clone of the HDR image was stretched to use as a deconvolution mask. Deconvolution was applied (10 iterations, regularized Richardson-Lucy, external PSF made using PSFImage script with 24 stars).
Linear Noise Reduction: MultiscaleLinearTransform was used to reduce noise in the background areas, using an internal mask to protect bright structures. Layer settings for threshold and strength: Layer 1: 3.0 0.9 Layer 2: 2.0, 0.75 Layer 3: 1.0, 0.6 Layer 4: 0.5, 0.2.
Stretching: HistogramTransformation was applied to make a pleasing, bright image, with background set to an intensity of approximately 0.08.
Combining SuperLuminance and RGB
LRGB Combination: The HDR luminance image was applied to the RGB image using LRGBCombine with default settings.
Additional Processing
Nonlinear Noise Reduction: TGVDenoise was used in L*a*b* mode to reduce noise with a mask used to target the background areas and protect the stars (max. 1000 iterations and convergence selected for both lightness and chrominance).
Dynamic Range Compression: HDRMultiscaleTransform (6 layers, to lightness, lightness mask) was applied to a clone of the image using a mask to target the core of the globular cluster. The compressed clone and original were blended 1:4 using PixelMath with rescaling.
Sharpening: MultiscaleLinearTransform targeting the lightness channel was used to sharpen Layers 2 and 3 with strengths of 0.05 for both. A mask was used to limit sharpening to the core of the cluster.
Final Steps: Background, cluster and star brightness, contrast and saturation were adjusted in several iterations using CurvesTransformation with masks as required.
Excellent Ron!
I too picked up an Eagle 3S and ECCO at NEAF this year. It works fantastic. One minor glitch with mine using planetarium software that utilizes OpenGL but other than that, the integration was seamless. As I have an iOptron CEM 120EC2 I ran both an 8A power lead and USB2 feed to the mounts onboard power and USB hub which fully now utilizes all of the nice features found on the mount and on the Eagle so I essentially have 8 USB2 ports. All done through the mount so not 1 single wire hanging.
Excellent image, you do such a fantastic job on your processing, great stars, colour and composition.