NGC 7000
First Light: Takahashi FS-60CB Scope and Sky-Watcher GTi Mount
Click image for full size version
July 23, 2023
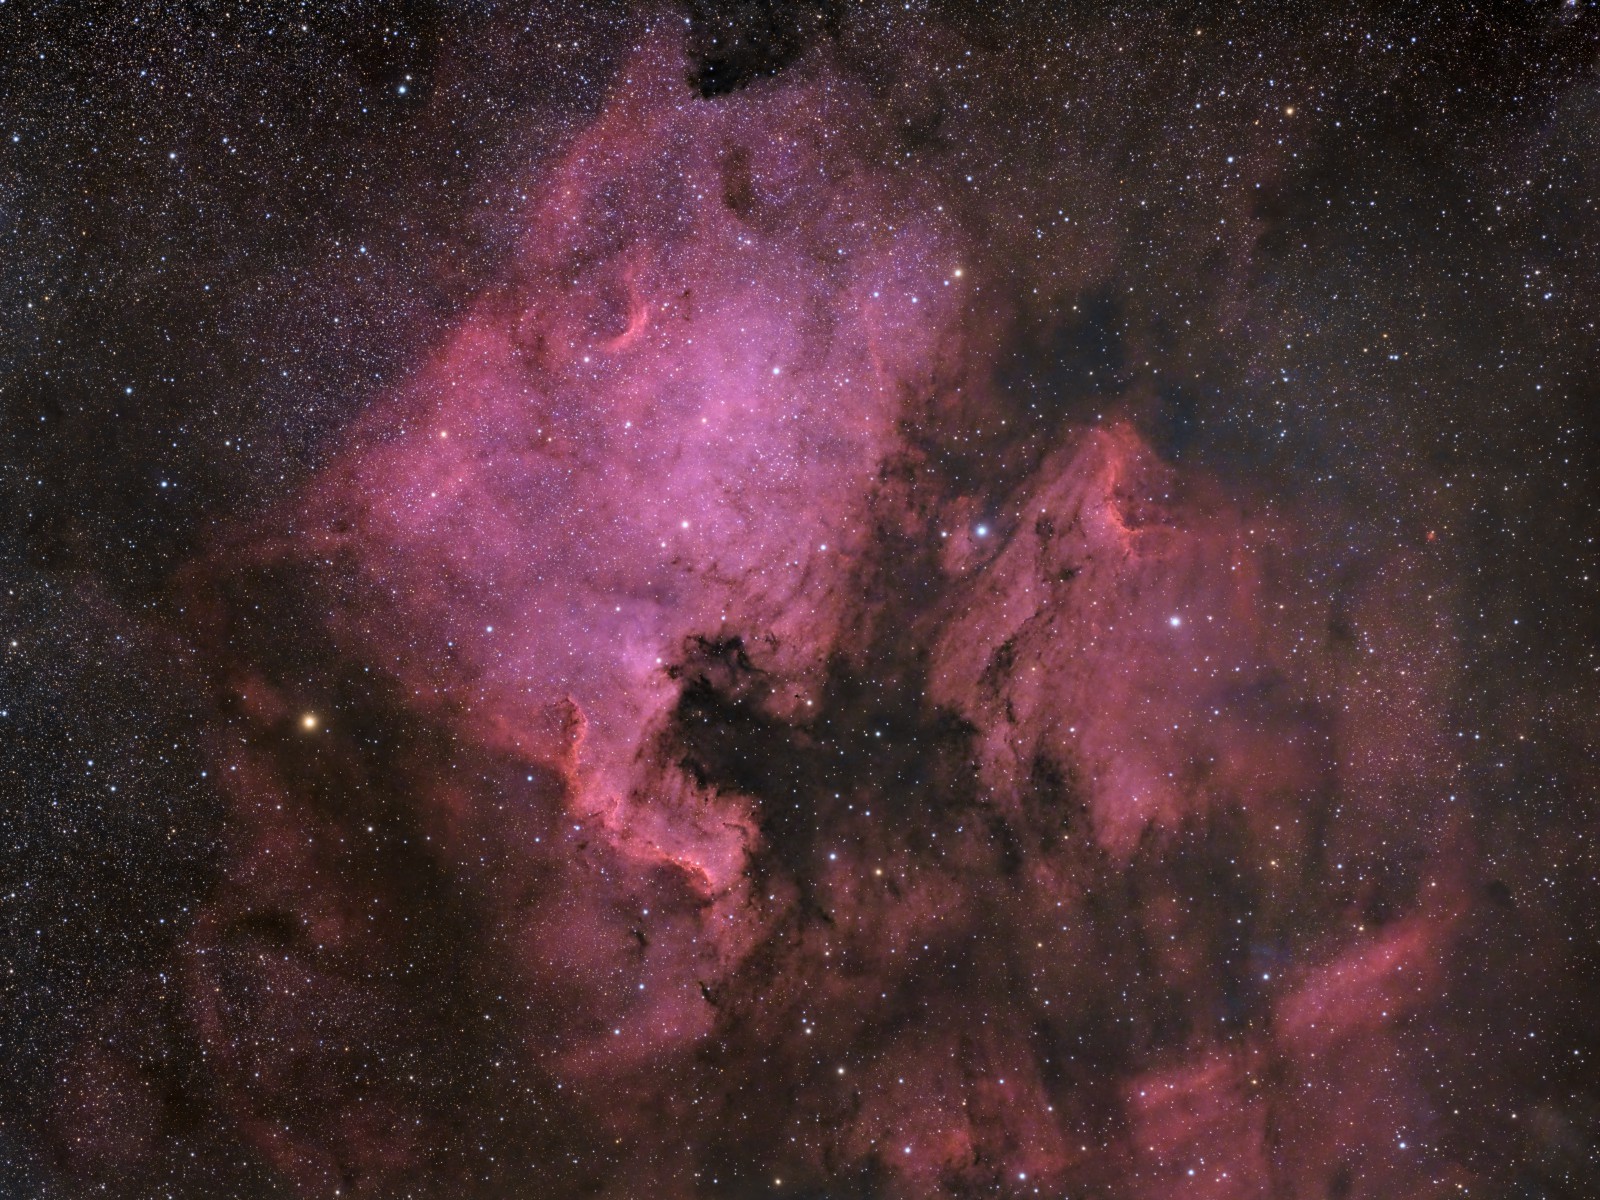
NGC 7000 (also called the North America Nebula) dominates the left side of this image, and NGC 5070 (the Pelican Nebula) is to the right. These clouds of gas are part of a huge complex of emission nebulae lying about 1,600 light years away in northern Cygnus. With an apparent magnitude (brightness) of 4, in theory this object is visible to the naked eye, even though its light is very spread out. I have seen it with my naked eye and with low power binoculars in dark skies north of where I live. It looks like a faintly hazy, irregular patch of grey.
I have previously imaged parts of this region at higher resolution. For example, you can find images of the Cygnus Wall (the “Central America” region) and the Pelican. I’ve also imaged these objects in a wider field view. I created an annotated image that identifies some of the bright and dark nebulae in the image.
Unlike most of my images of this region, I used no narrowband filters for this shot; it is all broadband one-shot colour.
Tekkies:
Takahashi FS-60CB scope with flattener at f/6.2 and QHY367C Pro one-shot colour camera with Optolong UV/IR filter. Sky-Watcher GTi mount, Sky-Watcher EVO Guide 50mm guidescope and QHY5 guide camera. Equipment control with N.I.N.A. and PHD2. All pre-processing and processing in PixInsight. Acquired from my SkyShed in Guelph on July 21, 2023. Average transparency and seeing, and no Moon.
30x3m chrominance = 1hr30m
Preprocessing: The WeightedBatchPreProcessing script was used to perform calibration, cosmetic correction, weighting, registration, local normalization, integration and Drizzle integration of all frames (CFA Drizzle checked, Scale=1x, Drop Shrink=1.0).
Gradient Removal: DynamicBackgroundExtraction was applied to the OSC master.
Colour Calibration: ColorCalibration was used to calibrate the OSC master.
Deconvolution: BlurXterminator was applied using an automatic PSF, star sharpening set to 0.10, and “Correct First” selected.
Linear Noise Reduction: NoiseXterminator was applied with Amount=0.95 and Detail=0.5
Stretching: HistogramTransformation was applied to make a pleasing yet bright image. Approximate background level after stretch was 0.10
Nonlinear Processing
Star Removal: StarXterminator was used to remove the stars, with Unscreen selected
Nonlinear Noise Reduction: NoiseXterminator was applied with Amount=0.9 and Detail=0.25
Contrast Enhancement: Using a mask to select the nebulae, LocalHistogramEqualization was applied three times. A Contrast Limit of 1.5 and 1 iteration was used for each LHE application (scale 40, strength 0.25; scale 90, strength 0.25; scale 150, strength 0.28).
Sharpening: The same mask was used with MultiscaleMedianTransform to sharpen Layers 1 – 5 with strengths of 0.01, 0.03, 0.05, 0.03, and 0.02, respectively.
Star Restoration: PixelMath expression combine(starless, stars, op_screen()) was used to combine the starless and stars-only images created with StarXterminator.
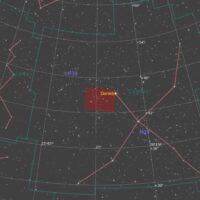
Final Steps: Background, nebula and star brightness, contrast and saturation were adjusted in several iterations using CurvesTransformation with masks as required. ICCProfileTransformation (sRGB IEC61966-2.1; Relative Colorimetric with black point compensation) was applied prior to saving as a jpg. The image was annotated with the AnnotateImage script. The finder chart was made using the FindingChart process.


Incredible image!
Thanks!
Simplistic rig and an excellent image! I appreciate you sharing the processing details.
Just super!!!
Are you using the stock focuser for the FS60CB?
Very best,
Marko
Yes, stock focuser.
Thanks so much, Ron!