Combining Colour and Narrowband Images
July 13, 2014
INTRODUCTION
It is challenging to produce images that give a realistic impression of how deep-sky objects might look if they were bright enough to be seen in colour. Full colour images, also known as “broadband” or”RGB,” include all of the colours of visible light but, just like the human eye, camera sensors aren’t equally sensitive to all wavelengths. The deep red hue known as hydrogen alpha (Ha) is particularly important in astrophotography, and is emitted by electrons of hydrogen atoms releasing energy, usually absorbed from a nearby star. Adding Ha can greatly enhance red objects in colour images, including large emission nebulae in the Milky Way and similar objects in distant galaxies.
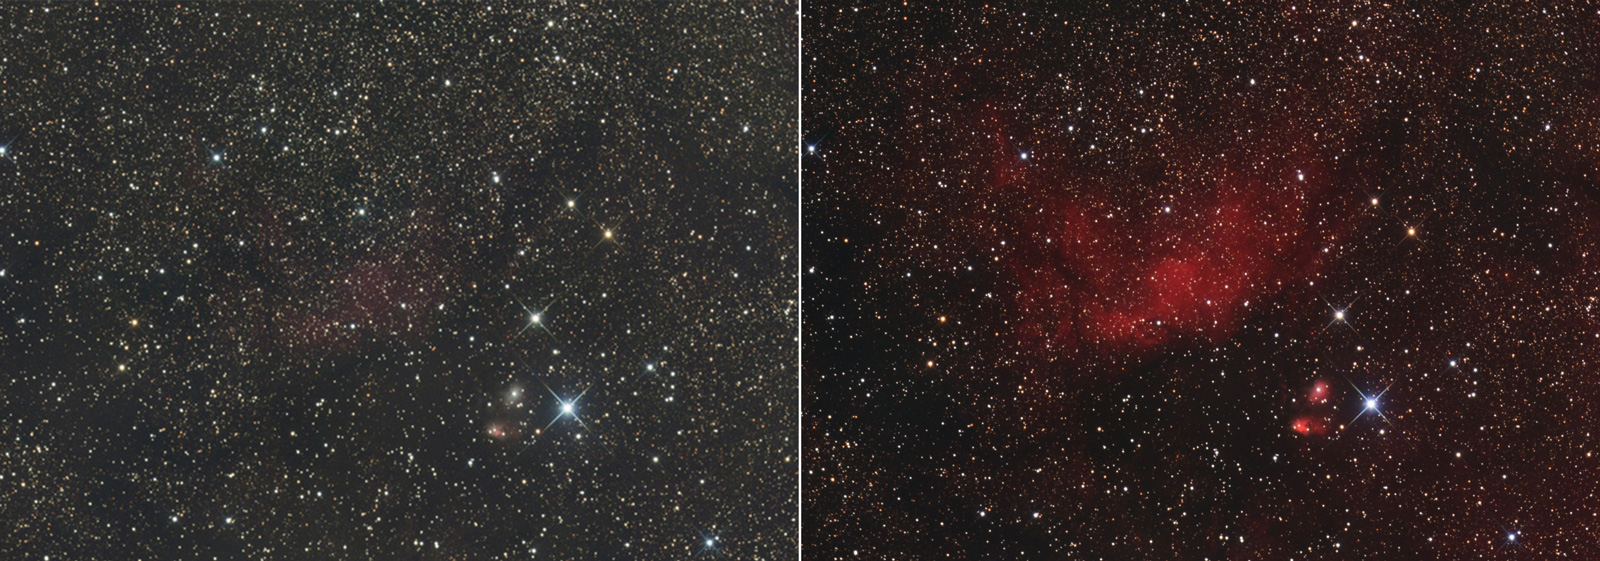
Figure 1: RGB (left) and HaRGB (right) images of emission nebula Sh2-88 processed similarly in PixInsight.
This article outlines a procedure for combining colour and narrowband images in PixInsight (PI). The tutorial focuses on Ha, but applies to other types of narrowband data, for example oxygen-III, which can enhance teal-coloured structures in planetary nebulae and supernova remnants. Figure 1 shows an image of Sh2-88 with and without Ha data. The method described below preserves the deep red colour of the nebula, and protects the shape and colour of the stars. Click on the figures for larger versions so you can see the images and settings.
WORKFLOW CONSIDERATIONS
The developer of this PixInsight method — Vicent Peris — recommends that it be used on files that have not been “stretched.” There is, however, a checkbox in the script (described later) that allows it to be used on stretched files. I combine Ha and RGB data right after cropping the image and correcting gradients, and before applying colour balance. For more information on where Ha-RGB combination should into your workflow, or about other processes referred to below, see my article on deep-sky image processing. There is also a series of excellent video tutorials for PI available from IP4AP.
PREPARE RGB AND Ha SOURCE FILES
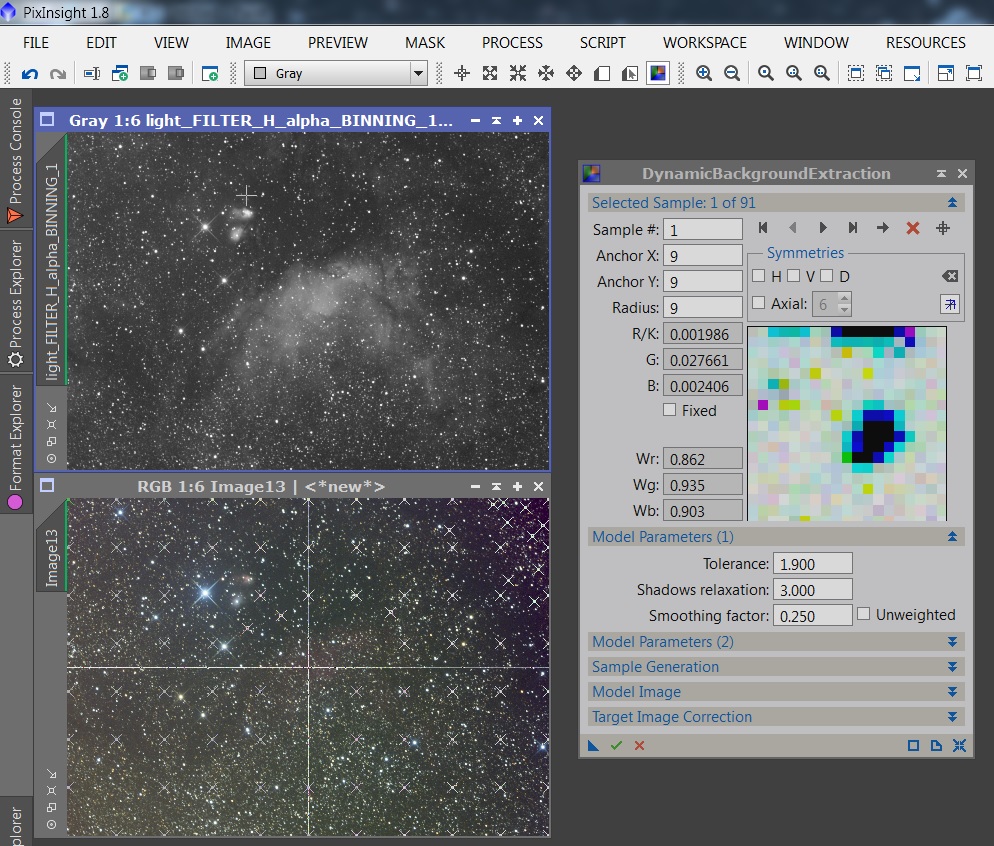
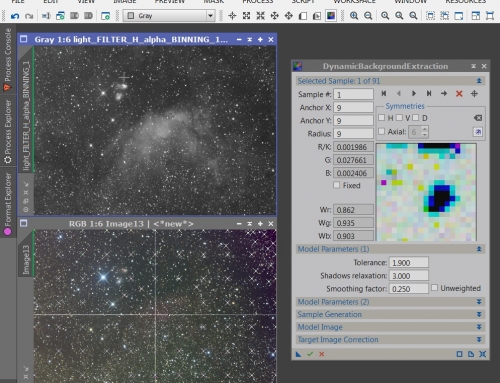
Figure 2: DynamicBackgroundExtraction about to be applied to the colour image. Ha image has already been corrected
The RGB and Ha source files need to be cleaned up a little before they are combined. The first step is to align the files using one of the Image Registration tools in PixInsight. Then on one of the image, select the region to be cropped using DynamicCrop. Don’t apply it to the selected image yet. First, apply it to the UNselected image, then to the selected image. That way both will be cropped identically and your alignment will be preserved. Now you can correct the gradients in both images using either AutomaticBackgroundExtraction or DynamicBackgroundExtraction (Figure 2). Use the Ha image to guide you as to where there may be hidden detail in the RGB image, and avoid using these areas to define background. There are excellent tutorials on these basic PI tools here.
APPLY NB-RGB COMBINATION SCRIPT

Figure 3: PI’s NB-RGB Combination script quickly and easily blends narrowband and colour data.
A PI user with the handle Silvercup produced the first NB-RGB script. That script has evolved and is now a mature and excellent processing tool that I use often. Before you open the script, open the images you will use with it (this script will throw an error if no image is open). Identify the RGB and Ha files in the appropriate locations, and use the slider to set the bandwidths (the total bandwidth, in nanometers, of the wavelengths included in the image) for both filters (Figure 3). For RGB try 200 to start. For Ha, use the bandwidth of your filter, which should be specified on the box or the filter ring. For example, my Baader Ha filter has a 7 nm bandwidth. I find the default Ha scale value of 1.2 to be fine for galaxies, but for red objects like emission nebulae, try a value of 4 to start with. You can preview the combined image by clkicking the “NBRGB” just to the right of the preview image in the script box. The image may not look right, but click on OK at bottom right and generate your HaRGB image. We’ll fix it up in a few minutes.
BALANCE THE COLOUR
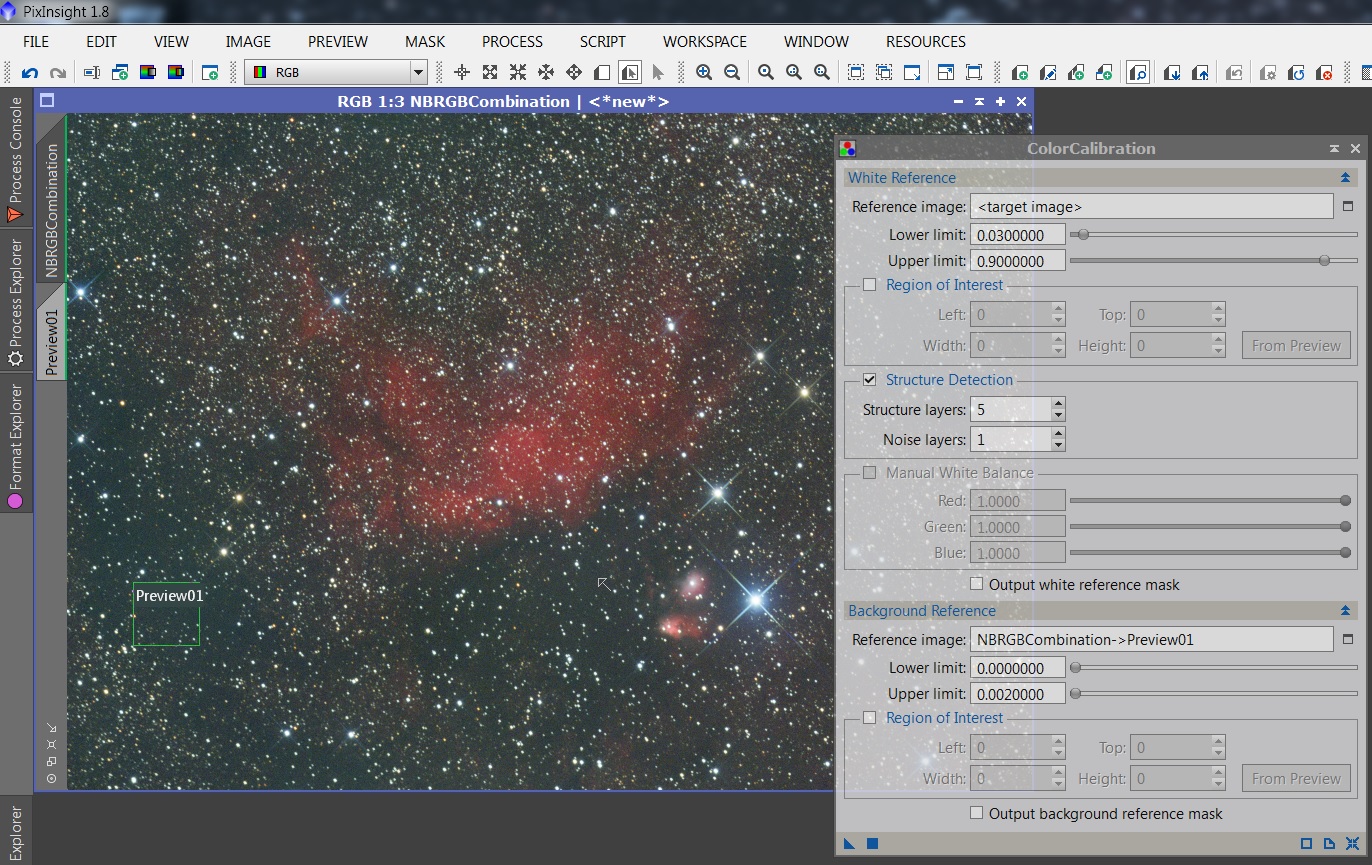
Figure 4: ColorCalibration applied. Preview01 was used to define background and all stars used to define white.
To fix the appearance of the HaRGB image, apply a colour balance using the ColorCalibration tool (Figure 4). Start by defining a small preview that has few stars in it. Use this for the background. Set the background upper limit slider to a bit higher than the highest value in the background area. Default settings can be used for the white point — this will set the white point to the average colour of all the stars in the image.
EVALUATE RESULTS

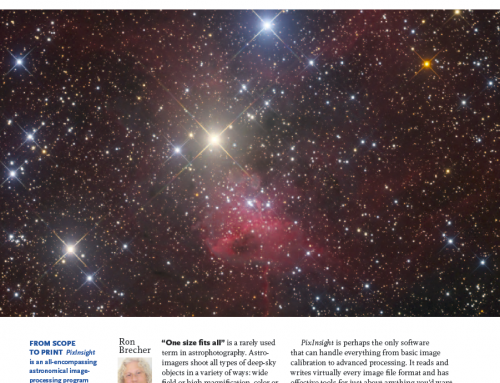
Figure 5: Compare RGB and HaRGB files. When you are happy with the basic look of the HaRGB file, continue processing it.
At this point, it’s time to do a “test stretch” and see whether the basic image is ready for further processing. Use HistogramTransformation to stretch the image, taking care not to clip the dark end of the histogram. Now you will have a good idea of how the image will look when it’s done, at least in terms of colour and the Ha-RGB blend. If you like it, undo the stretch and proceed with further processing (for me, it’s deconvolution at this stage). If you don’t like it, go back and rerun the script, experimenting with the different settings (I usually end up adjusting the Ha scale the most). I like to compare the HaRGB to RGB alone to evaluate colour balance and how the Ha image has affected the stars (see Figure 5).
CONCLUSION
Hydrogen is the most abundant element in the universe, and its characteristic red light dominates emission nebulae. Colour images of these objects can be enhanced by blending Ha data with colour data. PixInsight’s NB-RGB Combine script provides a simple way to do this that preserves the star sizes and colours, the colour saturation of the nebula and the dark, smooth background of the colour image.
Hi Ron, Thanks a lot for posting this tutorial to combine the Ha Channel with the RGB data from DSLR. I´ve already buy an Ha filter to test the results with the Canon 5D Mark II mod. I will let you know about the processing with pixinsight once I´ve got the datas and improve the weather conditions.
Thanks for posting this tutorial-that’s interesting!
[…] was the NBRGBCombination script, it is used at the linear stage. There's a good tutorial on it here Combining Colour and Narrowband Images – Astrodoc: Astrophotography by Ron Brecher, and it includes some tips on settings for the script, which is ever the tricky bit in PixInsight […]