Open Cluster M11
 Click image for full size version
September 8, 2020
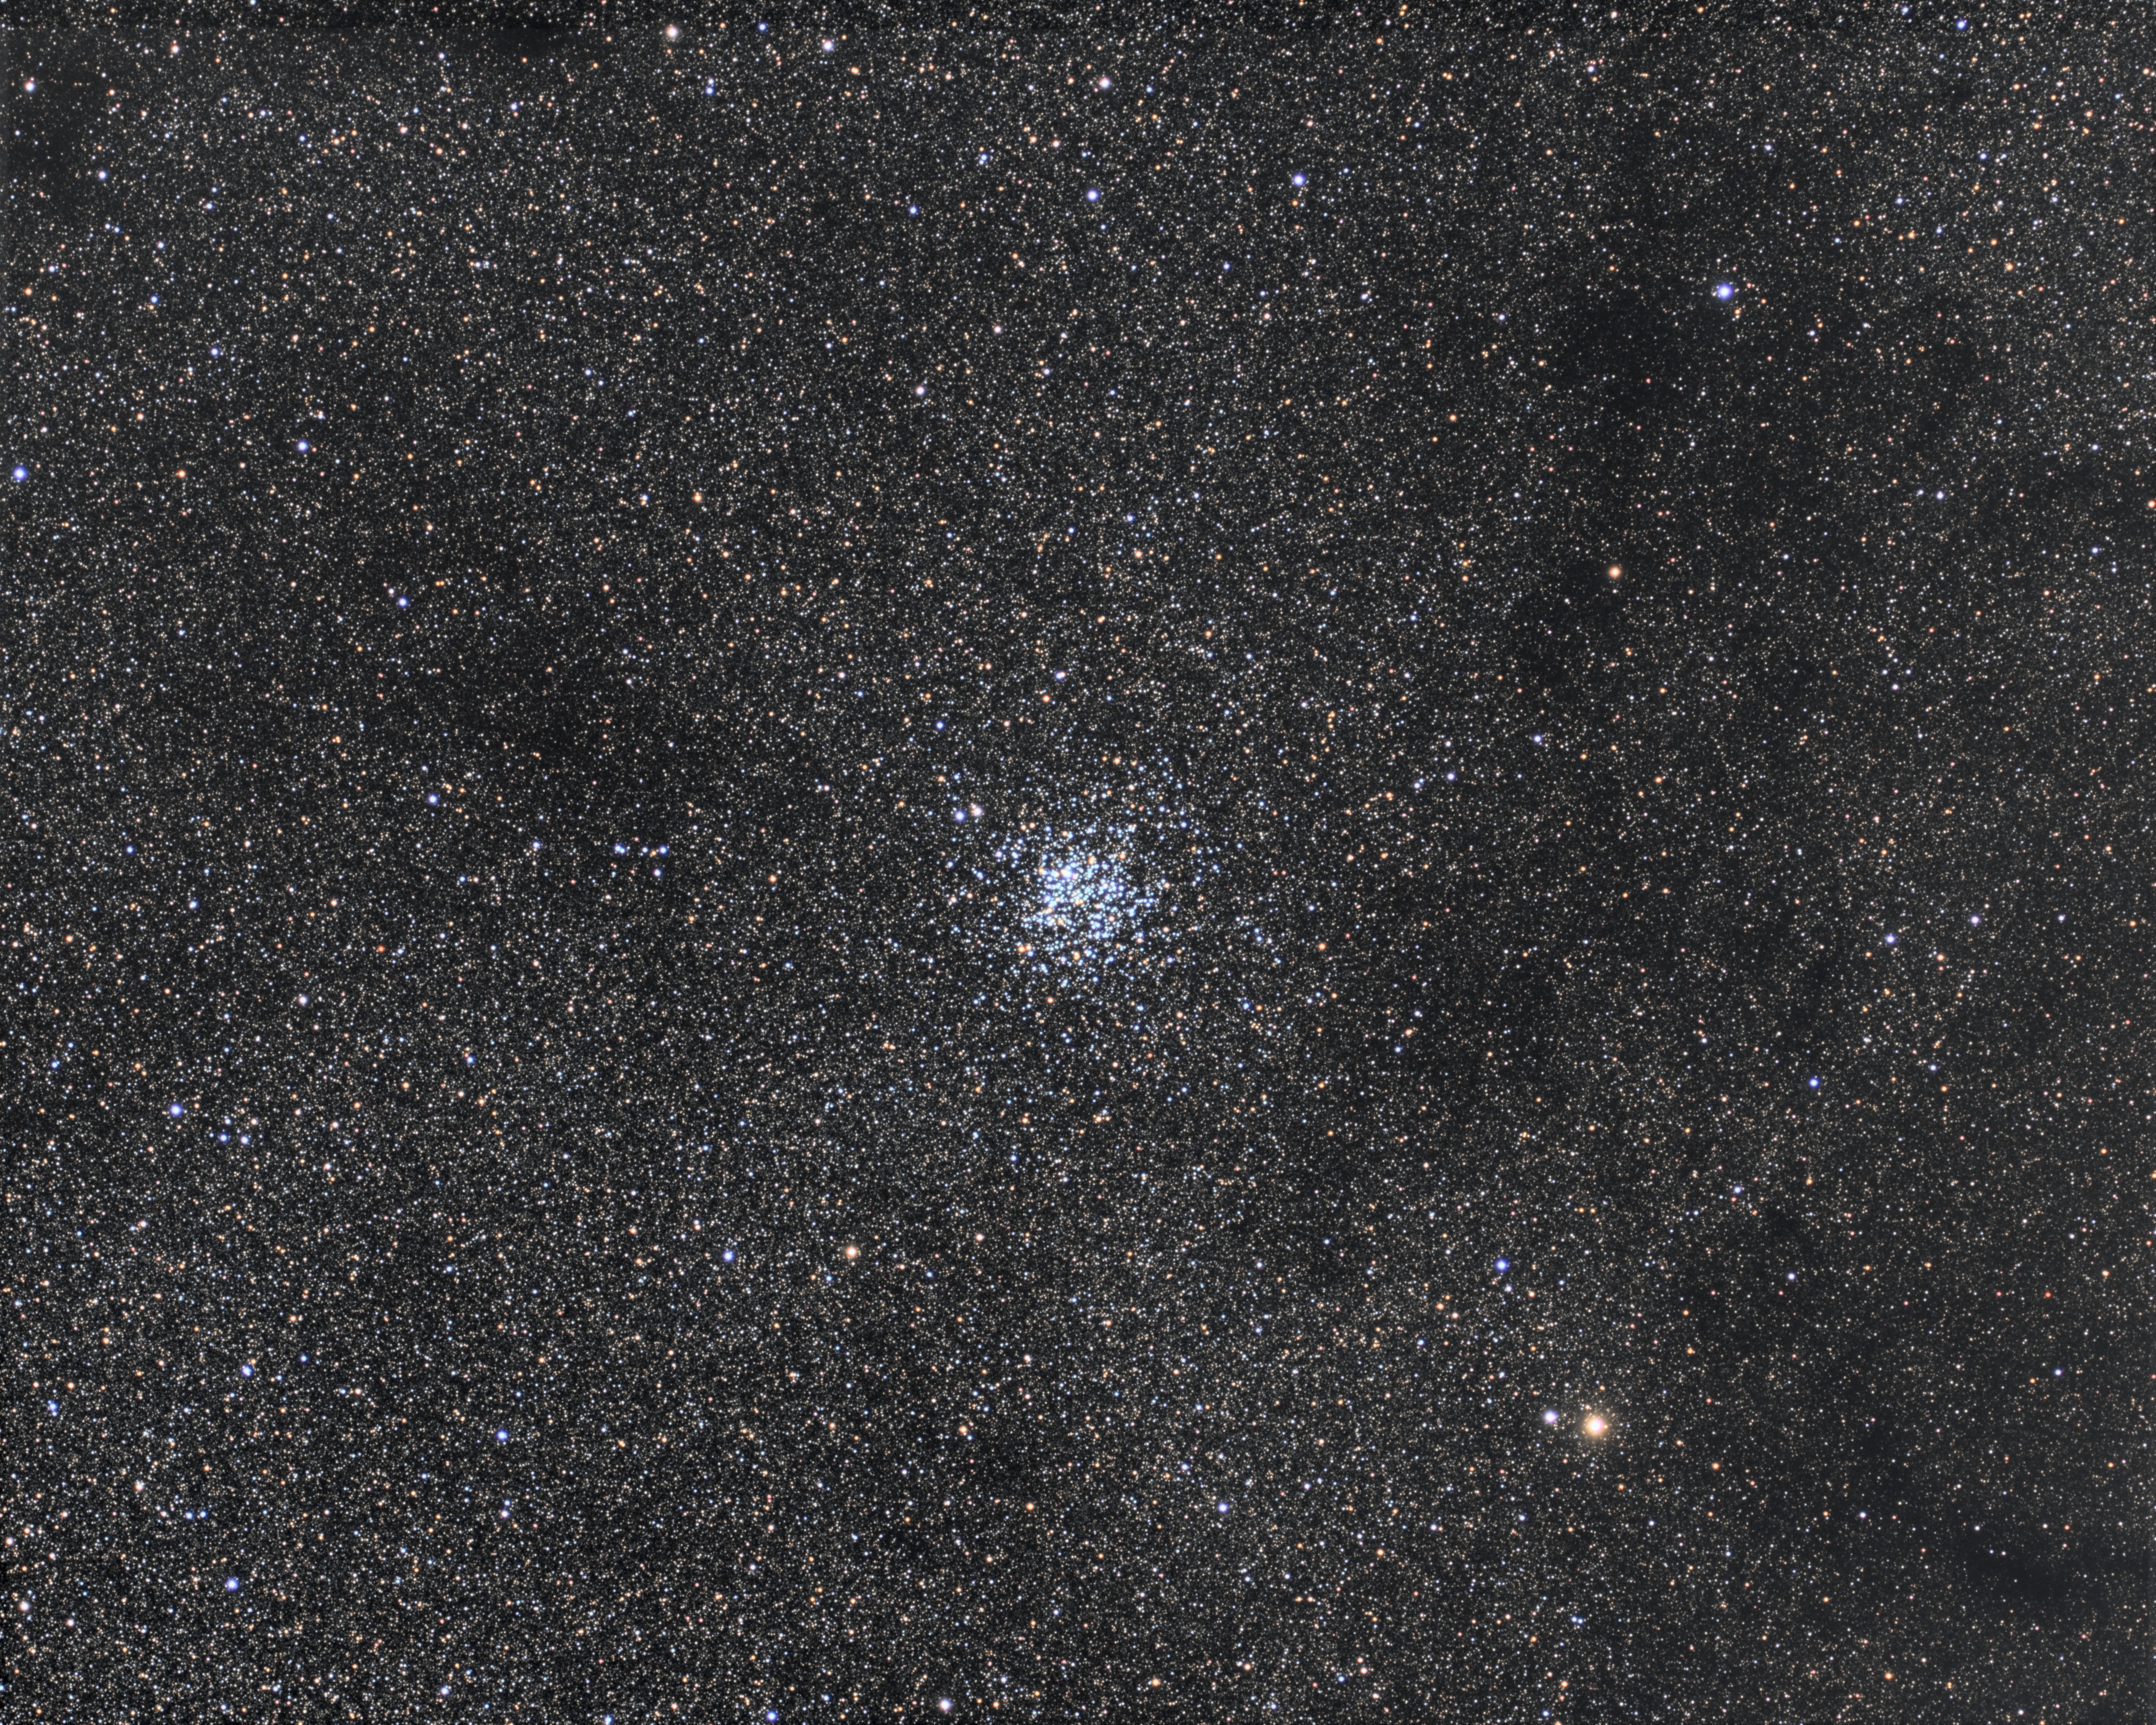
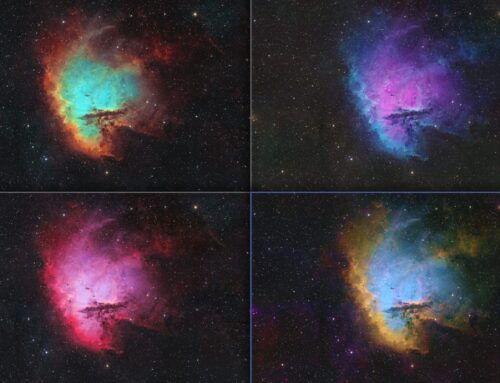
This image shows open cluster Messier 11 (M11) set in the rich summer Milky Way. There are so many stars! This shot really makes you think about the scale of the universe: it shows an area only a couple of times the size of the Moon. Can you imagine how many stars would be in an all-sky image? It’s literally astronomical! If you have binoculars, use them on M11: It makes a very fine sight at 7x or 10x, although the colours are very muted compared to this image.
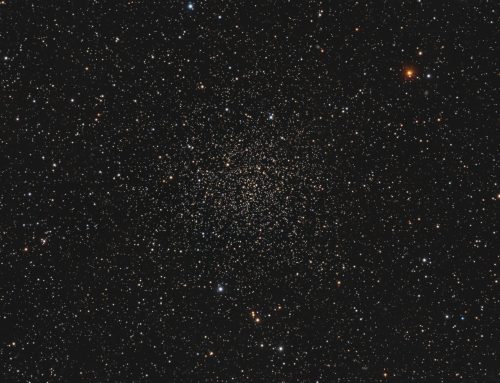
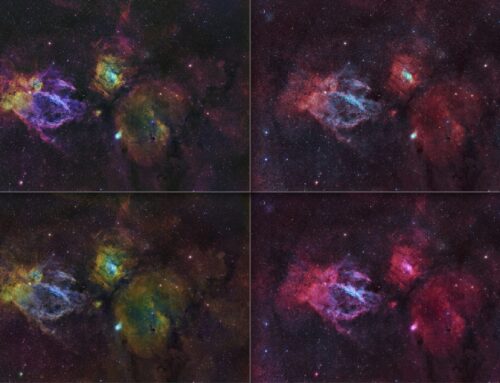
 Although the stars grab my attention first, there are also some obvious dark regions with far fewer stars; these are dark nebulae in our own galaxy caused by dust and soot blocking out or reducing the light from stars behind them. When we look at other galaxies, these dust lanes can be very obvious. The annotated image at left identifies some of these dark nebulae (B=Barnard catalogue of dark nebula), along with a few tiny galaxies from the PGC catalogue. This image is full of stars of many different hues, which tell us about their temperatures. Redder stars are coolest and the white and bluish stars that dominate the cluster are hottest.
The nickname of this cluster probably came from Admiral Smyth who observed it in the 19th century and apparently thought the distinctive wedge-shape group of stars that’s prominent in a small scope resembled a V-shaped flock of wild ducks in flight. Smyth didn’t discover it though. Credit is usually given to Gottfried Kirch, who is believed to have discovered it in 1681. M11 contains thousands of stars (rich for an open cluster) and is a little more than 5,000 light years away, so its light takes that long to reach us. It is estimated to be more than 200 million years old.
Tekkies:
Acquisition, focusing, and control of Paramount MX mount (unguided) with TheSkyX. Focus with Optec DirectSync motor and controller. Automation with CCDCommander. Equipment control with PrimaLuce Labs Eagle 3 Pro computer. All pre-processing and processing in PixInsight. Acquired from my SkyShed in Guelph. Average transparency and good seeing. Data acquired Sept 2-3, 2020 under a full Moon.
Luminance: Sky-Watcher Esprit 150 f/7 refractor and QHY 16200-A camera with Optolong UV/IR filter
Chrominance: Takahashi FSQ-106 ED IV @ f/3.6 and QHY367C one-shot colour camera with Optolong UV/IR filter
Chrominance: 86 x 3m = 4hr18m
Total: 7hr03m
Data Reduction and Initial Processing
Preprocessing: The WeightedBatchPreProcessing script was used to create a Luminance master frame (from the mono camera) and RGB registered files (from the one-shot colour camera). DrizzleIntegration was used to make the colour master. The colour master was registered to the luminance master.
Gradient Removal: ABE was applied to L and RGB masters using Subtraction.
Colour
Colour Balancing: Colour was balanced with PhotometricColorCalibration.
Linear Noise Reduction: MultiscaleLinearTransform was used to reduce noise in the background areas, using an internal mask to protect bright structures. Layer settings for threshold and strength: Layer 1: 5.0 0.85, 2 iterations; Layer 2: 3.5, 0.75, 2 iterations.
Stretching: HistogramTransformation was applied to make a pleasing, bright image, with background set to an intensity of approximately 0.10.
Lightness
Linear Noise Reduction: MultiscaleLinearTransform was used to reduce noise in the background areas, using an internal mask to protect bright stars. Layer settings for threshold and strength: Layer 1: 3.0 0.85, 1 iterations; Layer 2: 2.0, 0.75, 2 iterations.
Stretching: HistogramTransformation was applied to make a pleasing, bright image, with background set to an intensity of approximately 0.10.
Combining Lightness and Colour Images
LRGB Combination: The lightness image was applied to the RGB image using LRGBCombination with default settings.
Additional Processing
Nonlinear Noise Reduction: TGVDenoise was used in L*a*b* mode to reduce noise with a mask used to target the background areas and protect the stars (max. 1,000 iterations and convergence selected for both lightness and chrominance).
Final Steps: Background and star brightness, contrast, and colour saturation were adjusted in several iterations using CurvesTransformation with masks as required. ICCProfileTransformation (sRGB IEC61966-2.1; Relative Colorimetric with black point compensation) was applied prior to saving in jpg format.
Very nice representation of an open cluster, nice explanation of the entire image as well.
That’s a totally awesome image. The detail from edge to edge is impressive.
Amazing image! I have one question about the processing. How do you set the background intensity to 0.10?
I adjust HistogramTransformation such that the background ends up with an intensity of around 0.1, using the Real-Time Preview as a guide. Left-click in a Real-Time Preview to read the intensity values for the pixel under the cursor.